Tag Archives: strawberry recipes

Strawberry Sherbet 

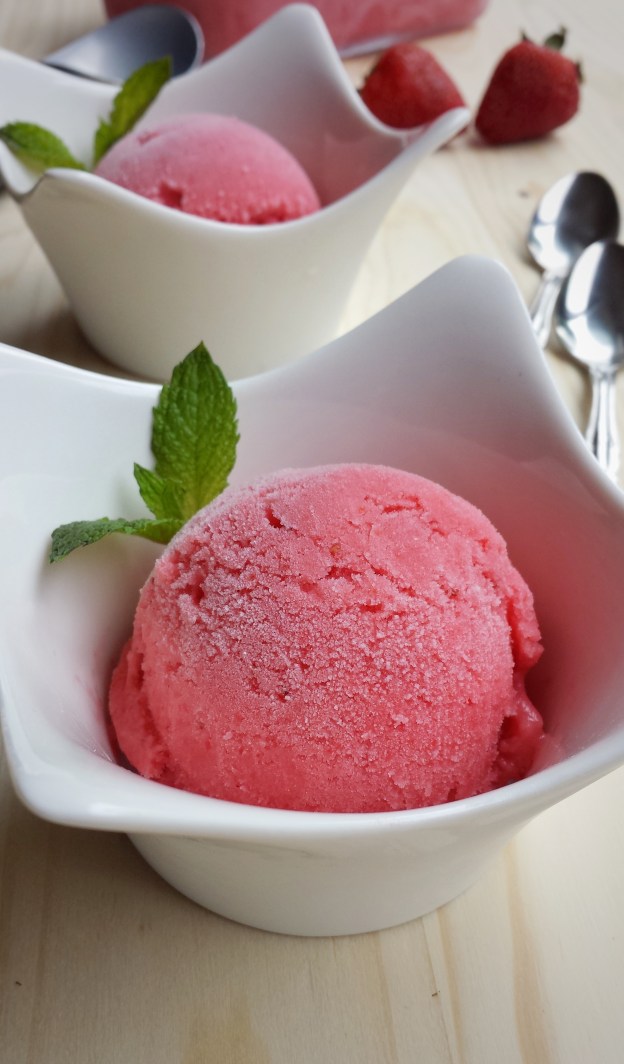
My son used to be a picky eater when he was little and was very reluctant to try new things. Meal time was a real challenge back then. Luckily, he would never say no to fruits, especially strawberries and blueberries. He is now 12 years old, not as picky as before, eats more than me, almost as tall as I am and still loves his berries. Strawberries are in season right now and he can easily eat half to one pound a day ! I love fresh strawberries, they taste yummy as a fruit but can also be used for many desserts. With the warmer weather finally showing up, I brought out my ice cream maker and made this strawberry sherbet. Sherbet is like a cousin of sorbet. Sorbet is mainly made with fruit juice and sugar without any dairy. On the other hand, milk or cream is added to sherbet. Its texture is in between a sorbet and an ice cream. So if you are craving for a cool treat, but don’t want something too rich, a sherbet will be perfect. And this recipe is approved by the strawberry fan in my house ! 

Makes about 1 L

  • 800 g fresh strawberries (after washed and hulled)
  • 120 g granulated sugar (adjust according to taste)
  • 1/4 teaspoon salt 
  • 250 mL milk 
  • 15 mL lemon juice 
  1. Blend all ingredients together and press mixture through a fine strainer with a spatula   
  2. Refrigerate for 3-4 hours or overnight 
  3. Pour into an ice-cream maker and churn according to manufacturer’s instructions 

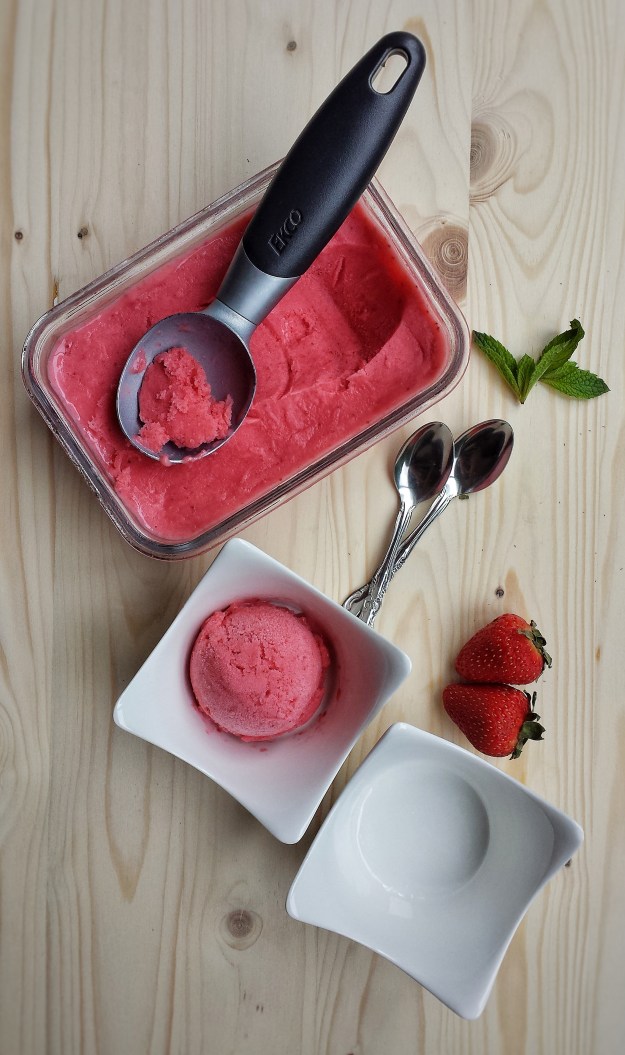
If you don’t have an ice cream maker, you can pour the mixture in a shallow tray, cover and put in the freezer for at least 4 hours or overnight; then break the frozen mixture into large chunks and blend again until smooth. 

Ice Cream Machine that I used 

41jgxv8adpl._sy400_.jpg

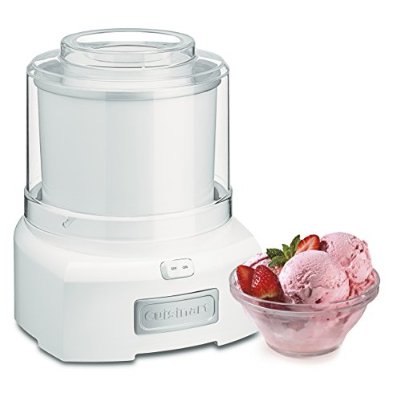
Cuisinart ICE-21C Frozen Yogurt, Ice Cream and Sorbet Maker

You can get this ice cream machine through the Amazon website by clicking the above link. I will receive a small compensation if you purchase the item. 

Advertisement

Strawberry Hand Pies

I am a home baker, so besides the couple of pastry classes that I have attended, I have never really had any formal training. When I just started baking as a teenager, pie is something that I felt very tricky and difficult to make and I would never be able to do it. To me, making pie was not “as easy as pie” ! But, as I became more experienced, I realized it is actually not that hard. I had a few failures, but it wasn’t a “mission impossible”.  So, gathering my failures and tips from my classes, I have learned a few things: 

  1. Making hand pies or mini pies to start if you haven’t made pies before. The dough is the same, but it’s easier to roll and to control the baking time. And I think it’s more fun ! 
  2. Use very cold butter. I put the cut butter and in the freezer for about 15 minutes before using.
  3. There should be small lumps of cold butter in the dough. So rubbing in the butter by hands would be better than pulsing with a food processor as you will have larger lumps. In the oven, the butter melts creating pockets, the moisture in the butter evaporates, expanding those pockets, hence flaky crust. 
  4. Do not knead the dough, just press it together. The lumps of butter that you want for flakiness will melt if you handle the dough too much.
  5. Let the dough rest in the fridge for at least an hour or overnight before baking.  This allows the butter to firm up and the gluten to relax, which makes rolling easier. 

I hope these tips will help if making pies is on your list ! Once you manage the crust, there are so many possibilities….all the berries, apples, peaches, pears….Mmmmmm, yummy ! 

Makes about 8-10 hand pies

For the pie dough

  • 180 g unsalted butter (cut into small pieces and chilled)
  • 200 mL ice-cold water
  • 400 g cake and pastry flour, sifted
  • 30 g granulated sugar
  • 5 g salt

You will also need 1 egg for brushing top of pies and more sugar for sprinkling 

  1. Combine flour,sugar and salt
  2. Rub in chilled butter with hands until resemble coarse crumbs, there should be pea-sized lumps of butter
  3. Add cold water and mix until dough just starting to form
  4. Transfer to a lightly floured surface, and press dough together (Do not knead)
  5. Wrap with plastic wrap and refrigerate for at least 1 hour or overnight

For the strawberry filling

  • 500 g fresh strawberries (wash, hull and cut into halves or quarters)
  • 60 g granulated sugar
  • 15 g cornstarch
  1. Coat strawberries with sugar and cornstarch
  2. Cook over medium heat until soft and jam-like
  3. Cool to room temperature 

To assemble the pie

  1. Preheat oven to 375°F
  2. On a lightly floured surface, roll dough to about 0.5 cm thickness (If the dough is too hard, let it sit at room temperature for about 10 minutes)
  3. Cut into 8 cm x 8 cm squares (dough scraps can be reused, but try to press them back together instead of kneading, and reuse as little times as possible)
  4. Place bottom squares on a baking tray lined with parchment paper
  5. Spoon about 1 tablespoon of strawberry filling in the middle
  6. Brush egg wash around edges of top squares, and place over bottom squares (egg wash sides down)
  7. Press edges to seal then press down with fork
  8. Cut a small opening on top of pies to let air out during baking
  9. Brush top with egg wash and sprinkle with vanilla sugar or granulated sugar
  10. Bake for about 30 minutes, then cover top with a foil and bake for another 10-15 minutes
  11. Serve warm


Strawberry Yoghurt Parfait

This can be breakfast, snack, dessert….whenever you want.  It’s easy, healthy and tasty !

Makes 2 to 3 servings

  • 1/2 cup granola
  • 1 cup vanilla flavour Greek yoghurt
  • 1 cup fresh strawberries, cut
  • 1 to 2 tablespoons honey
  1. Coat strawberries with honey
  2. Layer ingredients in glass, enjoy!

You can use any fruits you like, blueberries, banana, peaches, etc.