Tag Archives: food bloggers

Halloween Monster Cupcakes 

I used to make my kids’ Halloween costumes when they were younger….fairy, witch, Thomas the Tank Engine, Ash from Pokemon, etc. Even though they don’t fit anymore, I still keep them in a box ! Maybe I am collecting too much “junk”, but they really brought back a lot of fond memories…..This year my daughter wants to be a grim reaper again, but scarier than the last two years. Yes, you read it right, it’s my daughter, not my son, and for the third time ! This was her on Halloween night two years ago ! She was only 8 ! Most 8-year-old girls would probably want to be a princess or a fairy, well….. not my girl ! 

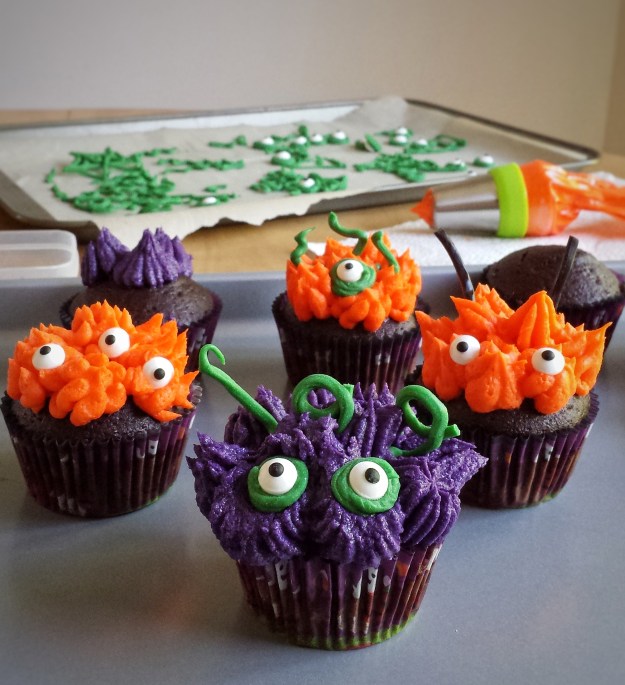
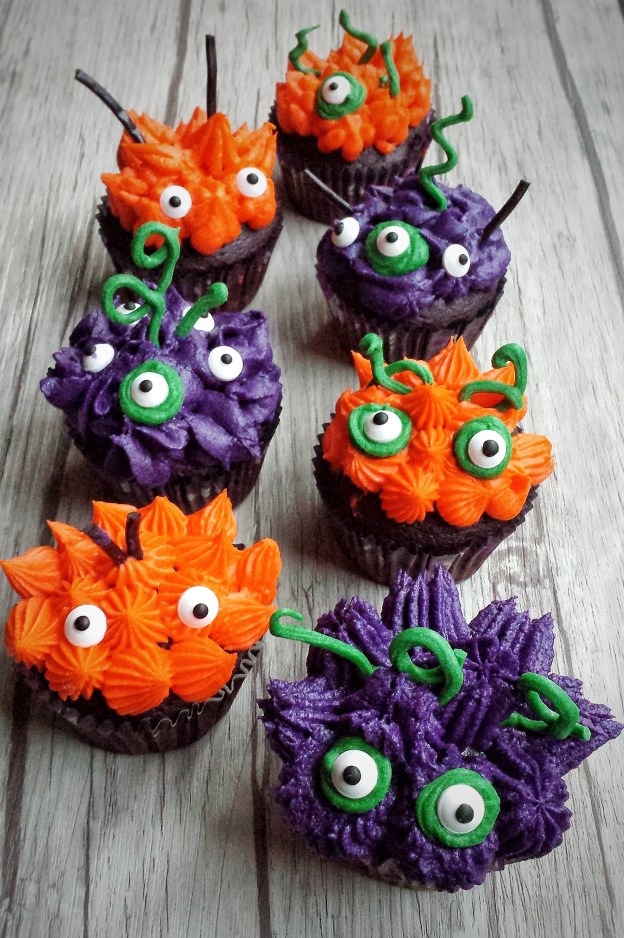
Me? I am just going to make monster cupcakes ! These chocolate cupcakes with vanilla butter cream taste really yummy and are not scary at all ! They actually look quite adorable ! Happy Halloween ! 

Makes about 18-20 cupcakes 

For the chocolate cupcakes

  • 150 g all-purpose flour 
  • 150 g cake and pastry flour 
  • 50 g unsweetened cocoa powder 
  • 6 g baking powder 
  • 3 g baking soda 
  • 3 g salt 
  • 200 g granulated sugar 
  • 2 eggs, lightly beaten 
  • 180 mL buttermilk 
  • 60 mL vegetable oil 
  • 5 mL pure vanilla extract 
  • 180 mL boiling water 

For the butter cream frosting 

  • 240 g unsalted butter 
  • 480 g icing sugar, sifted 
  • 5 mL pure vanilla extract 
  • 30 -60 mL milk 
  • Gel food colouring 

You will also need candy melts, licorice sticks, candy eyeballs, etc for decoration

  1. To make the cupcakes, preheat oven to 350ºF
  2. In a large mixing bowl, sift together flours, cocoa powder, baking powder, baking soda and salt 
  3. Mix in sugar
  4. In another bowl, mix together eggs, buttermilk, oil and vanilla 
  5. Pour wet ingredients (except boiling water) into dry ingredients, mix until just blended 
  6. Gradually stir in boiling water, 3-4 tablespoons at a time, until just combined, batter will be runny 
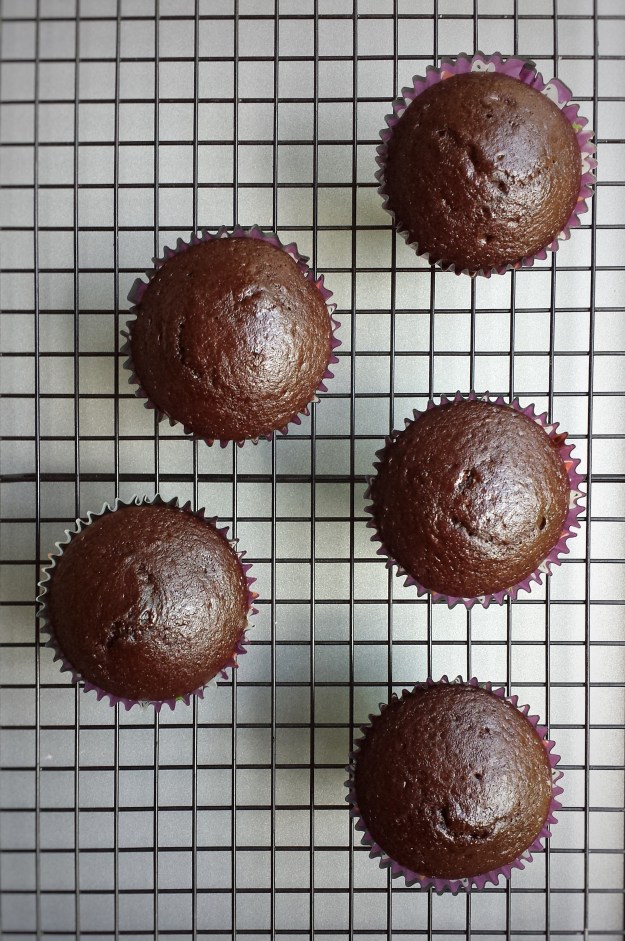
  7. Pour into slightly greased cupcake cups and bake in tins for about 16-18 minutes 
  8. Cool completely before frosting 
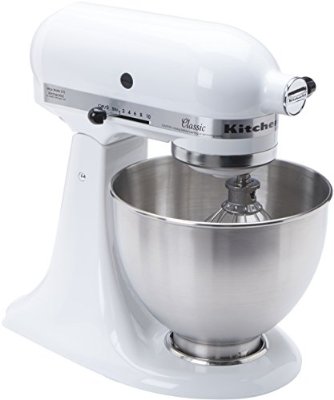
  9. To make the frosting, use an electric mixer with the paddle attachment, start creaming butter 
  10. Gradually add in icing sugar, beat until fluffy
  11. Add vanilla, then milk, a little at a time, to desired consistency 
  12. Separate into batches, add gel food colourings
  13. Decorate cupcakes as desired 

Keep in refrigerator if not consume right away


Advertisement

Strawberry Hand Pies

I am a home baker, so besides the couple of pastry classes that I have attended, I have never really had any formal training. When I just started baking as a teenager, pie is something that I felt very tricky and difficult to make and I would never be able to do it. To me, making pie was not “as easy as pie” ! But, as I became more experienced, I realized it is actually not that hard. I had a few failures, but it wasn’t a “mission impossible”.  So, gathering my failures and tips from my classes, I have learned a few things: 

  1. Making hand pies or mini pies to start if you haven’t made pies before. The dough is the same, but it’s easier to roll and to control the baking time. And I think it’s more fun ! 
  2. Use very cold butter. I put the cut butter and in the freezer for about 15 minutes before using.
  3. There should be small lumps of cold butter in the dough. So rubbing in the butter by hands would be better than pulsing with a food processor as you will have larger lumps. In the oven, the butter melts creating pockets, the moisture in the butter evaporates, expanding those pockets, hence flaky crust. 
  4. Do not knead the dough, just press it together. The lumps of butter that you want for flakiness will melt if you handle the dough too much.
  5. Let the dough rest in the fridge for at least an hour or overnight before baking.  This allows the butter to firm up and the gluten to relax, which makes rolling easier. 

I hope these tips will help if making pies is on your list ! Once you manage the crust, there are so many possibilities….all the berries, apples, peaches, pears….Mmmmmm, yummy ! 

Makes about 8-10 hand pies

For the pie dough

  • 180 g unsalted butter (cut into small pieces and chilled)
  • 200 mL ice-cold water
  • 400 g cake and pastry flour, sifted
  • 30 g granulated sugar
  • 5 g salt

You will also need 1 egg for brushing top of pies and more sugar for sprinkling 

  1. Combine flour,sugar and salt
  2. Rub in chilled butter with hands until resemble coarse crumbs, there should be pea-sized lumps of butter
  3. Add cold water and mix until dough just starting to form
  4. Transfer to a lightly floured surface, and press dough together (Do not knead)
  5. Wrap with plastic wrap and refrigerate for at least 1 hour or overnight

For the strawberry filling

  • 500 g fresh strawberries (wash, hull and cut into halves or quarters)
  • 60 g granulated sugar
  • 15 g cornstarch
  1. Coat strawberries with sugar and cornstarch
  2. Cook over medium heat until soft and jam-like
  3. Cool to room temperature 

To assemble the pie

  1. Preheat oven to 375°F
  2. On a lightly floured surface, roll dough to about 0.5 cm thickness (If the dough is too hard, let it sit at room temperature for about 10 minutes)
  3. Cut into 8 cm x 8 cm squares (dough scraps can be reused, but try to press them back together instead of kneading, and reuse as little times as possible)
  4. Place bottom squares on a baking tray lined with parchment paper
  5. Spoon about 1 tablespoon of strawberry filling in the middle
  6. Brush egg wash around edges of top squares, and place over bottom squares (egg wash sides down)
  7. Press edges to seal then press down with fork
  8. Cut a small opening on top of pies to let air out during baking
  9. Brush top with egg wash and sprinkle with vanilla sugar or granulated sugar
  10. Bake for about 30 minutes, then cover top with a foil and bake for another 10-15 minutes
  11. Serve warm


Baked Double Chocolate Doughnuts 

My daughter has been asking me to make doughnuts for a while. I love doughnuts,  just not too crazy about frying. I tried frying doughnut holes a couple of times, but they came out like burnt fritters. The only doughnuts I had successfully done were my Baked Honey Crullers. So this time, I decided to bake them again. I figured I would have a better chance of success. And voilà! I made it in one try ! The more exciting part is my son loves them ! He doesn’t have a sweet tooth and it’s not often that he likes my goodies (at least me and my daughter think they are !) He even asked me to make it again and I did ! It’s so easy when you have a doughnut pan. You can actually transform any of your muffin or quick bread recipes into doughnuts !  Just dress them up with a glaze or some sprinkles ! 

Makes 12 -14 doughnuts

For the doughnuts 

  • 270 g all-purpose flour
  • 40 g unsweetened cocoa powder 
  • 120 g granulated sugar 
  • 60 g demerara or brown sugar 
  • 3 g baking powder 
  • 3 g baking soda 
  • 2 g salt 
  • 2 large eggs
  • 60 mL vegetable oil 
  • 250 mL buttermilk (adjust if needed)
  • 5 mL pure vanilla extract 
  1. Preheat oven to 350°F
  2. Sift together flour,cocoa powder, baking powder, baking soda and salt
  3. Add in both sugars 
  4. In another bowl, mix together eggs, oil, buttermilk and vanilla 
  5. Add wet ingredients into dry ingredients 
  6. Mix until just blended 
  7. Spoon/pour batter into lightly greased doughnut trays 
  8. Bake for 10-12 minutes 
  9. Cool completely on rack 

For the chocolate glaze 

  • 120 g semi-sweet or dark chocolate, finely chopped 
  • 120 mL whipping cream
  • 2.5 mL pure vanilla extract 
  1. Heat whipping cream over medium heat until just starting to boil 
  2. Pour it over chopped chocolate 
  3. Wait 30 seconds, add vanilla and stir until smooth 

When doughnuts are cooled, dip one side into chocolate glaze, place on rack to dry 

Tools that I used

Wilton Nonstick 6-Cavity Donut Pan

You can get this doughnut pan through the Amazon website by clicking the above link. I will receive a small compensation if you purchase the item. 


Chocolate Souffle 

I think Valentine’s day is a perfect time to make chocolate souffle. It brings a sweet ending to your romantic dinner. I first learned it at a pastry course and it’s actually pretty easy. All souffles will rise in the oven and fall shortly after they are taken out. That doesn’t mean that you fail, it’s just the way they are. Some recipes have a higher ratio of egg whites, some add cornstarch and milk or cream. These methods may make the souffles higher and stay in shape a little longer. After trying a few recipes, I found this one, adapted from the book “How To Bake Everything” by Mark Bittman is the simplest. It uses equal parts of egg yolks and whites, so you won’t need to worry about what to do with the extra yolks and the souffles came out both rich and airy. Have a sweet Valentine’s Day!

Makes about 4-6 servings

  • Butter for greasing ramekins 
  • 80 g granulated sugar, plus more for coating
  • 90 g dark chocolate (70%), chopped 
  • 4 eggs, separated
  • 1/4 teaspoon cream of tartar 
  • Icing sugar for dusting
  1. Preheat oven to 350°F
  2. Grease ramekins with butter, then sprinkle sugar over to coat, tap off excess 
  3. Melt chocolate in a heat-proof bowl over a pot of simmering water, let cool slightly 
  4. Whisk together egg yolks and 30 g of granulated sugar using an electric mixer until light yellow and mixture falls in a ribbon over surface 
  5. Mix in melted chocolate until combined 
  6. Clean and dry the whisk
  7. In another mixing bowl using the electric mixer, whisk egg whites and cream of tartar at medium speed until frothy
  8. Increase speed to high and slowly add in 50 g of granulated sugar
  9. Whisk until a stiff peak is formed
  10. Gently fold egg whites, in 3 batches, into egg yolk mixture
  11. Pour into ramekins and place on a rimmed baking tray 
  12. Put tray into oven, pour about one inch of hot water into baking tray
  13. Bake in hot water bath for about 20 minutes (Do not open oven door during baking)
  14. Dust with icing sugar, serve immediatelyChocolate Souffle

Tools and Books 

41rqjlmpovl._sy400_.jpg

KitchenAid K45SSWH Classic 4.5-Quart Bowl Stand Mixer, White

How to Bake Everything

How to Bake Everything: Simple Recipes for the Best Baking

You can get these items through the Amazon website by clicking the above link. I will receive a small compensation if you purchase them.

Eggnog Panna Cotta with Frozen Sugared Raspberries

We love panna gotta and we love eggnog. So Christmas seems to be a perfect time to combine them together!  It makes a great dessert for your holiday dinner.  It is super easy and you can prepare it the day before.  For the sugared raspberries, many recipes use raw egg whites which I am not comfortable with.  I think a simple syrup works just as good. I also like to freeze mine for a little crunchiness.  Have a Merry Christmas everyone !

Makes about 4 servings

For the sugared raspberries

  • 100 g raspberries (wash and dry)
  • 60 g granulated sugar
  • 1/4 cup boiling water
  • 60 g vanilla sugar (or you can just use granulated sugar)

For the panna cotta

  • 1 envelope (7g) unflavoured gelatin
  • 1/2 cup milk
  • 1 cup eggnog
  • 1/2 cup whipping cream
  • 30 g granulated sugar
  • 1/2 teaspoon pure vanilla extract
  • pinch of nutmegSugared Raspberries
  1. For the sugared raspberries, prepare a simple syrup by dissolving 60 g of granulated sugar in 1/4 cup of boiling water, then let cool
  2. Gently brush raspberries with simple syrup and roll in a dish of vanilla sugar or granulated sugar
  3. Place on a tray lined with parchment paper and freeze for 2 or more hoursSugared Raspberries
  4. For the panna cotta, sprinkle gelatin over milk and let sit for a few minutes 
  5. Heat together eggnog, whipping cream and sugar in a non-stick pot over medium heat until sugar all dissolved and just starting to bubble, turn heat down to low 
  6. Add gelatin mixture
  7. Stir until gelatin all dissolved, add pinch of nutmeg
  8. Turn heat off, add vanilla extract
  9. Strain through a fine mesh twice
  10. Pour into ramekins or desired containers
  11. Let cool and refrigerate until set, at least 3 hours or overnight
  12. Top with frozen sugared raspberries when ready to serve

Eggnog Panna Cotta

Choux Pastry Puffs 

I was going to call these Cream Puffs, but my daughter insisted that these are cream sandwiches ! She said cream puffs should have a hole to fill the cream inside the puffs… OK, OK… So, now I call them Choux Pastry puffs ! Whatever it’s called, they look cute and are absolutely delicious ! (Actually I think Choux Pastry Puffs sounds fancier !) They will be a perfect dessert for your upcoming holiday dinners! 

Makes about 16 puffs 

  • 200 mL water
  • 90 g unsalted butter
  • 1/4 teaspoon salt
  • 30 g  granulated or vanilla sugar 
  • 120 g all-purpose flour
  • 3 eggs
  • 1 cup whipping cream
  • 2 tablespoons icing sugar, plus more for dusting, sifted 
  • 1/2 teaspoon pure vanilla extract 
  • 50 g semi-sweet chocolate (melted), for drizzling
    1. To prepare the whipped cream, place a mixing bowl into freezer for about 15 minutes 
    2. Using an electric mixer, whisk together whipping cream, 2 tablespoons of icing sugar and vanilla, in the cold mixing bowl, until stiff peak is formed 
    3. Refrigerate until use 
    4. To prepare the choux paste, heat together water, butter, salt and granulated or vanilla sugar in a pot over medium heat until just starting to boil
    5. Turn heat down to low, add flour all at once
    6. Stirring constantly, cook until a thin film of paste formed at the bottom of the pot, about 5 minutes
    7. Transfer paste to a heat-proofed mixing bowl and cool down
    8. Meanwhile, preheat oven to 350ºF and prepare piping bag with desired piping tip
    9. Add eggs to paste, one at a time and mix well after each addition
    10. Transfer to piping bag and pipe into rounds on baking sheets lined with parchment paper, no bigger than 2 inches in diameter Choux Pastry Puffs
    11. Bake at 350ºF  for about 12-14 minutes until starting to brown, turn heat down to 325°F and bake for another 15 minutes until golden (if puffs are under baked, they will collapse after taken out)
    12. Turn heat off, leave puffs inside oven for about 15 -20 minutes with oven door ajar
    13. Take puffs out, let cool on baking sheets, then completely on rack Choux Pastry Puffs
    14. Cut puffs in halves, fill centres with whipped cream
    15. Drizzle with melted chocolate and dust with icing sugar, serve immediately Choux Pastry Puffs

Chocolate Ice Cream

I made this ice cream about 2 weeks ago. Since then I have been thinking what I should write about this post. I wanted to share something special other than just telling you how good this ice cream is. (It is REALLY good !) The day that I made this ice cream, I actually just finished a very good session of rock climbing. So, I decided to share the experience. I started indoor rock climbing about a year ago, and I absolutely fell in love with it. Back then, I never thought I could do it. Yes, my arms “hurt like hell” every time I finished, but I feel good, it’s a good kind of pain. For a 40 something-year old mom, who was not very active, being able to finish a 5.8 route, it’s a big achievement…..(Oh, FYI, a climbing route is graded according to its difficulty. It ranges from 5 all the way to 5.15) Through rock climbing, and also running, I have become more healthy physically and mentally. (Well, I guess that’s a good excuse to make more desserts !) I have learned to be more patient and perseverance.  As a mom, I feel it is important to teach my kids to pursue their dreams and goals no matter how hard they seem…..I have to thank my daughter too ! She likes to climb and keeps me going.  Actually she is even tougher than I am !  Well done, girl ! …. and well done mom too ! 
OK, back to the ice cream ! I have made chocolate ice cream before but without the ice cream machine.  Now that I own one, I thought I should make the “real” thing.  And the “real” thing does taste better !  I added some chopped chocolate for extra flavour and crunchiness, you can omit it if preferred.  

Makes about 1 L

  • 2 cups whipping cream
  • 1 cup whole milk
  • 4 egg yolks
  • 200 g granulated sugar
  • 50 g unsweetened cocoa powder
  • 1 teaspoon pure vanilla extract
  • 100 g dark or semi-sweet chocolate, finely chopped (optional) 
  • ice and water for ice bath
  1. Whisk together egg yolks, sugar and 1/4 cup milk
  2. In a non-stick pot, heat remaining milk, 1 cup of whipping cream and cocoa powder over medium heat until just boiled, stirring constantly (Keep the other cup of whipping cream in the fridge)
  3. Add 1/3 cup of hot mixture into egg mixture to temper, then pour everything back into pot
  4. Turn heat down to low, stir constantly until just thickened, mixture should coat back of spoon (You can draw a streak in the middle of the spoon with your finger, if the streak stays clear, it is ready)
  5. Remove from heat immediately, strain through a fine mesh twice
  6. Let sit in an ice bath, stir in vanilla extract and remaining cold whipping cream
  7. Let cool completely, cover with plastic wrap and refrigerate for at least 3 hours or overnight
  8. Place in ice cream machine and churn according to manufacturer’s instructions
  9. Fold in chopped chocolate
  10. Serve soft immediately or keep in freezer

img_20160614_180310.jpg

Simple Shortbread Cookies

My mom, myself and my daughter all love sweets! Since Mother’s Day is coming up, I thought I would make something that all of us would enjoy. These shortbread cookies are sweet and buttery ! Making them is, literally, as easy as 1,2,3 ! All you need to remember is, 1 part of sugar, 2 parts of butter and 3 parts of flour! I also added a touch of lemon zest.
Have a Happy Mother’s Day ! I think moms are the most wonderful people into the world….of course that includes myself !……. 🙂   And I have to thank my daughter for her wonderful drawing !

Makes about 30 cookies

  • 1/2 cup very fine sugar or vanilla sugar plus more for sprinkling
  • 1 cup unsalted butter, at room temperature
  • 1+1/2 cups cake and pastry flour, sifted
  • Zest of half a lemon (optional)
  1. Using an electric mixer with the paddle attachment, cream butter and sugar together
  2. Add lemon zest
  3. Add flour in 2 portions, mix until dough starting to form
  4. Pat dough together with hands
  5. Cut dough into 2 parts, gently shape each dough into logs, about 1+1/2 inch in diameter
  6. Wrap with plastic wrap (Believe it or not, I wrapped the dough and put them inside paper towel rolls to shape! )
  7. Refrigerate for at least 3 hours or overnight
  8. When ready to bake, preheat oven to 300°F
  9. Cut dough into discs, about 1/4 – 3/8 inch in thickness (They do flattened slightly during baking)
  10. Place on cookie sheets lined with parchment paper, about 2 inches apart
  11. Sprinkle top with more sugar
  12. Bake for 18 -20 minutes until edges just golden (You don’t want them too brown)
  13. Cool on baking sheets for 10 minutes, then completely on rack

img_20160505_173658.jpg