Tag Archives: cookies recipes

Gluten-Free Almond Thumbprint Cookies 

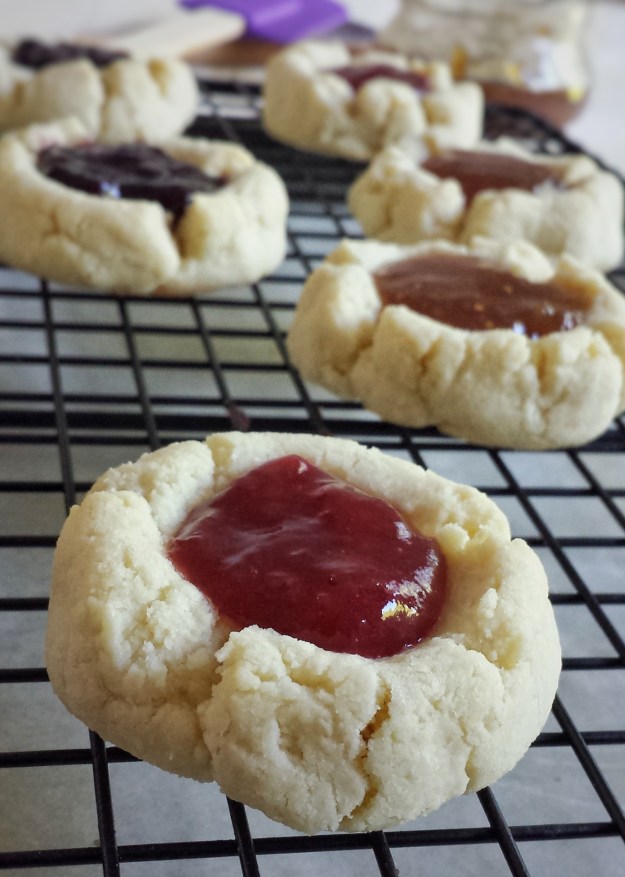
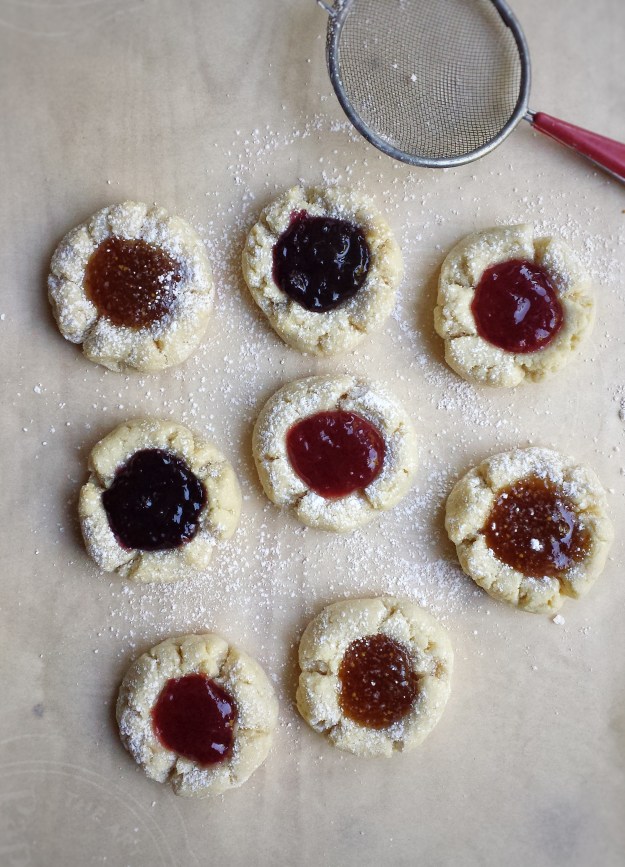
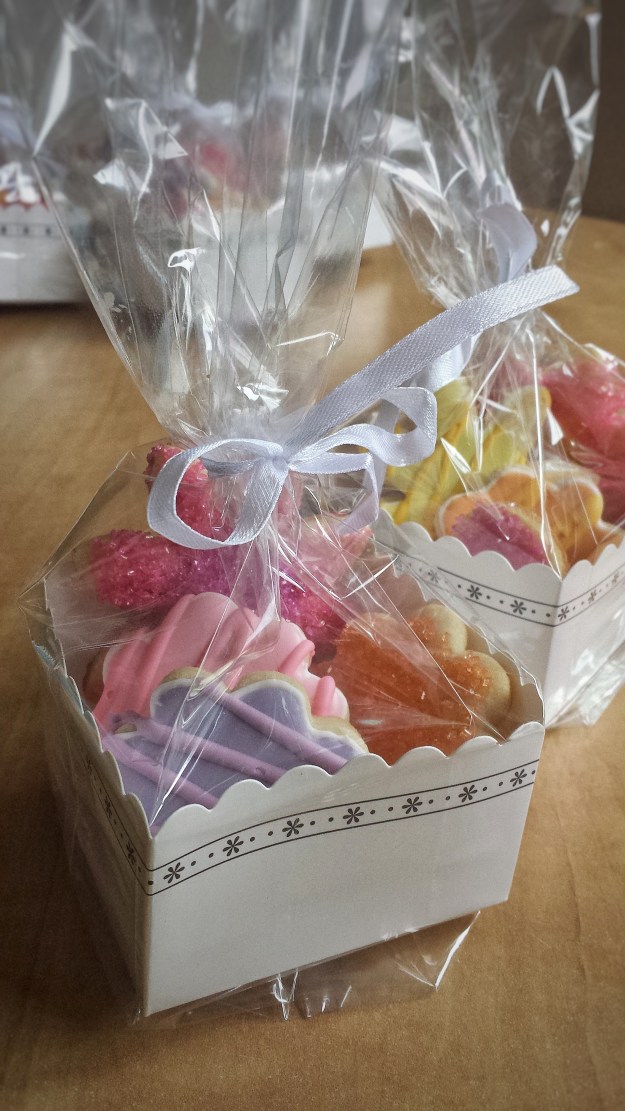
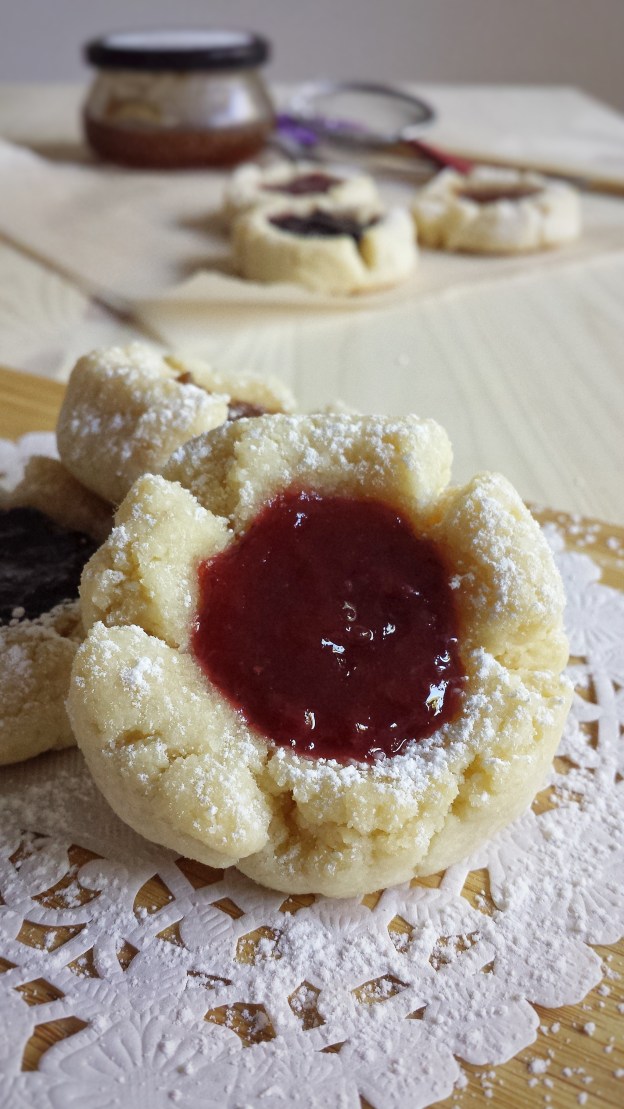
Halloween is over and Christmas is less than 2 months away ! Seriously ? Where did the time go ? And I am doing two Christmas Fairs in about 2 weeks ! This is my first time ever selling my cookies and baked goods ! I am super excited but nervous at the same time. How should I set up my table ? How much should I bake ? Am I going to have enough time ? Ahhhh……..My daughter told me the other day, “mom, don’t worry, just chill and do it and you will be fine ! ” OK, let’s take a deep breath and get organized, I can do this, I can do this ! Oh, and of course I can’t forget about my blog ! I wanted something that’s quick and easy…..How about thumbprint cookies ? Shortbread cookies filled with fruity jams, simple but absolutely delicious ! I made a gluten-free version this time by using ground almond. They are best to be consumed on the day you make it, so I would suggest making smaller batches. Although these cookies have less butter, they are still very rich and tasty ! Thanks to the high fat content of almonds. I totally need to eat a few of them to help me relax ! …..Wish me luck on my craft fairs ! And come visit me if you live around Richmond,B.C. ! 

Makes about 16 cookies

  • 90 g unsalted butter, soften 
  • 90 g icing sugar, plus more for dusting 
  • 240 g ground almond 
  • Pinch of salt 
  • 5 mL pure vanilla extract 
  • Jam of choice
  1. Preheat oven to 325ºF
  2. Cream butter and icing sugar with an electric mixer or wooden spoon 
  3. Add vanilla, then ground almond and salt, mix until combined
  4. Roll into one inch balls, place on baking sheet lined with parchment paper, about 2 inches apart 
  5. Make an indentation with your thumb in the middle of each ball (It’s normal for the dough to be slightly cracked)
  6. Bake for about 10 minutes 
  7. The indentations will flatten, gently press the middle again with the end of a wooden spoon while they are still fairly hot and soft 
  8. Let cool, then spoon jam in the middle. (If the jam is too cold to spread, you can warm it up in a hot water bath)
  9. Dust with icing sugar 

Advertisement

Classic Madeleines 

Madeleines are something that have been in my mind for a long time. These elegant looking mini cakes are so buttery and tasty. They are not difficult to make, you just need a little patience as both the batter and the molds have to be chilled before baking. And yes, you do have to buy the Madeleine pan to get that shell-liked shape, but for about $20-$30, it’s worth it. Well, I guess that’s from a baker’s point of view ! My kids often tell me I spend too much on my baking stuff, but hey, these are my toys, plus I don’t buy expensive clothes, handbags or jewellery like other people do ! Most importantly, I am doing something that makes me happy ! And when mom is happy, everyone’s happy ! 

Makes about 22-24 

  • 120 g unsalted butter + 30 g for greasing tray, melted 
  • 90 g all-purpose flour 
  • 90 g cake and pastry flour 
  • 3 g baking powder 
  • Pinch of salt
  • 150 g vanilla sugar or granulated sugar 
  • 2 large eggs 
  • Zest of one lemon 
  • 15 mL lemon juice 
  • 5 mL pure vanilla extract 
  • Icing sugar for dusting 
  1. Melt butter in a sauce pan or microwave, cool slightly 
  2. Brush madeleine moulds with about 30 g of melted butter, coat with flour, tapping off excess
  3. Place coated pan in freezer for at least one hour 
  4. Sift together flours, baking powder and salt, mix in sugar, set aside 
  5. Using an electric mixer, beat together eggs, lemon zest, lemon juice and vanilla until frothy, about 5 minutes 
  6. Fold flour mixture into egg mixture 
  7. Gently mix in 120 g of melted (and cooled) butter, 2-3 tablespoons at a time until just blended 
  8. Cover and refrigerate for at least one hour or overnight 
  9. When ready to bake, preheat oven to 375°F
  10. Drop about 1 tablespoon of batter into each mould without spreading it out
  11. Place madeleine pan on another large baking tray and bake for about 12 minutes until edges are golden 
  12. Cool in moulds for a few minutes then completely on rack 
  13. Dust with icing sugar, best to eat within 2 days 

Recipe adapted from Mark Bittman, “How to Bake Everything” 

Tools and Books 


Chicago Metallic 26631 12-Cup Nonstick Madeleine Pan

How to Bake Everything: Simple Recipes for the Best Baking

You can get the Madeleine pan and the cookbook through the Amazon website by clicking the above link. I will receive a small compensation if you purchase the item. 

Rose Water Sugar Cookies 

I’ve never been good at drawing. Really, if you ask me to draw something right now, it’s going to look like it was drawn by a six years old ! That’s why I admire people, including my daughter, who has the talent to draw. Her pictures are always full of creative ideas and her characters are very lively. Like this one here….Coffee and Tea are having a battle ! 

And this one, which she drew last week at her art class, illustrates people taking photos of the beautiful Cherry Blossoms.

And yes, thanks to the Cherry Blossoms, otherwise we wouldn’t even notice that Spring is here! The weather is still rainy and pretty cold…….To help “spring” our spirits back, I made these Rose Water Sugar Cookies ! The rose water gives the cookies a nice floral flavour, but you don’t need very much. I decorated the cookies two ways, with coloured sugar and with royal icing. (This is the time when I really wish I am as artistic as my daughter, so I can make my cookies prettier !) 

People often wonder what I do with all the goodies I made. I mostly share them with friends and family.  But this time, I wrapped them up nicely and sent them to my kids’ school for their annual Spring Fair ! Being able to share them and help raise money for our school feels fantastic ! Happy Spring everyone !

Makes about 3-4 dozens 

For the cookies 

    • 360 g all-purpose flour 
    • 3 g baking soda 
    • 2 g salt
    • 120 g unsalted butter, at room temperature
    • 180 g granulated sugar 
    • 1 egg + 1 egg white for brushing 
    • 5 mL pure vanilla extract 
    • 30 mL lemon juice 
    • Zest of 1 small lemon 
    • 5 mL rose water
  1. Preheat oven to 325°F
  2. Sift together flour,baking soda and salt, set aside 
  3. Using an electric mixer with the paddle attachment, cream together butter and sugar until fluffy 
  4. Add 1 egg, vanilla, lemon juice and lemon zest and rose water, mix until blended 
  5. Mix in flour mixture, 1/3 at a time  
  6. Transfer to a lightly floured surface and knead until dough is formed
  7. Roll out to about 0.3 cm in thickness 
  8. Cut with cookie cutters (You can collect the dough scraps all together and re-roll, cover unused dough with a damp cloth or plastic wrap)
  9. Place on cookie sheets lined with parchment paper 
  10. If decorating with coloured sugar, brush top with egg white, sprinkle with sugar, then bake for 8 minutes. If decorating with royal icing (see recipe below), bake first for 8 minutes, cool completely, then decorate. 

Royal Icing

    • 45 g meringue powder,sifted 
    • 500 g icing sugar
    • Pinch of salt
    • 90 – 120 mL warm water
    • 5 mL pure vanilla extract
    • 10 mL corn syrup 
    • Gel food colouring
  1. Mix meringue powder with about 45 mL of water, let sit for a few minutes 
  2. Stir in vanilla and corn syrup 
  3. Using an electric mixer with the whisk attachment, start mixing icing sugar and salt at low speed 
  4. Add meringue powder mixture 
  5. Slowly add in more warm water until shiny and desired consistency (thicker for outlining and thinner for filling)
  6. Add gel food colouring 

This recipe is also part of the Canadian Food Creatives’ round up. Our topic this month is “Bring On Spring” !  Be sure to check out the links below for more Spring recipes from other Canadian Food Bloggers. You can also find them on social media using the hashtag #CDNFoodCreatives. Many thanks to Melanie Maxwell at The Refreshanista for hosting. 


Simple Shortbread Cookies

My mom, myself and my daughter all love sweets! Since Mother’s Day is coming up, I thought I would make something that all of us would enjoy. These shortbread cookies are sweet and buttery ! Making them is, literally, as easy as 1,2,3 ! All you need to remember is, 1 part of sugar, 2 parts of butter and 3 parts of flour! I also added a touch of lemon zest.
Have a Happy Mother’s Day ! I think moms are the most wonderful people into the world….of course that includes myself !……. 🙂   And I have to thank my daughter for her wonderful drawing !

Makes about 30 cookies

  • 1/2 cup very fine sugar or vanilla sugar plus more for sprinkling
  • 1 cup unsalted butter, at room temperature
  • 1+1/2 cups cake and pastry flour, sifted
  • Zest of half a lemon (optional)
  1. Using an electric mixer with the paddle attachment, cream butter and sugar together
  2. Add lemon zest
  3. Add flour in 2 portions, mix until dough starting to form
  4. Pat dough together with hands
  5. Cut dough into 2 parts, gently shape each dough into logs, about 1+1/2 inch in diameter
  6. Wrap with plastic wrap (Believe it or not, I wrapped the dough and put them inside paper towel rolls to shape! )
  7. Refrigerate for at least 3 hours or overnight
  8. When ready to bake, preheat oven to 300°F
  9. Cut dough into discs, about 1/4 – 3/8 inch in thickness (They do flattened slightly during baking)
  10. Place on cookie sheets lined with parchment paper, about 2 inches apart
  11. Sprinkle top with more sugar
  12. Bake for 18 -20 minutes until edges just golden (You don’t want them too brown)
  13. Cool on baking sheets for 10 minutes, then completely on rack

img_20160505_173658.jpg

Butterscotch Coconut Cookies

I was cleaning up my pantry today. I found many bags and containers of leftover, soon expired ingredients. So I threw most of them together and made some granola bars. Still left with some butterscotch chips and shredded coconut, I decided to put the two together. I was never a big fan of butterscotch, but these cookies came out soft, sweet and chewy, they are super yummy ! So if you have some leftover ingredients in your pantry, don’t feel shy to experiment, you never know what you can come up with.

Makes about 40 cookies
Total time = 30 minutes

  • 2 cups all-purpose flour
  • 2 teaspoons baking powder
  • 1/2 teaspoon salt
  • 1/2 cup unsalted butter
  • 1 cup granulated sugar
  • 2 eggs
  • 1 teaspoon pure vanilla extract
  • 1/4 cup canned coconut milk
  • 1/2 cup unsweetened shredded coconut
  • 1/2 cup butterscotch chips
  1. Preheat oven to 350ºF
  2. Sift together flour, baking powder and salt, set aside
  3. Using an electric mixer with the paddle attachment, cream butter and sugar until fluffy
  4. Add eggs, vanilla and coconut milk, mix until blended, scraping sides and bottom of mixing bowl
  5. Stir in shredded coconut and butterscotch chips
  6. Drop about 1 tablespoon each of dough onto cookie sheets lined with parchment paper, spacing 2 inches apart
  7. Bake for about 12 minutes until edges are golden

img_20160419_102454.jpg


Lemon Coconut Thumbprint Cookies

Can’t believe Spring is already on its way ! The weather is warmer, Cherry Blossom trees are blooming….and my hay fever is back ! Even though my nose is a little itchy and stuffy, I can still smell these delicious cookies. They are loaded with lemon flavour ! I added some shredded coconut around the cookies for extra crunchiness. You can omit it, or use almonds or hazelnuts if you are not a coconut fan.

Total time: 90 minutes

For the lemon curd

Makes about 1/2 cup

  • 2 egg yolks
  • 6 tablespoons granulated sugar
  • 3 tablespoons lemon juice
  • 2 teaspoons lemon zest
  • 2 tablespoons water
  • 50 gram unsalted butter, chilled and cut into small pieces
  1. Whisk together egg yolks, sugar, lemon juice, water and zest
  2. Heat mixture in non-stick pot over low heat, stirring constantly until thickened (mixture should coat back of spoon)
  3. Turn heat off, mix in butter, a few pieces at a time until all melted
  4. Cool, can refrigerate up to 2 weeks

For the cookies

Makes about 20 cookies

  • 1+1/4 cup all-purpose flour
  • 1/4 teaspoon salt
  • 1/2 cup unsalted butter,at room temperature
  • 1/2 cup granulated sugar
  • 1 egg
  • 1 tablespoon lemon juice
  • 1 teaspoon pure vanilla extract
  • 1/4 cup unsweetened shredded coconut (optional)
  1. Preheat oven to 325ºF
  2. Sift together flour and salt, set aside
  3. Using an electric mixer with the paddle attachment, cream butter and sugar until fluffy
  4. Add egg, lemon juice and vanilla
  5. Add flour mixture in 2 portions, mix until blended
  6. Roll dough into one inch balls
  7. Gently crate an indentation in the middle of balls with thumb or tip of a wooden spoon
  8. Coat top of cookies with shredded coconut
  9. Bake for about 10 minutes, take cookies out, gently crate centres again
  10. Bake for another 7-8 minutes until golden
  11. Cool on cookie sheets for about 5 minutes, then completely on rack
  12. Spoon lemon curd into centres of cookies 

Pinwheel Cookies

I found this pinwheel recipe in my big recipe binder the other day. I don’t even remember when and how I got it as it was hand-written by me!? Perhaps it was from a friend? All I remember was I’ve made it once and it tasted good ! The original recipe was a chocolate pinwheel . I added some pink colour instead and made them into Valentine’s cookies !  

Makes about 3 dozens

  • 2 cups all-purpose flour
  • 1/2 teaspoon baking soda
  • 1/4 teaspoon salt
  • 1/2 cup unsalted butter, at room temperature
  • 3/4 cup granulated sugar
  • 1 egg
  • 1 egg white for brushing
  • 2 tablespoons lemon juice
  • 1 teaspoon pure vanilla extract
  • food colouring
  • vanilla sugar or granulated sugar for sprinkling (optional, to make cookies shinier)
  1. Preheat oven to 350ºF
  2. Sift together flour, baking soda and salt, set aside
  3. Using an electric mixer with paddle attachment, cream butter and sugar until light and fluffy
  4. Add 1 egg, lemon juice and vanilla extract
  5. Add flour mixture in 2-3 portions, mix until blended
  6. Divide dough into two halves, add food coloring to one part, knead to mix in color
  7. Roll out each half to about 1/8 inch in thickness between 2 sheets of parchment paper
  8. Remove the two top sheets of parchment paper 
  9. Brush plain dough with egg white
  10. Carefully invert coloured dough and place on top, roll gently with a rolling-pin to adhere
  11. Remove top sheet of parchment paper and trip off uneven edges
  12. Slowly roll up two sheets (like a Swiss roll)
  13. Wrap with plastic wrap and refrigerate for at least 2 hours or until firm
  14. Using a sharp knife, cut into slices about 1/8-1/4 inch in thickness (you may need to gently reshape the cookies into circles)
  15. Sprinkle top with vanilla sugar or granulated sugar if desired
  16. Place on cookie svheets lined with parchment paper
  17. Bake for about 8 minutes
  18. Cool on cookie sheets for 5 minutes, then completely on rack

Cookie Butter Cookies

Have you ever tried cookie butter? It is soooo delicious!  Try just spreading it on your toast or fruits like apples and bananas, I am sure you will fall in love with it.  And of course, these cookie butter cookies are absolutely scrumptious , This was originally a peanut butter recipe.  I used cookie butter instead.  Since it is sweeter than peanut butter, I cut back on the sugar. 

Makes about 24 cookies

  • 1+1/4 cups all-purpose flour
  • 1/2 teaspoon baking powder
  • 1/2 teaspoon baking soda
  • 1/4 teaspoon salt
  • 1/2 cup unsalted butter, at room temperature
  • 1/2 cup demerara or brown sugar
  • 200 g cookie butter
  • 1 egg
  • 1 teaspoon pure vanilla extract
  1. Preheat oven to 350ºF
  2. Sift together flour, baking powder, baking soda and salt, set aside
  3. Using an electric mixer with the paddle attachment, cream butter, cookie butter and sugar together until fluffy and creamy
  4. Mix in egg and vanilla extract, scraping sides and bottom of bowl
  5. Add flour mixture in 2-3 portions, mix until blended
  6. Gently shape about one tablespoon each of dough into balls
  7. Place on cookie sheets lined with parchment paper, about 2 inches apart (you can gently flattened cookies with fork if desired)
  8. Bake for about 9-10 minutes

Gingerbread Cookies

Every Christmas gingerbread cookie is at the top of my baking list.  The kids love to make and eat them.  My daughter and I spent a whole Sunday morning decorating them.  We had so much fun!

Makes about 24, depending on size of cookies
Total time = 90 minutes

For the cookies

  • 2+1/4 cake and pastry flour
  • 1/2 teaspoon baking soda
  • 1/4 teaspoon salt
  • 2 teaspoons ground ginger
  • 1 teaspoon ground cinnamon
  • 1/4 teaspoon ground cloves
  • pinch of nutmeg
  • 1/2 cup unsalted butter, at room temperature
  • 1/2 cup brown sugar
  • 1/3 cup fancy molasses
  • 1 egg
  1. Preheat oven to 350°F
  2. Sift together flour, baking soda, salt and the 4 spices, set aside
  3. Using and electric mixer with the paddle attachment, beat butter and sugar until fluffy
  4. Add egg and molasses, mix until blended
  5. Add flour mixture in 2-3 portions, mix until dough starting to form
  6. Transfer dough to a floured surface, press together to form a ball
  7. Wrap with plastic wrap and put in fridge for about 1 hour for easy handling
  8. On a floured surface, roll dough into about 1/8″ thickness, cut with cookie cutters. 
  9. Gather dough scraps together, roll out and cut into shapes again
  10. Place cookies on cookie sheets lined with parchment paper
  11. Bake for about 8 minutes
  12. Cool on cookie sheets for about 10 minutes them completely on rack
  13. Decorate with icing and candies when completely cooled

For the icing

  • 2 cups icing sugar
  • 4 tablespoons milk
  • 4 teaspoons corn syrup
  • 1 teaspoon vanilla extract
  • 1 to 2 teaspoons water
  • food coloring for icing
  1. Sift icing sugar
  2. Add milk, corn syrup and vanilla
  3. Add water, a few drops at a time to get the desired consistency
  4. Add food coloring
  5. Mix until smooth

Use a thicker icing to outline the borders, let dry, then use a thinner icing for the middle.  The icing is almost transparent, so you will need to add white food coloring to make it white.

Ginger Cookies 

These are one of my favourite cookies! I thought my kids would not like them, so I added a bit more ginger to please the adults’ palates. To my surprise, my daughter loves them. She said these cookies are really soft and tasty, and not spicy at all!

Makes about 24-30 cookies
Total time = 60 minutes

  • 2 cups cake and pastry flour
  • 1 teaspoon baking soda
  • 1/4 teaspoon salt
  • 2 teaspoons ground ginger
  • 1 teaspoon ground cinnamon
  • 1/4 teaspoon ground cloves
  • 1/2 cup unsalted butter, at room temperature
  • 1/2 cup granulated sugar
  • 1/4 brown sugar
  • 1/4 cup Crosby’s fancy molasses
  • 1 egg
  • 1 teaspoon pure vanilla extract
  • 2 teaspoons granulated sugar for rolling
  1. Preheat oven to 325°F
  2. Sift together flour, baking soda, salt and the three spices, set aside
  3. Using an electric mixer, beat together butter and sugars at medium speed until fluffy
  4. Add molasses, egg and vanilla, mix until blended
  5. Add flour mixture in 2 parts, mix until dough is formed, scraping sides and bottom of bowl
  6. Refrigerate dough for 30-60 minutes for easy handling
  7. Roll dough into 1 inch balls
  8. Lightly roll top half of cookie balls in sugar
  9. Place on cookie sheets lined with parchment paper, sugar side up, spacing about 2 inches apart
  10. Flatten top gently with bottom of a glass
  11. Bake for about 10-12 minutes