Tag Archives: snacks

Dark Chocolate Granola

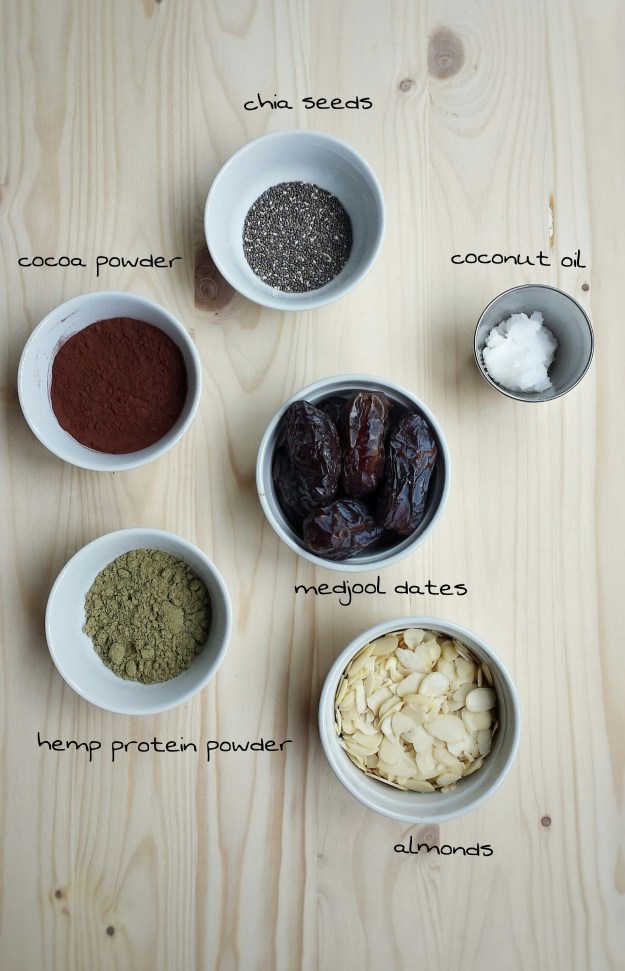
Happy New Year ! My first post of 2019 ! Do you have any new year resolution ? I am sure eating healthier is on everyone’s list, especially after the holiday indulgence…..but wait…..I still like my chocolates ?! So……let’s start with a recipe that has chocolate but also healthy and good for you ! How about granola ? It is easy to make and you can pretty much put whatever you like in there, nuts, seeds, dried fruits…..and yes, CHOCOLATES ! Use darker chocolate if you don’t mind the bitterness as it’s healthier. I used 85%, but if that’s too dark, you can use 60-70 %. Normally, I weigh all the ingredients in my recipe, but granola is very flexible, you can easily adjust the amount to your taste. 

I hope everyone is off to a good start this year ! Stay healthy and be happy !    

Makes about 2 cups     

  • 1 cup quick oats
  • 1/4 cup unsweetened shredded coconut
  • 1/4 cup dried cranberries
  • 1 tablespoon chia seeds
  • 1 tablespoon unsweetened cocoa powder
  • 50 g dark chocolate, coarsely chopped (I used 85 %) 
  • 1/4 cup maple syrup
  • 3 tablespoons melted coconut oil 
  • 1 teaspoon pure vanilla extract 
  1. Preheat oven to 300ºF
  2. Mix together all dry ingredients 
  3. Add maple syrup, coconut oil and vanilla extract, mix well
  4. Place a thin and even layer on cookie sheet lined with parchment paper
  5. Bake for about 20 minutes, stirring once
  6. Cool and store in air-tight container for up to 2 weeks


Advertisement

Date Energy Balls

Except my sweet tooth, I think I have a fairly healthy lifestyle. I exercise regularly, I eat a lot of vegetables and fruits, drink a lot of water. I try to avoid eating too much carbs and fat. And about a month ago, I started doing kickboxing classes ! Yes, isn’t that crazy ?! It is a pretty strenuous workout, but it’s a lot of fun ! And what a great way to release my stresses…..you know, I can just imagine I am punching my “enemies” …. LOL ! And after all the hard punching and kicking, I made these energy balls to treat myself ! They are delicious, nutritious and super easy to make ! Loaded with vitamins and minerals, they sure can give me a kick of energy before or after my class ! Medjool dates and nuts are however, fairly high in calories, so just keep in mind not to indulge yourself too much….even though they are so tasty and healthy !  

Makes about 12 balls

  • 90 g blanched almonds (or other nuts)
  • 250 g medjool dates (about 13-14 pitted dates)
  • 10 g chia seeds 
  • 15 g hemp protein powder 
  • 25 g cocoa powder 
  • 15 mL coconut oil 

  1. Put dates into a food processor and pulse until they are in small pieces 
  2. Add all other ingredients and blend until well combined
  3. Roll into one-inch balls
  4. Keep in refrigerator 


Homemade Pop Tarts

My daughter loves to read ever since she was very young, and she loves all kinds of books…novels, science, history, comics and even cook books ! So, a lot of times, our bedtime reading will include looking at recipes, sweet or savoury, and deciding what we should try. Pop tarts was one of them that’s on the top of our list. It’s easy, colourful, fun and of course, super yummy ! Personally, I like them without the sprinkles, but my daughter will definitely disagree. She had so much fun putting on the glaze and the sprinkles….yeah, might be just a little too much…..    

Makes about 6 tarts

For the crust

  • 360 g all-purpose flour
  • 20 g granulated sugar
  • 2 g salt
  • 240 cold unsalted butter, cut into small pieces and chilled
  • 2 eggs
  • 30 ml milk
  • 5 ml pure vanilla extract

For the glaze 

  • 120 g icing sugar 
  • 30-45 ml milk

Other ingredients

  • Fruit jam of choice (I used raspberry)
  • 1 egg white for brushing
  • 30 g vanilla sugar or granulated sugar 
  • Sprinkles for decorating
  1. To make the glaze, mix together icing sugar and milk until smooth, set aside
  2. To make the crust, put flour, sugar and salt in a large mixing bowl
  3. Rub in chilled butter with fingers until butter is pea-sized
  4. Mix in eggs, milk and vanilla
  5. Gently press dough together, do not knead
  6. Wrap with plastic wrap and refrigerate for at least an hour or overnight
  7. When ready to bake, preheat oven to 350°F
  8. Roll dough to about 0.5 cm in thickness. If dough was in the fridge overnight, let it sit at room temperature for about 20 minutes before rolling
  9. Cut into 8 cm x 12 cm rectangles (2 rectangles per tart)
  10. Place half of the rectangles on baking sheet lined with parchment paper
  11. Spoon 1-2 tablespoons of fillings on top
  12. Brush sides with egg white and cover with the other half of rectangles
  13. Press sides gently to seal, then press down with a fork
  14. Make a few holes on top to vent
  15. Brush top with egg white and sprinkle with vanilla sugar or granulated sugar
  16. Bake for about 30 minutes
  17. Cool, then decorate with glaze and sprinkles

Classic Madeleines 

Madeleines are something that have been in my mind for a long time. These elegant looking mini cakes are so buttery and tasty. They are not difficult to make, you just need a little patience as both the batter and the molds have to be chilled before baking. And yes, you do have to buy the Madeleine pan to get that shell-liked shape, but for about $20-$30, it’s worth it. Well, I guess that’s from a baker’s point of view ! My kids often tell me I spend too much on my baking stuff, but hey, these are my toys, plus I don’t buy expensive clothes, handbags or jewellery like other people do ! Most importantly, I am doing something that makes me happy ! And when mom is happy, everyone’s happy ! 

Makes about 22-24 

  • 120 g unsalted butter + 30 g for greasing tray, melted 
  • 90 g all-purpose flour 
  • 90 g cake and pastry flour 
  • 3 g baking powder 
  • Pinch of salt
  • 150 g vanilla sugar or granulated sugar 
  • 2 large eggs 
  • Zest of one lemon 
  • 15 mL lemon juice 
  • 5 mL pure vanilla extract 
  • Icing sugar for dusting 
  1. Melt butter in a sauce pan or microwave, cool slightly 
  2. Brush madeleine moulds with about 30 g of melted butter, coat with flour, tapping off excess
  3. Place coated pan in freezer for at least one hour 
  4. Sift together flours, baking powder and salt, mix in sugar, set aside 
  5. Using an electric mixer, beat together eggs, lemon zest, lemon juice and vanilla until frothy, about 5 minutes 
  6. Fold flour mixture into egg mixture 
  7. Gently mix in 120 g of melted (and cooled) butter, 2-3 tablespoons at a time until just blended 
  8. Cover and refrigerate for at least one hour or overnight 
  9. When ready to bake, preheat oven to 375°F
  10. Drop about 1 tablespoon of batter into each mould without spreading it out
  11. Place madeleine pan on another large baking tray and bake for about 12 minutes until edges are golden 
  12. Cool in moulds for a few minutes then completely on rack 
  13. Dust with icing sugar, best to eat within 2 days 

Recipe adapted from Mark Bittman, “How to Bake Everything” 

Tools and Books 


Chicago Metallic 26631 12-Cup Nonstick Madeleine Pan

How to Bake Everything: Simple Recipes for the Best Baking

You can get the Madeleine pan and the cookbook through the Amazon website by clicking the above link. I will receive a small compensation if you purchase the item. 

Spring Chocolate Pudding 

Spring is finally finally here ! It’s been a long time ! Even the cherry blossoms think so, they’ve been waiting to bloom and shine !  I used to garden a lot more, but ever since I have kids, I’ve been too busy growing two little humans and kind of abandoned my garden. This year, I want to at least plant some herbs, so I got some basil and cilantro seeds the other day and just put them in a couple of small pots. Well, I have to wait a while before my herbs grow.  So meanwhile, I made these cute little pudding pots to enjoy. They look very realistic !  And I was so happy that I could shoot the pictures in my backyard with some sunshine ! They would make a fun little snack for the kids at Easter ! Try to pick strawberries that are smaller and longer in shape so they would look more like little carrots.  

Makes about 6-8 servings 

For the candy coated strawberries

  • 180 g orange candy melts 
  • 5-10 mL vegetable oil
  • 8-10 strawberries (at room temperature)
  1. Wash and dry strawberries leaving the stems on 
  2. Melt candy melts in the microwave or over a double boiler according to package instructions 
  3. Add 5-10 mL of vegetable oil to achieve desired consistency if needed 
  4. Coat strawberries with candy melts, tap off excess, be careful not to break the stems 
  5. Place on a tray lined with parchment paper 
  6. Pour remaining candy melts into a piping bag 
  7. Cut a small hole at the end of piping bag 
  8. Drizzle over dried, coated strawberries 

For the chocolate pudding 

    • 30 g unsweetened cocoa powder 
    • 75 g granulated sugar 
    • 30 g cornstarch 
    • Pinch of salt 
    • 500 mL milk (whole or 2%)
    • 120 g semi-sweet chocolate chips 
    • 5 mL pure vanilla extract 

You would also need 8 regular-sized Oreo cookies for topping

      1. In a non-stick pot, mix together cocoa powder, sugar, cornstarch, salt
      2. Gradually stir in milk 
      3. Place over medium heat, stirring continuously until starting to bubble   
      4. Add chocolate chips, stir until thickened and chocolate all melted
      5. Remove from heat, mix in vanilla extract 
      6. Spoon into containers, let cool and refrigerate for at least 2-3 hours (a skin will form on top of pudding, but that’s OK, as we will put crushed Oreo on top)

To assemble pudding, crushed Oreo into small pieces, put on top of pudding, place a coated “carrot” on top 

Candy coated strawberries recipe adapted from lifemadesimplebakes.com

Overnight Oats with Chia Seeds

After indulging myself over Christmas and New Year, I guess it’s time to make something a little healthier! Chia seed pudding has been on my “to make” list for quite a while, but I’ve been pushing it back. Somehow I associate the word “pudding” with something soft and creamy, not seedy and chewy.  So I ended up making this overnight oats.  It was really yummy, and to my surprise, my daughter loved it ! This is another recipe that can have so many variations. My ratio is roughly, 1 part oats, 2 parts milk and 1/4 part chia seeds, then add sweetener, and toppings.  It makes a great breakfast, or for me, a snack after my morning run !  

Makes 1 serving

  • 1/2 cup unsweetened milk of choice (I used almond and coconut milk)
  • 1/4 cup rolled oats
  • 1 tablespoon chia seeds
  • 1 tablespoon honey or maple syrup
  • toppings of choice, e.g. banana, berries, shredded coconut, almond slices, pumpkin seeds, sunflower seeds etc
  1. Combine milk, oats, chia seeds and sweetener in a bowl or a mason jar  
  2. Stir well, cover and refrigerate overnight
  3. Add toppings when ready to serveOvernight Oats with Chia Seeds


Double Chocolate Cranberry Cookies 

I was craving for some chocolate cookies yesterday. Not just a plain chocolate chip cookie. But the decadent kind that is loaded with chocolate, and all you want to say after taking a bite is Mmmmm…..Mmmmmm and Mmmmmm ! So here they are ! Rich, chocolaty and soft…. I had to quickly shoot a few photos before they were all gone !
This is my first time using coconut sugar. Its taste and sweetness are very similar to brown sugar. I do find it gives the cookies a slightly drier texture. The cranberries are optional, but I thought it’s nice to add some tanginess. I hope you enjoy them as much as we do ! 

Makes about 16 cookies

  • 150 g all-purpose flour
  • 25 g unsweetened cocoa powder
  • 1/2 teaspoon baking soda
  • 1/4 teaspoon salt
  • 100 g unsalted butter
  • 60 g coconut sugar (or brown sugar)
  • 60 g granulated sugar
  • 1 egg
  • 1 teaspoon pure vanilla extract
  • 50 g dark chocolate, 70%, (chopped into small chunks)
  • 50 g semi-sweet chocolate (chopped into small chunks)
  • 60 g dried cranberries
  1. Preheat oven to 350ºF
  2. Sift together flour,cocoa powder, baking soda and salt, set aside
  3. Cream together butter and sugars using either an electric mixer with the paddle attachment or by hand with a wooden spoon (I just did it by hand)
  4. Add egg and vanilla, mix until blended
  5. Mix in flour mixture in two parts
  6. Stir in chocolate chunks and dried cranberries
  7. Drop about 1 tablespoon each of dough onto baking sheets lined with parchment paper, about 2 inches apart
  8. Bake for about 12 minutes
  9. Cool on baking sheets for about 5 minutes, then completely on rack

Double Chocolate Cranberry Cookies

No Bake Nutella Bites 

Can’t believe September is here already ! Kids are back to school, routines are slowly getting back to normal, and I have to start making lunches and snacks. I made these little energy bites as an after school snack. They are like mini granola bars and are super easy to make. Keep them in the fridge and the kids can just grab them when they want. They come in handy before hockey practices too ! There can be many variations to the recipe.  I used Nutella, but you can also use peanut butter, cookie butter or sunflower butter. You can also choose other nuts, seeds and dried fruits. 

Makes about 25-30 

  • 1 cup quick oats
  • 1 cup rice crispy cereal 
  • 2 tablespoons chia seeds 
  • 2 tablespoons ground flax seed 
  • 1/4 cup unsweetened shredded coconut 
  • 1/2 cup Nutella spread 
  • 3 tablespoons melted coconut oil 
  • 2 tablespoons honey 
  1. Mix all dry ingredients together 
  2. Add Nutella, coconut oil and honey, mix until blended 
  3. With the help of a melon scooper or spoon, roll mixtures into small balls
  4. Refrigerate until firm
  5. Keep in refrigerator 

No Bake Nutella Bites

Bran Frozen Yoghurt Cups

During the summer, when my kids are at home, they are always hungry, especially my son. I feel like I am feeding him constantly ! So, I like healthy snacks that are easy to make and can be prepared ahead of time. This recipe is really simple, even the kids can do it ! You probably already have all the ingredients at home and what I’ve made is very basic. You can choose your cereal, yoghurt and fruits. I am sure the kids would enjoy making and eating them ! I eat them after my workouts too !

Makes about 12 mini cups 

  • 50 g bran flakes 
  • 1 tablespoon honey (depends how sweet your cereal is)
  • 1+1/2 tablespoons melted coconut oil 
  • 250 g vanilla-flavoured Greek yoghurt 
  • 50-100 g fresh or frozen fruits (I used fresh strawberries, blueberries and kiwi)
  1. Crush bran flakes into small pieces 
  2. Mix in honey and coconut oil 
  3. Spoon about 1-2 teaspoons into each small silicone cup and press down firmly to form base 
  4. Place in freezer for about 20 minutes to harden
  5. Spoon in yoghurt, then top with fresh fruits
  6. Freeze until set


Iced Coffee Popsicles 

For a lot of people, summer is a relaxing season, but if you are a mom, you would know, summer can be very busy too! For the last few weeks, I have been driving my kids to swimming and other activities almost every day, trying to keep them active and occupied….so they don’t spend too much time in front of the computer ! It’s busy, but they’ve been having a good time. For me, many days, by the afternoon, I am pooped ! And I need my afternoon “fuel” to keep me going, which is usually a light snack and a cup of iced coffee.  It was so hot the last few days, so I decided to transform my “fuel” into popsicles ! Oh, and I found a bottle of Kahlua in my fridge so I added some extra boost ! Sorry kids, you can’t have these, but you know what ?  When mom is cool, everything is cool ! 

Makes about 8-10 popsicles 

  • 1/2 cup hot brewed coffee 
  • 1/2 cup condensed milk 
  • 3/4 cup whole milk 
  • 3/4 cup half and half cream
  • 1 teaspoon pure vanilla extract 
  • 2 tablespoons coffee liqueur (optional)
  • 60 g semi-sweet or dark chocolate, melted (optional for drizzles) 
  1. Mix hot coffee and condensed milk together
  2. Add all other ingredients except the melted chocolate, stir until blended 
  3. Pour into popsicle molds and freeze until set, about 4 hours 
  4. Drizzle with melted chocolate if desired 

Iced Coffee Popsicles