Tag Archives: recipe

Baked Pears

Our fall weather has been kind of cold. It seems like we had summer, lots of rain, then winter is here …..Do you ever crave for a nice warm dessert after dinner on a cold night ? My daughter and I certainly do ! And often we want something that’s slightly healthier.  Here is one very simple recipe. You can just put it together just before having dinner, put it in the oven and it’s ready when you finish !  You can serve them with some vanilla yoghurt….or ice cream ! Well, I think that’s still pretty healthy….. 

Makes 4 servings

  • 4 ripe Anjou pears
  • 1/2 teaspoon ground cinnamon
  • 1/4 cup crushed walnuts
  • 3-4 tablespoons maple syrup
  1. Preheat oven to 350°F
  2. Cut pears in halves and remove cores
  3. Mix together walnuts, cinnamon and maple syrup
  4. Spoon fillings into pears
  5. Sprinkle and drizzle with more cinnamon and maple syrup
  6. Bake for about 40 minutes until soft
  7. Serve warm with vanilla yoghurt if desired 


Advertisement

Berries and Tofu Smoothie Bowl (Vegan)

Over the past year, I have been trying to eat less meat and more plant-based proteins. I was never a big meat eater, so the transition was pretty easy. To me, the change has been beneficial, especially for my gut. I have a lot less indigestion and heartburn. Trying to cooperate these ingredients in recipes has been fun too. Tofu is my favourite, I mostly use it in savoury dishes or soups, but I can also make it into a simple and nutritious sweet treat, like this smoothie bowl ! You can use any berries and toppings of your choice. For a thicker smoothie, freeze some of the berries first. Look at the beautiful and vibrant colours ! It’s definitely a treat for your eyes and your tummy !  

Makes one serving

  • 150 g mixed berries (I used fresh raspberries, frozen blueberries and blackberries)
  • 150 g soft tofu
  • 1 tablespoon of maple syrup to sweeten (optional)
  • Toppings of choice (other fruits, seeds and nuts)

Blend all ingredients together then add toppings 

Vanilla Cake with Blueberry Cream Cheese Frosting

Sorry! I was one day late for my Mother’s Day post ! Well, but I think we can treat our moms (and myself) any time of the year, and we should ! It doesn’t have to be just Mother’s Day, right ? This cake is very simple, and the blueberries give it a stunning, beautiful color that you don’t need to do much decorations ! I added some freeze-dried blueberries.  If you cannot find them, just add a little more puree to enhance the blueberry flavour. (Just a little otherwise the frosting may become watery). The cream cheese frosting is quite soft, so you should keep it in the fridge until serving. I use vanilla cake as I find it very versatile. You can pretty much pair it  with any flavour, berries, citrus, caramel, chocolate,etc. Once you have a good recipe, you are set and good to go. You can also use this recipe to make cupcakes, just decrease your baking time to about 18-20 minutes. 

I hope all moms had a good Mother’s Day yesterday ! I got a nice surprise from my daughter. She made me some Blueberry Chocolate Bark !  How sweet !

Makes one 6 inch cake

For the vanilla cake

  • 300 g cake and pastry flour
  • 6 g baking powder
  • 3 g baking soda
  • 2 g salt
  • 180 g granulated sugar
  • 2 eggs
  • 180 mL buttermilk
  • 120 mL milk
  • 10 mL pure vanilla extract
  • 100 g unsalted butter (melted)
  • 100 mL vegetable oil
  1. Preheat oven to 350ºF
  2. Line the bottom of two 6 inch round cake pans with parchment paper, lightly oil and flour the sides
  3. Sift together flour, baking powder, baking soda and salt, set aside
  4. Whisk together eggs and sugar until pale
  5. Mix in milk, buttermilk, vanilla, butter and oil (it’s ok if batter is lumpy, the butter may just be solidifying)
  6. Add the wet ingredients into the dry ingredients, mix until just cooperated.
  7. Pour batter into the cake pans and bake for about 40 minutes
  8. Cool completely  before assembling

Tips:

To keep the cake moist and evenly baked, you can bake them in a hot water bath. You can also use cake strips, which you soak in water for a few minutes, squeeze out excess, wrap it around the cake pans and bake.

For the frosting

  • 270 g unsalted butter (soften)
  • 225 g soft cream cheese
  • 120 g icing sugar
  • 45 g blueberry puree (store bought or homemade) 
  • 20 g freeze-dried blueberry powder (optional)
  1. To make the puree, blend fresh or frozen blueberries (you may need more than 45 g of whole blueberries) 
  2. To make the blueberry powder, grind freeze-dried blueberries with food processor until fine
  3. Beat together butter and cream cheese until smooth
  4. Sift in icing sugar, beat until light and smooth
  5. Add blueberry puree and powder, mix well
  6. Refrigerate until use

To assemble

  1.  Trip top of cakes to flatten
  2. Layer cakes with frosting in between
  3. Coat side and top of cake with more frosting
  4. Decorate as desired
  5. Keep in fridge until ready to serve


You can get the cake strips through the Amazon website by clicking the link below. I will receive a small compensation if you purchase the item. 


Wilton Bake Even Cake Strips, 2 Pieces

Lemon Coconut Muffins

My friends often ask me how I come up with recipe ideas. Most of the time is seasonal, like using berries in the summer and pumpkin in the fall. Sometimes it’s just sort of random and use whatever I have at home. The other day, I was cleaning up my pantry, I found a bag of shredded coconut, some coconut oil and a few leftovers that I’ve only used once or twice ! Then I remembered I had  some coconut milk in the fridge too ! (Wow…didn’t realize I love coconut so much…..) So, I came up with these very “coconuty” muffins ! I added some lemon juice and zest to add fresshness and balance the flavour, and I just love that golden crust on top ! So, if you have some extras lying around, don’t waste them ! Create your own recipes ! You may come up with something really delicious ! You never know !  

Makes about 8-10

  • 200 g all-purpose flour
  • 3 g baking powder
  • 3 g baking soda
  • pinch of salt
  • 1 egg
  • 100 g granulated sugar
  • 120 mL unsweetened coconut milk
  • 80 mL buttermilk
  • 60 mL coconut oil, melted and slightly cooled
  • 5 mL pure vanilla extract
  • 30 mL lemon juice
  • Zest of a small lemon
  • 30 g unsweetened shredded coconut + more to sprinkle on top
  1. Preheat oven to 350ºF
  2. Sift together flour, baking powder, baking soda and salt, side aside
  3. In a separate bowl, whisk together sugar and egg
  4. Mix in coconut milk, buttermilk, melted coconut oil, vanilla extract and lemon juice
  5. Add wet ingredients into dry ingredient, mix until just blended
  6. Stir in lemon zest and shredded coconut
  7. Spoon batter into muffin tins lined with lightly greased muffin cups, about 3/4 full
  8. Sprinkle top with more shredded coconut
  9. Bake for about 18-20 minutes

Dark Chocolate Granola

Happy New Year ! My first post of 2019 ! Do you have any new year resolution ? I am sure eating healthier is on everyone’s list, especially after the holiday indulgence…..but wait…..I still like my chocolates ?! So……let’s start with a recipe that has chocolate but also healthy and good for you ! How about granola ? It is easy to make and you can pretty much put whatever you like in there, nuts, seeds, dried fruits…..and yes, CHOCOLATES ! Use darker chocolate if you don’t mind the bitterness as it’s healthier. I used 85%, but if that’s too dark, you can use 60-70 %. Normally, I weigh all the ingredients in my recipe, but granola is very flexible, you can easily adjust the amount to your taste. 

I hope everyone is off to a good start this year ! Stay healthy and be happy !    

Makes about 2 cups     

  • 1 cup quick oats
  • 1/4 cup unsweetened shredded coconut
  • 1/4 cup dried cranberries
  • 1 tablespoon chia seeds
  • 1 tablespoon unsweetened cocoa powder
  • 50 g dark chocolate, coarsely chopped (I used 85 %) 
  • 1/4 cup maple syrup
  • 3 tablespoons melted coconut oil 
  • 1 teaspoon pure vanilla extract 
  1. Preheat oven to 300ºF
  2. Mix together all dry ingredients 
  3. Add maple syrup, coconut oil and vanilla extract, mix well
  4. Place a thin and even layer on cookie sheet lined with parchment paper
  5. Bake for about 20 minutes, stirring once
  6. Cool and store in air-tight container for up to 2 weeks


Baked Matcha (Green Tea) Doughnuts

My family took a trip to Japan this summer and we had so much fun ! It’s a really fantastic country to travel. It’s clean, organized, modern yet traditional, there is so much to see. And the food was soooo good ! From fresh sashimi, ramen, to crepe, and everything matcha…..mmmmm, they were all super delicious !

fresh sashimi, teppanyaki, ramen, takoyaki octopus balls

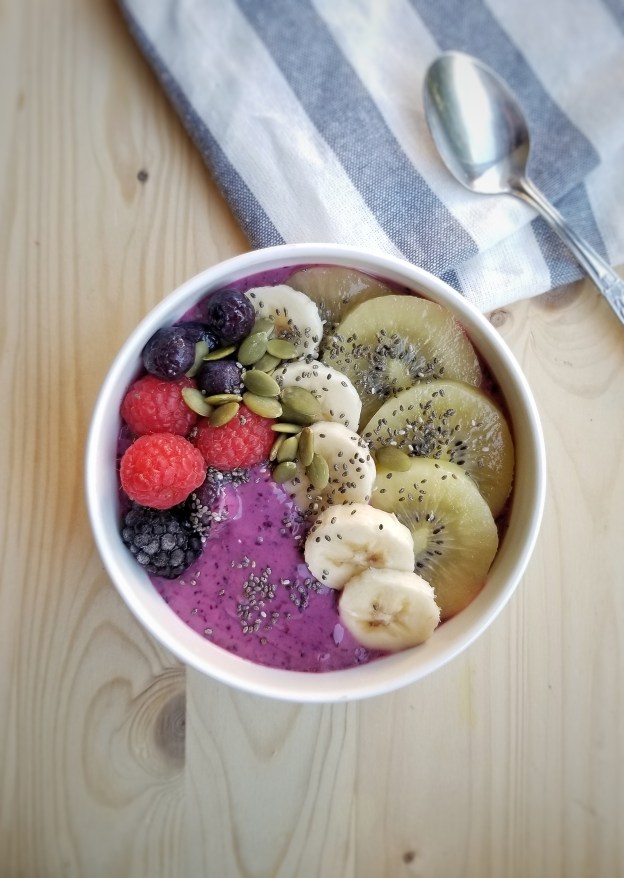
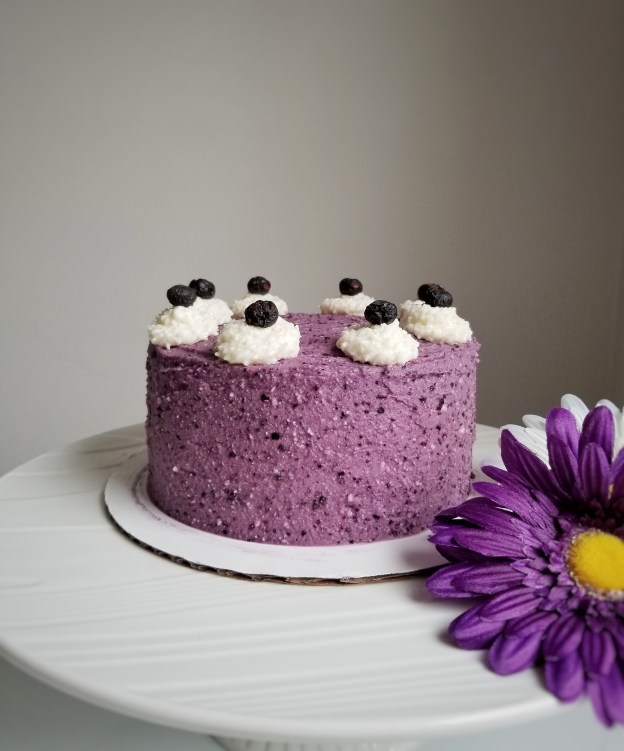
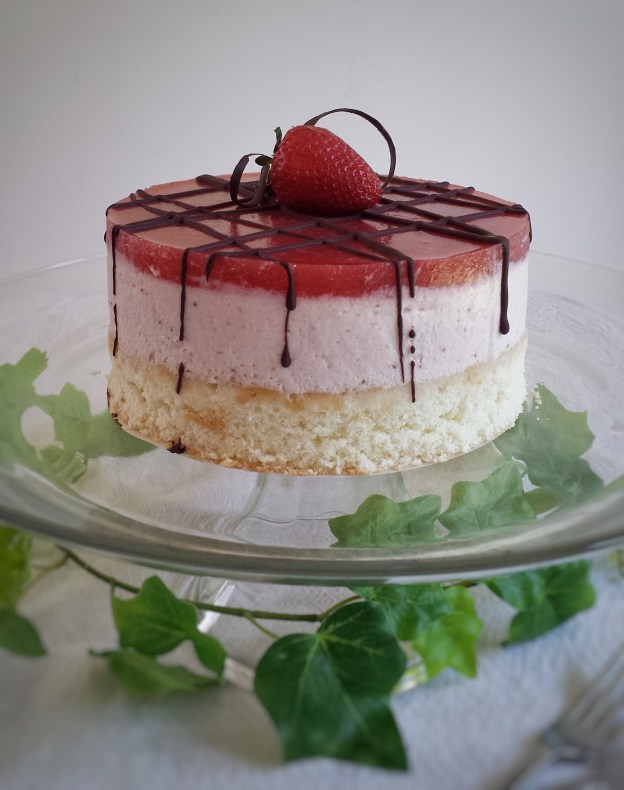
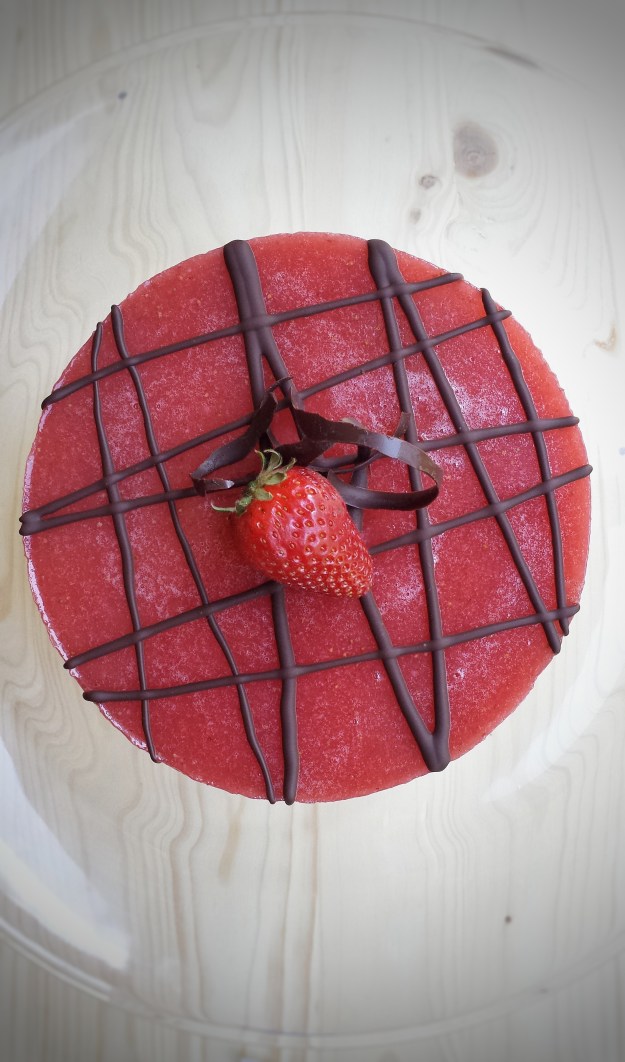
creme brulee crepe, matcha parfait, soft cheesecake, pancake skewer

I think the only part we didn’t enjoy was the heat and the crowd. But we were actually very lucky, as Japan was hit by a powerful typhoon soon after we left, and also an earthquake in Hokkaido…just hope everything is ok…

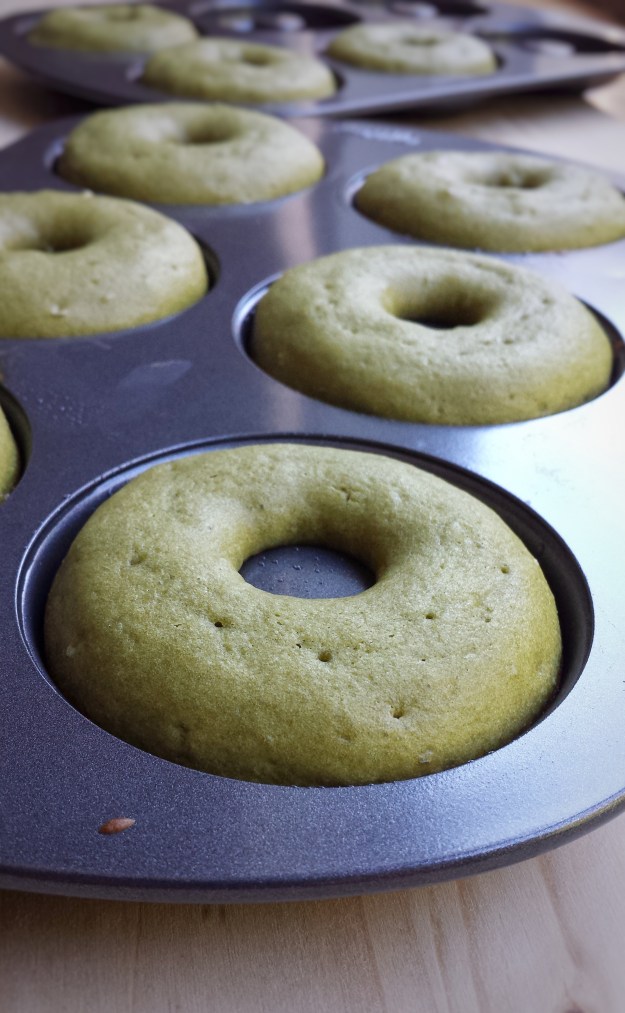
Matcha (green tea powder) is really popular there, not only as a tea, but in many desserts ! Mochi, cake, cookies, ice cream, shaved ice, parfait, latte……the list is endless ! I wish I could bring all of them home….or I can try making them myself ! Here are my Baked Matcha Doughnuts ! They are as delicious as the fried ones but “matcha” more easier to make !

Makes about 8-10 doughnuts

For the doughnuts

  • 75 g all-purpose flour
  • 75 g cake and pastry flour
  • 60 g granulated sugar
  • 5 g matcha powder
  • 3 g baking powder
  • 1.5 g baking soda
  • pinch of salt
  • 1 egg
  • 150 mL buttermilk
  • 45 mL vegetable oil
  • 2.5 mL pure vanilla extract

For the glaze

  • 90 g icing sugar
  • 2 g matcha powder
  • 15-20 mL milk
  1. Preheat oven to 350 ºF
  2. Sift together flours, baking powder, baking soda, salt and matcha powder, set aside
  3. Whisk together egg and sugar until frothy, mix in buttermilk, oil and vanilla extract
  4. Add wet ingredients into dry ingredients, mix until just combined
  5. Pour batter into lightly-greased doughnut pans
  6. Bake for about 12 minutes, let cool in pans for 10 minutes, then completely on rack
  7. To make the glaze, sift icing sugar, whisk in milk until smooth
  8. Sift matcha powder and add a little at a time into icing mixture, whisk until no more lumps
  9. Dip one side of doughnuts into matcha glaze, best to serve within one day

Strawberry Mousse Cake

I first made this cake for my son’s 13th birthday last year. He specifically wanted a strawberry cake. It came out alright…but the cake was slightly dry and the mousse layer was too thick…..

My son’s birthday cake

I have been wanting to remake and “upgrade” it ever since, but never had a chance. It’s Mother’s Day, so I thought this is the perfect time! I added a jelly glaze on top to brighten both the colour and flavour. Each of the three layers has a different texture but they match very well together. It looks much prettier than last time too! I can now share it with my mom and my family. Happy Mother’s Day to all our moms! I wonder what my kids are doing to surprise me this year…….

Makes one 6 inch cake

For the cake

  • 2 eggs, separated
  • 75 g granulated sugar
  • 75 g cake and pastry flour, sifted
  • 2 g baking powder
  • 1 g salt
  • 5 mL pure vanilla extract
  • 5 mL fresh lemon juice
  • 30 mL vegetable oil

For the mousse and jelly glaze

  • 400 g fresh strawberries, washed and hulled
  • 160 g granulated sugar
  • 10 mL fresh lemon juice
  • 250 mL cold whipping cream
  • 4 x 1 g gelatin sheets

To make the cake

  1. Preheat oven to 350°F
  2. Sift together flour, baking powder and salt, set aside
  3. Whisk together egg yolks and 60 g of sugar until pale
  4. Mix in vanilla and oil, then gently fold in flour mixture
  5. In a separate bowl, make a meringue by whisking together egg whites and lemon juice until frothy
  6. Slowly add in 15 g of sugar, whisk until medium peak
  7. Gently fold meringue into flour mixture
  8. Pour batter into a lightly-greased 6 or 7 inch cake pan, lined with parchment paper at the bottom (see notes)
  9. Bake for about 20 minutes
  10. Let cool, then trim top and side of cake

Notes : I baked my cake in a 7 inch springform pan and trimmed it to fit into a 6 inch cake ring. You can just bake and assemble your cake in the same pan.

To make the mousse and jelly glaze

  1. For the mousse, place a large mixing bowl in the freezer for about 15 minutes
  2. Soak 3 gelatin sheets (1 g each) in cold water for a few minutes
  3. Blend strawberries and strain seeds out through a mesh
  4. Add sugar and lemon juice, and cook over medium heat until sugar is dissolved
  5. Set aside half of the puree for the glaze
  6. Drained gelatin and add to remaining puree, stir until dissolved, let cool
  7. Whisk whipping cream in the cold mixing bowl until stiff peak
  8. Fold in strawberry gelatin mixture until just blended
  9. Pour on top of cake, smooth with a spatula and refrigerate for at least 3-4 hours until set
  10. For the jelly glaze, soak 1 gelatin sheet in cold water for a few minutes
  11. Reheat the saved strawberry puree over medium heat
  12. Add drained gelatin and stir until dissolved
  13. Let cool, pour on top of mousse layer and refrigerate for another 3-4 hours until set
  14. Release cake from pan or ring and decorate as desired

Blueberry Galette 

Can’t believe summer is half-way through already ! I have been really busy, driving the kids around to different activities, keeping them occupied. If you are a parent, you would know, summer is actually busier than school days ! But they are having so much fun…..swimming, trampoline park, bowling, sleep over…..Although I am exhausted at the end of the day, seeing their happy faces makes it all worth it. Hey, kids are supposed to sleep in, play lots and eat lots during the summer, right ? With all the activities, meal times for us may not always be as regular and as healthy as I’d like. To balance that out, I make sure I stock lots of fruits at home. Luckily my kids are not picky eaters and love the summer fruits…blueberries, cherries, watermelon, peaches, etc.  And of course I use them to make desserts, like this blueberry galette. It’s basically a rustic blueberry pie and you don’t need to worry about making the crust neat and tidy. It makes a perfect summer dessert with some vanilla ice cream or whipped cream !

Makes one galette

For the crust 

  • 90 g unsalted butter (cut into small pieces and chilled)
  • 100 mL ice-cold water
  • 200 g cake and pastry flour, sifted
  • 15 g granulated sugar
  • 2.5 g salt

For the filling 

  • 200 g fresh blueberries 
  • 30 g granulated sugar 
  • 7.5 mL lemon juice 
  • Zest of 1/2 small lemon 
  • 7.5 g cornstarch 
  • 10 g graham cracker crumbs 
  1. To make the crust, combine flour,sugar and salt
  2. Rub in chilled butter with hands until resemble coarse crumbs, there should be pea-sized lumps of butter
  3. Add cold water and mix until dough just starting to form
  4. Transfer to a lightly floured surface, and press dough together (Do not knead)
  5. Wrap with plastic wrap and refrigerate for at least 1 hour or overnight (I actually doubled the amount of ingredients and kept half of the dough in the freezer for later) 
  6. When ready to bake, preheat oven to 375°F 
  7. Gently mix blueberries with sugar,lemon juice, lemon zest and cornstarch 
  8. Let sit for about 10 minutes 
  9. Roll dough out to about 0.5 cm in thickness 
  10. Sprinkle with graham cracker crumbs in the middle leaving about 5 cm from the edge, the crumbs help to prevent a soggy crust 
  11. Spoon filling on top  
  12. Fold and pleat edges over part of the filling
  13. Brush edges with water and sprinkle with vanilla sugar or granulated sugar 
  14. Bake for about 60 minutes until golden and filling is bubbling (you can cover it with aluminium foil for the last 15 to 20 minutes to prevent crust from getting too brown)
  15. Serve warm with whipped cream or vanilla ice cream 

Peanut Butter Nice Cream Sandwiches

Summer is always busy for me….working, driving the kids, getting together with friends and relatives, etc. But it seems like everything I do revolve around food or desserts…..snacks, lunches, picnics, BBQ’s. Making something that are easy and healthy would be great when I am running a tight schedule. These Peanut Butter Nice Cream Sandwiches are super simple and most of us probably have all the ingredients at home already. Nice cream is a much healthier alternative to ice cream using frozen bananas. I added peanut butter, but there are many variations you can do, like cocoa powder, chocolate chips, berries, nuts, etc. You can also use other cookies or crackers for the sandwiches. Don’t think that you have to compromise on taste by making a healthier dessert because they are really really yummy ! They didn’t last long at all in my house !

Makes 12 sandwiches  

  • 4 ripe bananas 
  • 100 g smooth peanut butter 
  • 30 mL milk (or you can use almond or coconut milk) 
  • 24 squares graham crackers 
  • 60 g melted chocolate for drizzling (optional)
  1. Peel and cut banana into small pieces 
  2. Freeze for 3-4 hours or overnight 
  3. Lay half of the graham crackers on a square or rectangular pan lined with parchment paper 
  4. In a food processor or blender, blend together frozen bananas, peanut butter and milk until smooth 
  5. Spoon on top of graham crackers in pan, smooth evenly with a spatula 
  6. Arrange the other graham crackers on top
  7. Freeze until set 
  8. Cut into squares and top with melted chocolate or other toppings as desired 

Orange Cupcakes with Chocolate Frosting

For me, the taste of chocolate and orange brings back a lot of childhood memories.  One of my favourite treats when I was young was Jacob’s Club Orange Chocolate Bar.  It’s a orange-flavoured wafer biscuit coated with chocolate.  It’s absolutely delicious !  So when I was thinking about a cupcake recipe, this combination came to my mind.

For the cupcakes

  • 1+1/2 cups cake and pastry flour
  • 1 teaspoon baking powder
  • 1/4 teaspoon baking soda
  • 1/4 teaspoon salt
  • 1/2 cup (120g) unsalted butter, at room temperature
  • 2/3 cup granulated sugar
  • 2 eggs
  • 3 tablespoons orange juice
  • zest of one large orange
  • 4 tablespoons milk
  • 1 +1/2 teaspoon pure orange extract
  • 1 teaspoon pure vanilla extract
  1. Preheat oven to 350ºF
  2. Sift together flour, baking powder, baking soda and salt, set aside
  3. Using an electric mixer with the paddle attachment, cream butter and sugar until light and fluffy
  4. Add eggs, orange juice, orange zest, milk and the 2 extracts, mix until blended
  5. Mix in flour mixture in 2-3 portions
  6. Pour into baking tins lined with baking cups, about 2/3 full
  7. Bake for about 20 minutes
  8. Cool completely before frosting


For the chocolate frosting

  • 3/4 cup unsalted butter (150 g), at room temperature
  • 2 cups icing sugar
  • 1/4 cup unsweetened cocoa powder
  • 3 tablespoons milk
  • 1 teaspoon pure vanilla extract
  • 2 ounces semi-sweet chocolate
  1. Sift together icing sugar and cocoa powder
  2. Melt chocolate in a bowl over a pot of simmering water, cool slightly
  3. Using an electric mixer with the paddle attachment, beat butter until creamy
  4. Add milk and vanilla
  5. Add sugar and cocoa powder in 2-3 portions, mix well after each addition, scraping sides of bowl
  6. Add melted chocolate, mix until smooth