Tag Archives: cakes

Orange Olive Oil Cake

The world has changed a lot over the past few months… It’s literally a whole new world. We are in the middle of a pandemic….staying home, social distancing, online schooling have all become the new normal. It is no doubt a very stressful time. Nevertheless, I think we are all doing our best and staying positive. I am very thankful that my family is keeping safe and healthy.

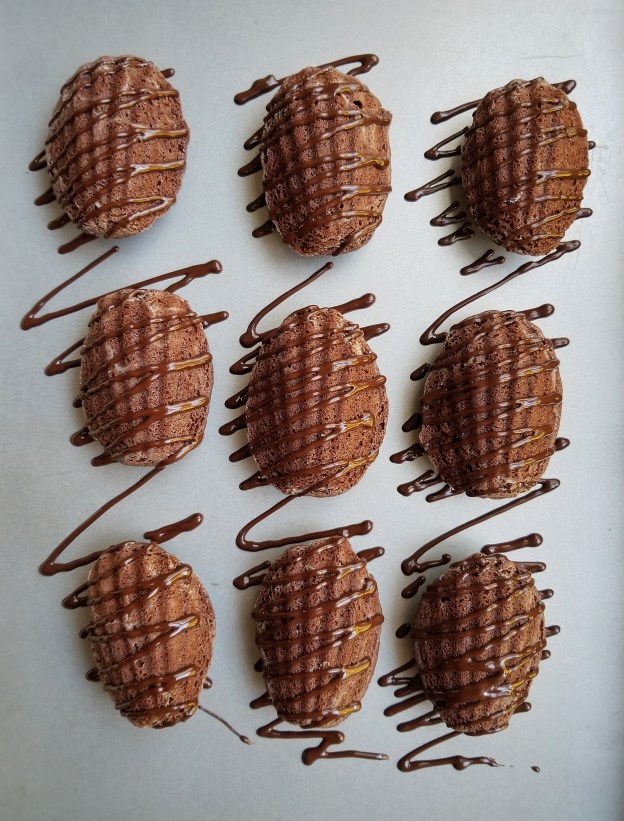
Because of the situation, my spring market got cancelled, but I am still baking a lot. Last month, my friends and I did a charity bake sale. We sold lots of cookies, cupcakes, brownies……The support was overwhelming! Together, we raised $1000 for the Vancouver Hospital Foundation COVID-19 Response Fund. A big thank you to everyone that donated.

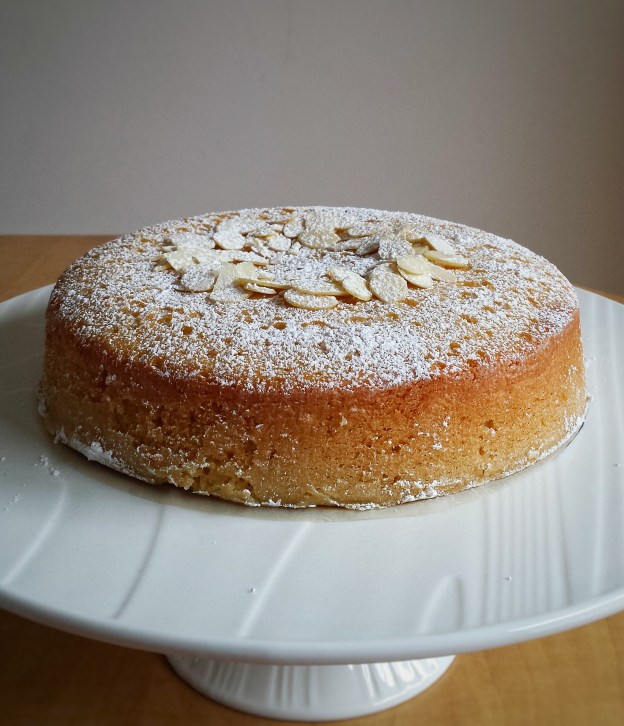
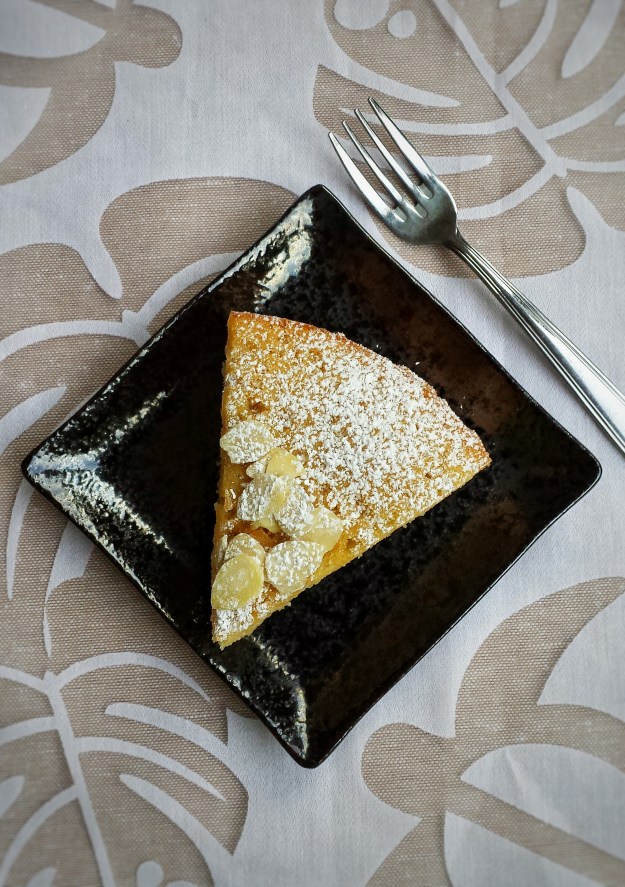
More time at home also means more time to work on recipes! I have been wanting to make an olive oil cake for a while. My first time eating one was years ago at a little cafe and I loved it. It makes the cake soft and moist without leaving a strong taste. I used orange for this recipe, but I think lemon will work wonderfully as well.

Makes one 9.5 inch bundt cake

  • 150 g cake and pastry flour
  • 150 g all purpose flour
  • 6 g baking powder
  • 3 g baking soda
  • 2 g salt
  • 180 g sugar
  • 2 eggs
  • 180 mL extra virgin olive oil
  • 180 mL milk
  • 50 mL fresh orange juice
  • zest of a medium orange
  • 5 ml pure vanilla extract
  • 4 mL pure orange extract
  1. Pre-heat oven to 350° F
  2. Sift together flours, baking powder, baking soda and salt, set aside
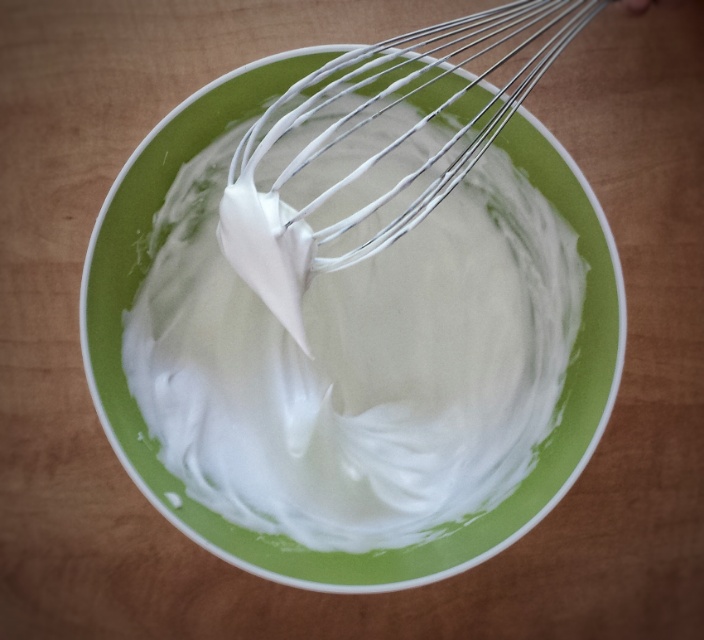
  3. Beat together sugar and eggs until frothy, using an eletrical mixer or hand whisk
  4. Mix in olive oil, milk, orange juice, orange zest and extracts
  5. Gradually add flour mixture and mix until just cooperated
  6. Pour batter into a 9-inch non-stick bundt pan and bake for about 35 minutes (you can use any other cake pan, but baking time may have to be adjusted)
  7. Dust with icing sugar when cooled if desired

Advertisement

Chocolate Madeleines

Madeleines are buttery little cakes originated from France. These shell-like sweets are actually very easy to make. Of course, you will need a madeleine pan. The classic flavour is usually lemon. But as a chocolate lover and an avid baker, I am “obligated” to make some chocolate ones ! And (almost) everything is better with chocolate, right ? They may not be the most eye catching desserts, but they are absolutely delicious ! And I finally tempered my own chocolate! It’s much smoother and shinier !  Here is the recipe that I followed https://www.cordonbleu.edu/news/technique-tempering-chocolate/en . Again, it’s something that looks more difficult than it actually is.  All you need is a thermometer, good chocolate and some patience ! But trust me, it’s worth it ! 

Makes about 20-24 madeleines

  • 120 g unsalted butter + 30 g for greasing pan, melted
  • 60 g all-purpose flour
  • 90 g cake and pastry flour
  • 30 g unsweetened cocoa powder
  • 3 g baking powder
  • Pinch of salt
  • 180 g granulated sugar
  • 2 large eggs
  • 7.5 mL pure vanilla extract
  • melted dark chocolate for drizzles
  1. Melt 120 g of butter in a sauce pan or microwave, cool slightly 
  2. Sift together flours, cocoa powder, baking powder and salt, set aside 
  3. Whisk together eggs, sugar and vanilla until frothy 
  4. Fold flour mixture into egg mixture 
  5. Gently mix in melted and cooled butter, 2-3 tablespoons at a time until just blended 
  6. Cover and refrigerate for at least one hour or overnight 
  7. When ready to bake, prepare madeleine pan by melting about 30 g of butter in a sauce pan or microwave, cool slightly 
  8. Brush moulds with melted butter, coat with flour, tapping off excess
  9. Place coated pan in freezer for at least one hour
  10. Preheat oven to 375°F
  11. Drop about 1 tablespoon of batter into each mould without spreading it out
  12. Place madeleine pan on another large baking tray and bake for about 12 minutes 
  13. Cool in moulds for a few minutes then completely on rack 
  14. Drizzle with melted, tempered dark chocolate, best to consume within 2 days

Matcha (Green Tea) Mousse Cake

I wish Spring is here soon ! Our winter here in the west coast has been pretty cold and snowy. Well, I guess I shouldn’t complain, the kids did have a lot of fun playing in the snow and compare to many other places in Canada, this is very mild. To welcome Spring and St. Patrick’s Day, I thought I should make something green. And of course matcha is the first thing that comes to mind. This recipe is what I call a 2-in-1. The mousse cake has two parts, but each of them can be a dessert on its own ! You can use the cake batter to make cupcakes or mini loaves.  And for the mousse, you can pour it into nice little bowls and refrigerate, which is exactly what I did with the leftover !

Matcha (Green Tea) Mousse

Matcha (Green Tea) Mousse

For the mousse cake itself, I made one layer of each, but you can definitely stack them in multiple layers if you like. I also added some chopped dark chocolate on top but it’s optional, cause I believe everything (almost everything) tastes better with chocolate ! And hopefully this Spring dessert can bring some warm weather soon ! 

Matcha (Green Tea) Mousse Cake

Makes one 6-inch cake

For the cake

  • 4 large eggs (separated)
  • 120 g granulated sugar (20 g for meringue)
  • 75 g cake and pastry flour
  • 5 g matcha (green tea) powder
  • 1 teaspoon pure vanilla extract
  • 1 teaspoon lemon juice 
  1. To make the cake, preheat oven to 350°F
  2. Lightly grease an 8″ x 10″ x 1″ baking tray and line bottom with parchment paper
  3. Sift together flour and matcha powder, set aside
  4. In a mixing bowl, beat together egg yolks and 100 g of sugar until pale
  5. Add vanilla and the flour mixture, mix until blended
  6. In a separate bowl, using an electric mixer with whisk attachment, whisk egg whites and lemon juice until frothy
  7. Increase speed to high and slowly add in 20 g of sugar
  8. Whisk until medium peak is formed
  9. Gently fold meringue into cake batter, 1/3 at a time, do not over mix
  10. Pour into baking tray and bake for about 15 minutes
  11. Let cool completely, then cut into a round disc to fit cake mould (I used a cake ring, so I just cut it with the ring)Matcha (Green Tea) Mousse Cake

For the mousse

  • 500 mL whipping cream (cold)
  • 250 mL milk (preferably whole milk)
  • 120 g granulated sugar
  • 15 g matcha powder
  • 10 g gelatin powder
  • 1 teaspoon pure vanilla extract
  1. Chill the mixing bowl in the fridge for at least 30 minutes
  2. Sprinkle gelatin over about 1/4 cup of milk and let sit for a few minutes to bloom
  3. Heat and stir remaining milk, sugar and matcha powder in a pot over medium heat until sugar melted and just starting to bubble
  4. Add gelatin mixture, stir until all dissolved
  5. Turn heat off, add vanilla 
  6. Strain mixture through a fine mesh and let cool to room temperature
  7. Using an electric mixer with the whisk attachment and the chilled mixing bowl, beat cold whipping cream until medium peak is formed
  8. Gently fold the whipped cream into milk mixture, 1/3 at a time, do not over mix

To assemble

  1. Place a lightly greased cake ring on a tray lined with parchment paper
  2. Place cake disc (smooth side down) at the bottom
  3. Pour mousse on top of cake and smooth top with a spatula 
  4. Refrigerate for at least 3-4 hours to set
  5. Sprinkle top with finely chopped dark chocolate (optional)

NotesIf you have trouble removing the ring, you can freeze the cake for about 1-2 hours, put a knife or an angled spatula in hot water, wipe dry, then run it around the cakeMatcha (Green Tea) Mousse Cake


Marzipan Cake

I never knew marzipan can be so tasty and so useful in baking ! My first encounter with it was eating some marzipan-filled chocolate. To be honest, I didn’t really enjoy it. Perhaps it was too sweet or perhaps I always prefer eating pure chocolate. But after I learned to make the Eisenbahner (Railroad) Cookies, I absolutely fell in love with it ! With high hopes for myself, I decided to make a cake this time…..but sadly…..I failed twice ! How frustrating ! The “failures” actually tasted pretty good. I realized the problem was the pans I used. For the first time, I used a 9 inch spring-form pan and the cake turned out too flat (It is a denser cake and it won’t rise very much). So I switched to a 9 inch x 5 inch loaf pan. But it took too long to bake through and the outside of the cake was dry and brown. So for the third time, I used an 8 inch cake ring and baked it in a hot water bath and…..Success finally ! I thought I would never make it !  Phew ! Now I get to sit down, relax and enjoy my cake after all that hard work !

Makes one 8 inch round cake 

  • 180 g unsalted butter, softened
  • 200 g marzipan, cut into small pieces and softened
  • 120 g granulated sugar
  • 4 eggs
  • 1 teaspoon pure vanilla extract
  • 1/2 teaspoon almond extract
  • 60 ml milk
  • 60 g honey
  • Zest of 1/2 orange
  • 180 g all-purpose flour
  • 2 teaspoons baking powder
  • 1/4 teaspoon salt
  • Icing sugar and almond slices for toppings
  1. Grease and flour an 8 inch cake ring  
  2. Wrap bottom with parchment paper, then 2 layers of aluminium foil and place on a rimmed baking trayCake RingCake Ring
  3. Preheat oven to 350°F
  4. Sift together flour, baking powder and salt, set aside
  5. Using an electric mixer with the paddle attachment, beat together butter, marzipan and sugar 
  6. Add eggs, one at a time
  7. Mix in vanilla and almond extract, milk, honey and orange zest 
  8. Add flour mixture in two parts, mix until blended
  9. Pour batter into cake ring (it’s ok if batter is slightly gritty) 
  10. Pour about one inch of hot water in baking tray and bake cake in hot water bath for about 60 minutes  
  11. Cool and remove cake ring
  12. Top with icing sugar and almond slicesMarzipan CakeMarzipan Cake

Raspberry Swiss Roll

The other night, my daughter said,”mom, I want some cake ! ” , but I didn’t have any at home and it was a little too late to bake.  So the next day, I decided to make a Swiss Roll, using some fresh raspberries that I had.  The first attempt……not so good, I put too much filling in and did a bad job in rolling, so it looked more like a Halloween cake with “blood” all over.  Lucky the cake tasted pretty good, so my daughter could at least have some tasty cake.  The second time around, much better.  I tried not to use my electric mixer and do everything by hand. It came out perfect! I actually learned that when making meringues, you can get more volume whisking it by hand. Also you don’t need to worry about overbeating, cause you sore arms will tell you to stop! I used raspberries as the filling, you can switch it up easily with other fruits, whipped cream, Nutella, even peanut butter.

Makes one log (about 6-8 slices)

For the raspberry filling

  • 350 g fresh raspberry
  • 60 g granulated sugar (adjust to your own taste)
  • 15 mL lemon juice

For the sheet cake

  • 4 eggs (separated)
  • 120 g granulated sugar (20 g is used for the meringue)
  • 75 g cake and pastry flour, sifted
  • 1 teaspoon pure vanilla extract
  • 1/4 teaspoon cream of tartar
  • icing sugar for dusting

Meringue

  1. Prepare raspberries by heating them together with sugar and lemon juice in a non-stick pot over medium heat
  2. Turn heat down to low when liquid starts to bubble
  3. Gently mash raspberries with a wooden spoon, cook until thickened
  4. Strain seeds, let cool
  5. To make the cake, preheat oven to 350ºF
  6. Lightly grease a 8″ x 10″ baking tray and line bottom with parchment paper 
  7. In a mixing bowl, beat together egg yolks and 100 g of sugar until pale
  8. Add vanilla and the flour, mix until blended
  9. In a separate bowl, whisk egg whites, and cream of tartar until frothy, then add sugar slowly, a little at a time, and whisk until medium peak is formed
  10. Gently fold meringue into batter, do not over mix 
  11. Pour into baking tray and bake for about 15 minutes until golden
  12. Let cool, but still a little warm to touch
  13. Gently invert cake and place on top of another piece of parchment paper
  14. Carefully remove top sheet of parchment and trip sides of cake
  15. Spread a very thin layer of raspberry sauce on top
  16. Gently roll cake up
  17. Dust with icing sugar

Raspberry Swiss Roll


Chocolate Zucchini Cake with Chocolate Ganache Glaze

My daughter said “zucchini is my worst enemy ! ” But with this yummy cake, I have successful converted her enemy into her new friend ! Yes, zucchini is definitely chocolate cake’s best friend. It makes the cake moist and soft. And you can eat your vegetable right inside a dessert !

Makes one 9 inch round cake

For the cake

  • 200 g grated zucchini
  • 2 ounces semi-sweet chocolate, finely chopped
  • 1+3/4 cups cake and pastry flour
  • 1/4 cup unsweetened cocoa powder
  • 1 teaspoon baking powder
  • 1/2 teaspoon baking soda
  • 1/2 teaspoon salt
  • 1/2 cup vegetable oil
  • 3/4 cup demerara or brown sugar
  • 1/4 cup granulated sugar
  • 2 eggs
  • 1/4 cup milk
  • 1 teaspoon lemon juice
  • 1 teaspoon pure vanilla extract

For the ganache

  • 1 cup whipping or heavy cream
  • 8 ounces semi-sweet chocolate, finely chopped

img_20160406_222927.jpg

  1. Preheat oven to 350ºF
  2. Lightly grease 9 inch spring-form cake pan with oil, then dust with flour
  3. Sift together flour, cocoa powder, baking powder, baking soda and salt, set aside
  4. Add lemon juice into milk, let sit for a few minutes
  5. Using an electric mixer with the paddle attachment, beat oil and sugars at medium speed until blended
  6. Mix in eggs, milk with lemon juice and vanilla
  7. Add flour mixture in 2-3 portions, scraping sides and bottom of mixing bowl
  8. Add grated zucchini, mix until just blended
  9. Stir in 2 ounces of chopped chocolate 
  10. Pour batter into pan and bake for about 30 minutes (toothpick should come out clear when inserted into middle of cake)
  11. Meanwhile, prepare the ganache by heating cream in a non-stick pot over medium heat
  12. Turn heat off when cream just starting to bubble
  13. Pour over chopped chocolate, let sit for 1 minute
  14. Stir until smooth, let cool at room temperature
  15. When cake is ready, cool in pan for about 10 minutes, then completely on rack
  16. Cover cake with chocolate ganache, smooth with a spatula
  17. Let chocolate set, keep in refrigerator

img_20160408_225656.jpg

Tools I used and you may like

41rqjlmpovl._sy400_.jpg

KitchenAid K45SSWH Classic 4.5-Quart Bowl Stand Mixer, White

31fyrsctu1l._sy400_.jpg

Wilton 409-7716 Angled Icing Spatula, 13-Inch, Black

You can get these tools through the Amazon website by clicking the above link. I will receive a small compensation if you purchase the item. 

Carrot Cupcakes with Marshmallow Frosting

These cupcakes are a delightful treat for kids at Easter ! The carrot cupcakes are soft and moist. The marshmallow frosting is fluffy and shiny but actually contains no real marshmallows ! Overall, they contain less fat and are lighter than a regular carrot cake with cream cheese frosting.  Hey ! I think I just saw an Easter Bunny taking one of my cupcakes !

Makes about 15 cupcakes
Total time = 90 minutes

For the cupcakes

  • 200 g grated carrots
  • 1+1/2 cups cake and pastry flour
  • 1 teaspoon baking powder
  • 1/2 teaspoon baking soda
  • 1/2 teaspoon ground cinnamon
  • 1/4 teaspoon salt
  • 1/2 cup unsalted butter
  • 3/4 granulated sugar
  • 2 eggs
  • 6 tablespoons milk
  • 2 teaspoons lemon juice
  • 1 teaspoon pure vanilla extract
  1. Preheat oven to 350ºF
  2. Sift together flour, baking powder, baking soda, salt and cinnamon, set aside
  3. Using an electric mixer with the paddle attachment, cream butter and sugar until light and fluffy
  4. Mix in eggs,milk, lemon juice and vanilla
  5. Add flour mixture in 2 portions, mix until blended
  6. Add grated carrots
  7. Pour batter into lightly greased paper muffin cups
  8. Bake in muffin tins for about 20 minutes
  9. Cool in tins for about 5 minutes, then completely on rack before frosting

For the marshmallow frosting

  • 4 egg whites
  • 1 cup granulated sugar
  • 1/4 teaspoon cream of tartar
  • 1 teaspoon pure vanilla extract
  1. Put egg whites, sugar and cream of tartar in a heat-proof mixing bowl, and place on top of a pan of simmering water
  2. Whisk constantly until sugar is dissolved and egg whites are warm (3-4 minutes)
  3. Remove bowl from heat, continue whisking with an electric mixer until stiff peak is formed (start slow, then increase speed to high)
  4. Add in vanilla
  5. Best to use immediately, may refrigerate for 2 days

Original marshmallow frosting recipe is by Martha Stewart at marthastewart.com

Japanese Cheesecake

Last Sunday, I made this Japanese cheesecake with my daughter. It turned out very nice. It has a lighter taste and a softer texture than a regular cheesecake, but is still very creamy. The special ingredient ? ……. Meringue ! It allows more air to be incorporated into the cake batter and hence, a fluffy cake. So if you find regular cheesecake too heavy, this may just be right.
By the way, you can now “yum” my recipes on Yummly if you have an account.  Just click the Yummly button under each recipe. Thanks in advance !

For the cake

  • 3/4 cup cake and pastry flour
  • 1/2 teaspoon baking soda
  • 400 g soft cream cheese
  • 1/4 cup granulated sugar
  • 60 g unsalted butter, at room temperature
  • 6 egg yolks
  • 200 mL whipping cream
  • 2 teaspoons lemon juice
  • 1 teaspoon pure vanilla extract
  • pot of boiling water for baking cake

For the meringue

  • 6 egg whites
  • 1/2 cup granulated sugar
  • 1/4 teaspoon cream of tartar

To make the cake

  1. Preheat oven to 325ºF
  2. Line a 9 inch spring-form cake pan with slightly greased parchment paper
  3. Wrap base of pan with two layers of aluminium foil to prevent seepage
  4. Sift together flour and baking soda, set aside
  5. Using an electric mixer with the paddle attachment, cream butter, cream cheese and sugar until fluffy
  6. Add egg yolks, lemon juice, vanilla extract and whipping cream, mix until blended
  7. Add flour mixture, mix until smooth
  8. Pour batter into a different large mixing bowl
  9. Clean and dry used mixing bowl thoroughly before making meringue
  10. To make the meringue, use the electric mixer with whisk attachment, whisk egg whites and cream of tartar at medium speed until frothy
  11. Increase speed to high, gradually add in sugar
  12. Whisk until stiff peak is formed
  13. Gently fold meringue into cake batter until just blended, do not over mix
  14. Pour batter into cake pan, place on a tray filled with boiling water and bake for about 60 minutes until golden brown, a tooth pick should come out clear when inserted in the middle
  15. Turn oven off, leave oven door ajar for about 20 minutes before taking cake out. This will prevent cake from shrinking too much due to sudden drop in temperature.  A slight shrinkage is normal.
  16. Remove baking tray, let cool on rack completely
  17. Remove from cake pan, refrigerate for 2-3 hours or overnight in an air tight container
  18. Cut, serve and enjoy!


img_20160228_112118.jpg

Adapted from http://www.justonecookbook.com

Orange Cupcakes with Chocolate Frosting

For me, the taste of chocolate and orange brings back a lot of childhood memories.  One of my favourite treats when I was young was Jacob’s Club Orange Chocolate Bar.  It’s a orange-flavoured wafer biscuit coated with chocolate.  It’s absolutely delicious !  So when I was thinking about a cupcake recipe, this combination came to my mind.

For the cupcakes

  • 1+1/2 cups cake and pastry flour
  • 1 teaspoon baking powder
  • 1/4 teaspoon baking soda
  • 1/4 teaspoon salt
  • 1/2 cup (120g) unsalted butter, at room temperature
  • 2/3 cup granulated sugar
  • 2 eggs
  • 3 tablespoons orange juice
  • zest of one large orange
  • 4 tablespoons milk
  • 1 +1/2 teaspoon pure orange extract
  • 1 teaspoon pure vanilla extract
  1. Preheat oven to 350ºF
  2. Sift together flour, baking powder, baking soda and salt, set aside
  3. Using an electric mixer with the paddle attachment, cream butter and sugar until light and fluffy
  4. Add eggs, orange juice, orange zest, milk and the 2 extracts, mix until blended
  5. Mix in flour mixture in 2-3 portions
  6. Pour into baking tins lined with baking cups, about 2/3 full
  7. Bake for about 20 minutes
  8. Cool completely before frosting


For the chocolate frosting

  • 3/4 cup unsalted butter (150 g), at room temperature
  • 2 cups icing sugar
  • 1/4 cup unsweetened cocoa powder
  • 3 tablespoons milk
  • 1 teaspoon pure vanilla extract
  • 2 ounces semi-sweet chocolate
  1. Sift together icing sugar and cocoa powder
  2. Melt chocolate in a bowl over a pot of simmering water, cool slightly
  3. Using an electric mixer with the paddle attachment, beat butter until creamy
  4. Add milk and vanilla
  5. Add sugar and cocoa powder in 2-3 portions, mix well after each addition, scraping sides of bowl
  6. Add melted chocolate, mix until smooth

Cake Pops

This was another fun project that I did with my daughter.  She helped me make the cake balls and decorate them.  I am not a good artist, so I really admire bakers that can make beautiful and amazing cake pops, cookies and cakes.  This is just the basic recipe, you can decorate any way your imagination takes you !

To make cake pops, you need to prepare the cake, the frosting and the coating. You would also need cake pop sticks and a cake pop stand of or a styrofoam block for drying.   

Makes about 30 cake pops

For the cake

  • 1/2 cup unsalted butter, at room temperature
  • 1/3 cup granulated sugar
  • 1+1/3 cup self-rising flour
  • 2 large eggs
  • 1 teaspoon pure vanilla extract
  • 90 mL milk

For the frosting

  • 1/3 cup unsalted butter, at room temperature
  • 120 gm cream cheese
  • 1+1/2 cup icing sugar
  • 1 teaspoon pure vanilla extract

For the coating

  • 24 ounces candy melts or chocolate
  • 1-2 tablespoons vegetable oil if using candy melts

To make the cake

  1. Preheat oven to 350ºF
  2. Sift self-rising flour
  3. Using an electric mixer with the paddle attachment,  cream butter and sugar until fluffy
  4. Add eggs, vanilla and milk
  5. Add flour in 2-3 portions, mix until blended
  6. Bake in muffin tins for about 20 minutes (toothpick should come out clear when inserted in the middle)
  7. Let cake cool completely

I used muffin tins because the cake would bake more evenly and it would take less time.  You can use a loaf pan, but bake it for about 35-40 minutes.

To make the frosting

  1. Using an electric mixer, beat butter and cream cheese together
  2. Add vanilla, then icing sugar in 2-3 portions
  3. Mix until smooth

To prepare the cake balls

  1. When the cake is completely cooled, break the cake into fine crumbs with fork or fingers
  2. Gradually add frosting, a couple of tablespoons at a time, mix and knead until you can roll mixture into balls
  3. Roll cake mixture into small balls, place on a cookie sheet lined with parchment paper, cover with plastic wrap and put in fridge for at least about 30 minutes

Meanwhile, start preparing the coating

To make the coating

  1. Melt candy melts or chocolate in a bowl over a pot of simmering water 
  2. Stir in a little vegetable oil, if using candy melts,to get desired consistency and to make coating shiny

Finally ! To assemble the cake pops

  1. Dip cake pop sticks into coating about 1 inch deep
  2. Insert coated sticks into cake balls (you may need to gently reshape them into balls)
  3. Dip into coating, covering the whole cake pop
  4. Gently tap off excess coating
  5. Decorate with sprinkles while coating is still wet
  6. Stand them into a cake pop stand or a styrofoam block to dry