Category Archives: Christmas

Orange Cranberry Biscotti

I haven’t posted for over 2 months ! Even my daughter told me I have to start working on my blog again. Yeah…. sorry….working for the Christmas markets and other commitments had taken up all my time and I had to “abandon” my blog for a while. But here I am ! And I promise it won’t be another 2 months before I post again.

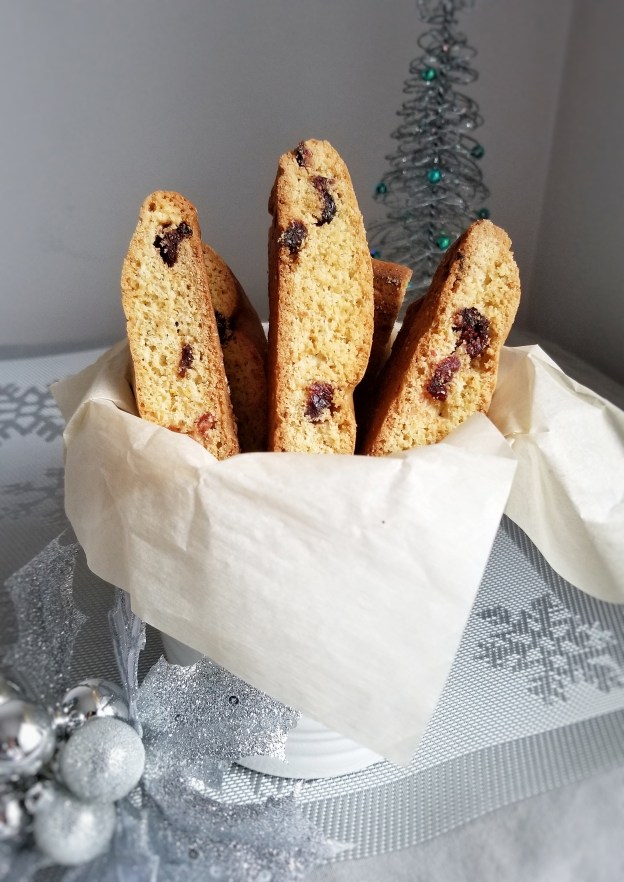
I love biscotti ! It is something that I would order every time I visit a new bakery. Maybe I am weird, but I actually enjoy them without dipping into anything. That’s why I only leave them in the oven for about 10-15 minutes during the second-bake, so they won’t be too dry and hard. You can also make this recipe with almonds. Just add a little bit of almond extract and replace the dried cranberries with some toasted almond slices, or you can have both.

Christmas is just around the corner, so I wish you all a Merry Christmas and a wonderful holiday !

Makes about 18 – 20 pieces

  • 60 g unsalted butter, softened
  • 180 g granulated sugar
  • 2 eggs
  • 30 mL orange juice
  • Zest of 1 small orange
  • 5 mL pure vanilla extract
  • 5 mL orange extract
  • 360 g all-purpose flour
  • 3 g baking powder
  • 3 g baking soda
  • 2 g salt
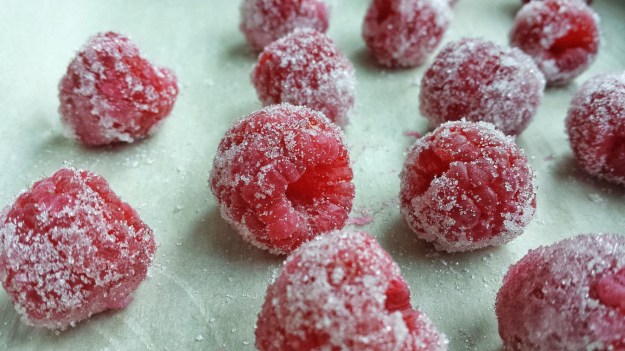
  • 60 g dried cranberries
  1. Preheat to 350ºF
  2. Sift together flour, baking powder, baking soda and salt
  3. Cream together butter and sugar (either by hand with a spatula or a mixer)
  4. Add eggs, orange juice, zest and extracts, mix until blended
  5. Add flour mixtures in 2 parts, mix until combined
  6. Stir in cranberries
  7. Divide dough into half, press down and form each one into a flat log, approximately 30 cm x 10 cm x 2 cm (you can freeze the logs if not baking right away)
  8. Place in baking sheet lined with parchment paper and bake for about 30 minutes
  9. Remove from oven, turn heat down to 300ºF
  10. Let cool until manageable, about 10-15 minutes
  11. Cut with a serrated knife into 1/2 inch-wide pieces (either diagonally or vertically)
  12. Place on baking sheet, and bake for another 10 -15 minutes, flipping half way
Advertisement

Gingerbread Eggnog Trifle

Christmas is only 2 days away ! It is the most wonderful time of the year, but it can also be the craziest time of the year ! Shopping, baking, cooking, decorating…..I think we all wish we had 48 hours in a day ! But to me, spending time with family and friends is more important and is the best Christmas gift of all ! So, I decided to make this quick dessert so I can have more time snuggling with my kids after dinner ! Gingerbread and eggnog ! Nothing says Christmas more than these two  flavours together and it’s so simple to make ! You can even get the kids to make their own dessert !  Have a very Merry Christmas everyone ! 

Makes about 6 – 8 servings

    • About 10 gingerbread cookies
    • 500 g vanilla cake, break into chunks (you can use store-bought cake or I just used mug cakes, see recipe below)
    • 1 box instant vanilla pudding mix
    • 500 mL light eggnog
    • 250 mL cold whipping cream
    1. Add eggnog to pudding mix, whisk for about 2 minutes until thick, keep in refrigerator until use
    2. In a separate bowl, using an electric mixer, beat whipping cream until stiff peak
    3. Crush gingerbread cookies into pieces 
    4. To assemble, layer cookies, cake, pudding and whipped cream
    5. Sprinkle top with more cookie crumbs 

For the mug cake

  • 75 g unsalted butter, melted, cool slightly 
  • 120 g granulated sugar
  • 120 mL milk
  • 2 eggs
  • 5 mL pure vanilla extract
  • 90 g self-rising flour
  1. Coat inside of mugs with about a tablespoon of melted butter
  2. In a mixing bowl, whisk together sugar, milk, remaining melted butter, vanilla extract and eggs until blended 
  3. Add flour, whisk until smooth
  4. Pour into mugs, no more than half-full
  5. Microwave each for about 90 seconds


Gingerbread Cookies

I have to apologize ! I haven’t been able to post for a month ! I have been busy…very busy. I participated in two Christmas Fairs selling my baked goodies….for the very first time ! 

It was a lot of work, more than I anticipated, but it was well worth it ! It was a very rewarding experience. I’ve received many positive comments, from the set up of my table to how yummy my cookies were. More important, I feel so blessed to have so much support from family and friends, especially my daughter ! I couldn’t do it without her ! 

Gingerbread cookie was one of the items I sold at the fairs. I had posted a recipe before, but over the years, I have made a few changes to make it better. So here is an updated version !

For the cookies

  • 180 g all-purpose flour
  • 180 g cake and pastry flour
  • 3 g baking soda
  • 2 g salt
  • 6 g ground ginger
  • 3.5 g ground cinnamon
  • Pinch of ground cloves
  • Pinch of ground nutmeg
  • 120 g butter
  • 120 g brown sugar
  • 100 g molasses
  • 1 egg
  1. Preheat oven to 350ºF
  2. Sift together flours, baking soda, salt and spices, set aside
  3. Using an electric mixer with the paddle attachment, cream together butter and brown sugar until light
  4. Add egg and molasses
  5. Add flour mixture in 2-3 parts, mixing after each addition until just blended
  6. Refrigerate dough for about 60 minutes for easy handling, you can also freeze it for later use
  7. Roll on a lightly floured surface to about 0.5 cm in thickness
  8. Cut with cookie cutters
  9. Bake on a cookie sheet lined with parchment paper for about 8 minutes.
  10. Cool completely before decorating

For the icing 

  • 45 g meringue powder
  • 500 g icing sugar, sifted 
  • 90 – 120 mL warm water
  • 5 mL pure vanilla extract
  • 10 mL corn syrup
  • Gel food colouring
  1. Mix meringue powder with about 45 mL of water, let sit for a few minutes
  2. Stir in vanilla and corn syrup 
  3. Whisk into icing sugar using an electric mixer or a hand whisk
  4. Slowly add in more warm water until shiny and desired consistency (thicker for outlining and thinner for filling)
  5. Add food colouring

Eggnog Panna Cotta with Frozen Sugared Raspberries

We love panna gotta and we love eggnog. So Christmas seems to be a perfect time to combine them together!  It makes a great dessert for your holiday dinner.  It is super easy and you can prepare it the day before.  For the sugared raspberries, many recipes use raw egg whites which I am not comfortable with.  I think a simple syrup works just as good. I also like to freeze mine for a little crunchiness.  Have a Merry Christmas everyone !

Makes about 4 servings

For the sugared raspberries

  • 100 g raspberries (wash and dry)
  • 60 g granulated sugar
  • 1/4 cup boiling water
  • 60 g vanilla sugar (or you can just use granulated sugar)

For the panna cotta

  • 1 envelope (7g) unflavoured gelatin
  • 1/2 cup milk
  • 1 cup eggnog
  • 1/2 cup whipping cream
  • 30 g granulated sugar
  • 1/2 teaspoon pure vanilla extract
  • pinch of nutmegSugared Raspberries
  1. For the sugared raspberries, prepare a simple syrup by dissolving 60 g of granulated sugar in 1/4 cup of boiling water, then let cool
  2. Gently brush raspberries with simple syrup and roll in a dish of vanilla sugar or granulated sugar
  3. Place on a tray lined with parchment paper and freeze for 2 or more hoursSugared Raspberries
  4. For the panna cotta, sprinkle gelatin over milk and let sit for a few minutes 
  5. Heat together eggnog, whipping cream and sugar in a non-stick pot over medium heat until sugar all dissolved and just starting to bubble, turn heat down to low 
  6. Add gelatin mixture
  7. Stir until gelatin all dissolved, add pinch of nutmeg
  8. Turn heat off, add vanilla extract
  9. Strain through a fine mesh twice
  10. Pour into ramekins or desired containers
  11. Let cool and refrigerate until set, at least 3 hours or overnight
  12. Top with frozen sugared raspberries when ready to serve

Eggnog Panna Cotta

Marble Chocolate Bark 

This is probably one of the easiest homemade Christmas treats that you can give to your friends and relatives. And there are so many different ingredients you can use.  All you need are three basics :

  1. chocolate, dark, milk, white or a mix
  2. something chewy, like dried fruits
  3. something crunchy, like nuts, seeds,toffee bits, crushed candy canes

I like mine very simple because I still like to enjoy the chocolate.  So here is my creation !

  • 240 g dark chocolate
  • 120 g white chocolate 
  • 30 g pistachios (remove shells and crush into small pieces)
  • 30 g dried cranberries 
  1. Melt chocolates in a heat-proof bowl over a pot of simmering water.
  2. Pour dark chocolate on a baking tray lined with parchment paper, spread evenly with a spatula
  3. Drop spoonfuls of white chocolate over dark chocolate
  4. Swirl with a skewer or handle of a spatula to create marble effect
  5. Sprinkle dried cranberries and pistachios 
  6. Refrigerate until firm
  7. Break into pieces


Eisenbahner (Railroad) Cookies 

This is a cookie that I learned at my pastry course earlier this year. It was one of my favourites. It’s beautiful, festive, delicious and has a cool name! It looks like a railroad track, hence the name Eisenbahner, which means railroad man in German. When I did a google search, almost all the recipes for this cookie are in German. So, I think it’s a great idea to share this in our Canadian Food Creatives and the Canadian Christmas Cookie Exchange round-up. There are 3 parts to this cookie, the base, the marzipan paste and the jam. Yes, it may seem a little complicated, but it’s definitely worth all the work. Hope you enjoy the ride !

Makes about 12 cookies

For the cookie base

  • 120 g cold unsalted butter
  • 60 g granulated sugar
  • 1 egg yolk
  • 170 g cake and pastry flour

For the marzipan paste and jam 

  • 200 g marzipan
  • 20 g unsalted butter, softened
  • 30 g icing sugar
  • 30 g honey
  • 1 egg white
  • 100 g raspberry jam (You want the jam to be hot and runny, so you can put it in a bowl and sit in a hot water bath for a few minutes before using)
  1. To make the cookie base, mix together cold butter and sugar using a wooden spoon until no more lumps
  2. Add egg yolk, mix until blended
  3. Add flour all at once, mix then transfer onto a table or counter and gently knead dough together (do not overmix, just work until ingredients are mixed in)
  4. Wrap with plastic wrap, refrigerate for at least 2-3 hours or overnight
  5. To make the marzipan paste, mix together marzipan, softened butter, icing sugar and honey into a thick paste (I found it easier to mix them with hands)
  6. Add egg white, mix until it has a stiff piping consistency (it looks like mash potato and you may not need the whole egg white)
  7. Put in piping bag with a star tip
  8. When ready to bake, preheat oven to 325ºF
  9. Take dough out from fridge and knead gently on a floured surface until pliable
  10. Roll it flat, about 0.3 cm in thickness (it’s OK if it cracks a little, just patch it back together)
  11. Cut into two 6 cm x 25 cm rectanglesEisenbahner (Railroad) Cookies
  12. Bake on a cookie sheet lined with parchment paper until edges just starting to brown, about 8 minutes
  13. Cool, then brush a thin layer of hot jam in between the 2 sheets 
  14. Pipe marzipan paste along edgesEisenbahner (Railroad) Cookies
  15. Turn oven up to 425-450ºF at broiler setting
  16. Bake 2-3 minutes just to caramelize the marzipan paste (watch closely, as it can burn very quickly)
  17. Cool, then fill centre with hot jamEisenbahner (Railroad) Cookies
  18. Cool completely, cut into pieces, dust with icing sugarEisenbahner (Railroad) Cookies

Original recipe by Chef Marco Ropke at the Vancouver Pastry Training Centre.

Be sure to check out the links below for more cookie recipes from other Canadian Bloggers.  You can also find them on social media using the hashtag #CDNFoodCreatives . Many thanks to Laura Irvin at The Blue Nose Baker , Kacey Joanette at The Cookie Writer and Evelyne Budkewitsch at The Cultureatz for organizing.

cookie-collage-final.jpg.jpeg

Choux Pastry Puffs 

I was going to call these Cream Puffs, but my daughter insisted that these are cream sandwiches ! She said cream puffs should have a hole to fill the cream inside the puffs… OK, OK… So, now I call them Choux Pastry puffs ! Whatever it’s called, they look cute and are absolutely delicious ! (Actually I think Choux Pastry Puffs sounds fancier !) They will be a perfect dessert for your upcoming holiday dinners! 

Makes about 16 puffs 

  • 200 mL water
  • 90 g unsalted butter
  • 1/4 teaspoon salt
  • 30 g  granulated or vanilla sugar 
  • 120 g all-purpose flour
  • 3 eggs
  • 1 cup whipping cream
  • 2 tablespoons icing sugar, plus more for dusting, sifted 
  • 1/2 teaspoon pure vanilla extract 
  • 50 g semi-sweet chocolate (melted), for drizzling
    1. To prepare the whipped cream, place a mixing bowl into freezer for about 15 minutes 
    2. Using an electric mixer, whisk together whipping cream, 2 tablespoons of icing sugar and vanilla, in the cold mixing bowl, until stiff peak is formed 
    3. Refrigerate until use 
    4. To prepare the choux paste, heat together water, butter, salt and granulated or vanilla sugar in a pot over medium heat until just starting to boil
    5. Turn heat down to low, add flour all at once
    6. Stirring constantly, cook until a thin film of paste formed at the bottom of the pot, about 5 minutes
    7. Transfer paste to a heat-proofed mixing bowl and cool down
    8. Meanwhile, preheat oven to 350ºF and prepare piping bag with desired piping tip
    9. Add eggs to paste, one at a time and mix well after each addition
    10. Transfer to piping bag and pipe into rounds on baking sheets lined with parchment paper, no bigger than 2 inches in diameter Choux Pastry Puffs
    11. Bake at 350ºF  for about 12-14 minutes until starting to brown, turn heat down to 325°F and bake for another 15 minutes until golden (if puffs are under baked, they will collapse after taken out)
    12. Turn heat off, leave puffs inside oven for about 15 -20 minutes with oven door ajar
    13. Take puffs out, let cool on baking sheets, then completely on rack Choux Pastry Puffs
    14. Cut puffs in halves, fill centres with whipped cream
    15. Drizzle with melted chocolate and dust with icing sugar, serve immediately Choux Pastry Puffs

Simple Chocolate Mousse

I just can’t get enough of chocolate, even after Christmas and New Year !  Most mousse recipes contain raw eggs which I don’t feel too comfortable with, especially with kids in the house. This recipe only uses 5 ingredients, it is much easier and doesn’t involve raw eggs.  Hope you enjoy it !

Makes about 4 servings

  • 3 ounces semi-sweet chocolate, plus about 1/2 ounce for toppings, finely chopped 
  • 1 cup heavy or whipping cream
  • 1/2 teaspoon pure vanilla extract
  • pinch of salt
  • 1 tablespoon of granulated sugar to adjust sweetness if desired
  1. Heat cream in a non-stick pot over medium heat
  2. Add chopped chocolate, sugar and salt, stir until smooth and chocolate all melted
  3. Turn heat off, mix in vanilla extract 
  4. Pour mixture through a fine strainer
  5. Let cool, cover and refrigerate overnight
  6. Before serving, whisk mousse using an electric mixer until soft peak is formed 
  7. Spoon or pipe into glasses then top with chopped chocolate

Cake Pops

This was another fun project that I did with my daughter.  She helped me make the cake balls and decorate them.  I am not a good artist, so I really admire bakers that can make beautiful and amazing cake pops, cookies and cakes.  This is just the basic recipe, you can decorate any way your imagination takes you !

To make cake pops, you need to prepare the cake, the frosting and the coating. You would also need cake pop sticks and a cake pop stand of or a styrofoam block for drying.   

Makes about 30 cake pops

For the cake

  • 1/2 cup unsalted butter, at room temperature
  • 1/3 cup granulated sugar
  • 1+1/3 cup self-rising flour
  • 2 large eggs
  • 1 teaspoon pure vanilla extract
  • 90 mL milk

For the frosting

  • 1/3 cup unsalted butter, at room temperature
  • 120 gm cream cheese
  • 1+1/2 cup icing sugar
  • 1 teaspoon pure vanilla extract

For the coating

  • 24 ounces candy melts or chocolate
  • 1-2 tablespoons vegetable oil if using candy melts

To make the cake

  1. Preheat oven to 350ºF
  2. Sift self-rising flour
  3. Using an electric mixer with the paddle attachment,  cream butter and sugar until fluffy
  4. Add eggs, vanilla and milk
  5. Add flour in 2-3 portions, mix until blended
  6. Bake in muffin tins for about 20 minutes (toothpick should come out clear when inserted in the middle)
  7. Let cake cool completely

I used muffin tins because the cake would bake more evenly and it would take less time.  You can use a loaf pan, but bake it for about 35-40 minutes.

To make the frosting

  1. Using an electric mixer, beat butter and cream cheese together
  2. Add vanilla, then icing sugar in 2-3 portions
  3. Mix until smooth

To prepare the cake balls

  1. When the cake is completely cooled, break the cake into fine crumbs with fork or fingers
  2. Gradually add frosting, a couple of tablespoons at a time, mix and knead until you can roll mixture into balls
  3. Roll cake mixture into small balls, place on a cookie sheet lined with parchment paper, cover with plastic wrap and put in fridge for at least about 30 minutes

Meanwhile, start preparing the coating

To make the coating

  1. Melt candy melts or chocolate in a bowl over a pot of simmering water 
  2. Stir in a little vegetable oil, if using candy melts,to get desired consistency and to make coating shiny

Finally ! To assemble the cake pops

  1. Dip cake pop sticks into coating about 1 inch deep
  2. Insert coated sticks into cake balls (you may need to gently reshape them into balls)
  3. Dip into coating, covering the whole cake pop
  4. Gently tap off excess coating
  5. Decorate with sprinkles while coating is still wet
  6. Stand them into a cake pop stand or a styrofoam block to dry

Orange Cranberry Cookie Bites

These cookies can be a delicious Christmas treat or you can have them anytime of the year! They have a rich butter flavour with a delightful orange taste.

Makes about 18-20 cookies

  • 1 cup unsalted butter, at room temperature
  • 1/2 cup icing sugar + more for dusting
  • 1+1/2 cup all-purpose flour
  • 1/4 self rising flour
  • 1/4 teaspoon salt
  • 2 tablespoons orange juice
  • 1 teaspoon orange zest
  • 1 teaspoon pure orange extract
  • 1 teaspoon pure vanilla extract
  • 1/4 cup dried cranberries
  1. Preheat oven to 350ºF
  2. Sift together flour, self-rising flour and salt, set aside
  3. Using an electric mixer with the paddle attachment, cream butter and sugar until light and fluffy
  4. Add orange juice,orange and vanilla extract
  5. Add flour mixture in 2-3 portions, mix until blended, scraping sides and bottom of mixing bowl
  6. Stir in orange zest and cranberries
  7. Spoon about 1 tablespoon each of dough and roughly shape into balls
  8. Place on cookie sheets lined with parchment paper, about 2 inches apart
  9. Bake for about 12 minutes, then decrease temperature to 325ºF and bake for about 10 minutes
  10. Cool on cookie sheets for about 5 minutes, then completely on rack
  11. Dust with icing sugar when completely cooled

I shape the cookies into bite sized balls.  You can also shape them in bigger balls and flatten gently with a fork.