Tag Archives: love baking

Marzipan Cake

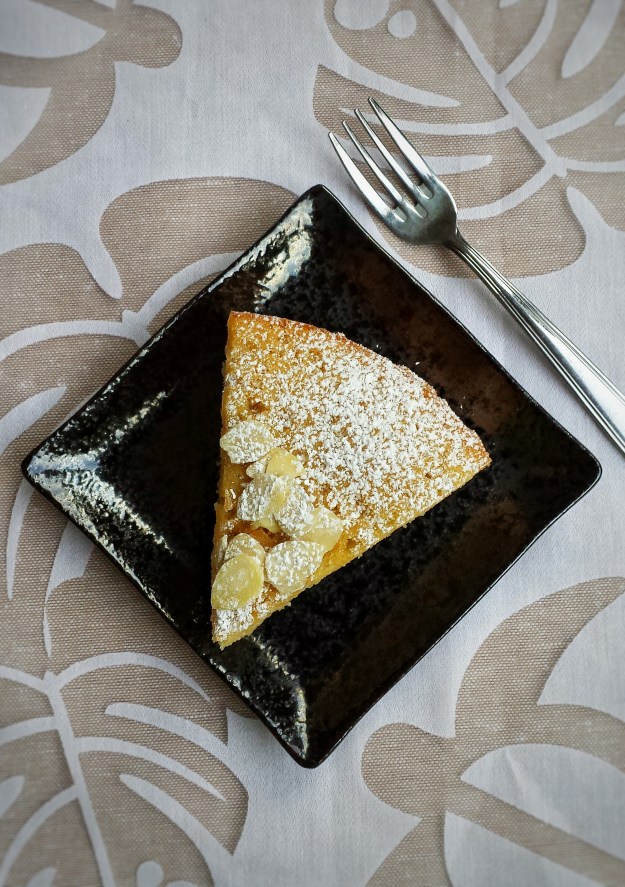
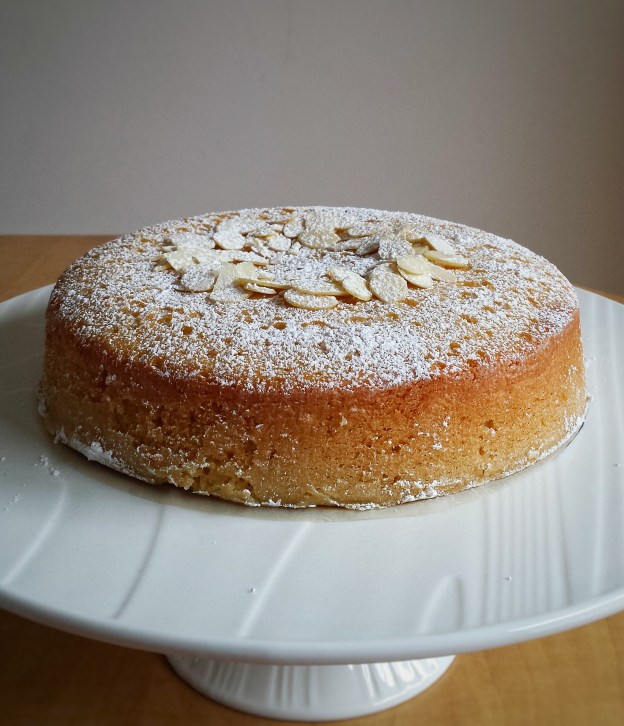
I never knew marzipan can be so tasty and so useful in baking ! My first encounter with it was eating some marzipan-filled chocolate. To be honest, I didn’t really enjoy it. Perhaps it was too sweet or perhaps I always prefer eating pure chocolate. But after I learned to make the Eisenbahner (Railroad) Cookies, I absolutely fell in love with it ! With high hopes for myself, I decided to make a cake this time…..but sadly…..I failed twice ! How frustrating ! The “failures” actually tasted pretty good. I realized the problem was the pans I used. For the first time, I used a 9 inch spring-form pan and the cake turned out too flat (It is a denser cake and it won’t rise very much). So I switched to a 9 inch x 5 inch loaf pan. But it took too long to bake through and the outside of the cake was dry and brown. So for the third time, I used an 8 inch cake ring and baked it in a hot water bath and…..Success finally ! I thought I would never make it !  Phew ! Now I get to sit down, relax and enjoy my cake after all that hard work !

Makes one 8 inch round cake 

  • 180 g unsalted butter, softened
  • 200 g marzipan, cut into small pieces and softened
  • 120 g granulated sugar
  • 4 eggs
  • 1 teaspoon pure vanilla extract
  • 1/2 teaspoon almond extract
  • 60 ml milk
  • 60 g honey
  • Zest of 1/2 orange
  • 180 g all-purpose flour
  • 2 teaspoons baking powder
  • 1/4 teaspoon salt
  • Icing sugar and almond slices for toppings
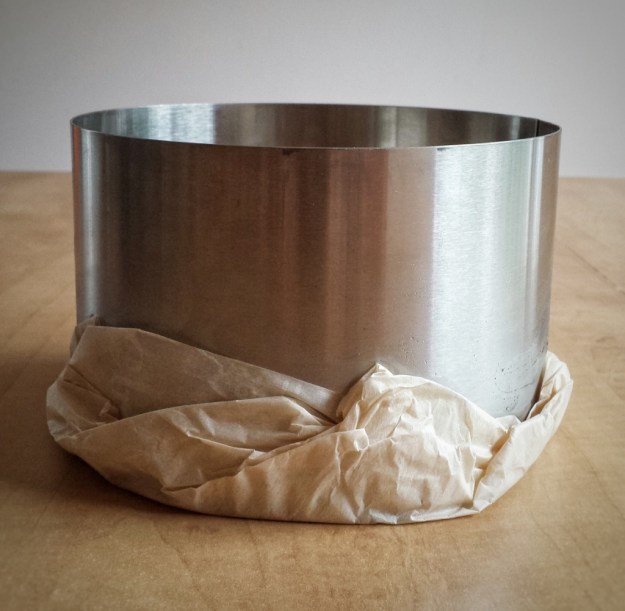
  1. Grease and flour an 8 inch cake ring  
  2. Wrap bottom with parchment paper, then 2 layers of aluminium foil and place on a rimmed baking trayCake RingCake Ring
  3. Preheat oven to 350°F
  4. Sift together flour, baking powder and salt, set aside
  5. Using an electric mixer with the paddle attachment, beat together butter, marzipan and sugar 
  6. Add eggs, one at a time
  7. Mix in vanilla and almond extract, milk, honey and orange zest 
  8. Add flour mixture in two parts, mix until blended
  9. Pour batter into cake ring (it’s ok if batter is slightly gritty) 
  10. Pour about one inch of hot water in baking tray and bake cake in hot water bath for about 60 minutes  
  11. Cool and remove cake ring
  12. Top with icing sugar and almond slicesMarzipan CakeMarzipan Cake
Advertisement

Eisenbahner (Railroad) Cookies 

This is a cookie that I learned at my pastry course earlier this year. It was one of my favourites. It’s beautiful, festive, delicious and has a cool name! It looks like a railroad track, hence the name Eisenbahner, which means railroad man in German. When I did a google search, almost all the recipes for this cookie are in German. So, I think it’s a great idea to share this in our Canadian Food Creatives and the Canadian Christmas Cookie Exchange round-up. There are 3 parts to this cookie, the base, the marzipan paste and the jam. Yes, it may seem a little complicated, but it’s definitely worth all the work. Hope you enjoy the ride !

Makes about 12 cookies

For the cookie base

  • 120 g cold unsalted butter
  • 60 g granulated sugar
  • 1 egg yolk
  • 170 g cake and pastry flour

For the marzipan paste and jam 

  • 200 g marzipan
  • 20 g unsalted butter, softened
  • 30 g icing sugar
  • 30 g honey
  • 1 egg white
  • 100 g raspberry jam (You want the jam to be hot and runny, so you can put it in a bowl and sit in a hot water bath for a few minutes before using)
  1. To make the cookie base, mix together cold butter and sugar using a wooden spoon until no more lumps
  2. Add egg yolk, mix until blended
  3. Add flour all at once, mix then transfer onto a table or counter and gently knead dough together (do not overmix, just work until ingredients are mixed in)
  4. Wrap with plastic wrap, refrigerate for at least 2-3 hours or overnight
  5. To make the marzipan paste, mix together marzipan, softened butter, icing sugar and honey into a thick paste (I found it easier to mix them with hands)
  6. Add egg white, mix until it has a stiff piping consistency (it looks like mash potato and you may not need the whole egg white)
  7. Put in piping bag with a star tip
  8. When ready to bake, preheat oven to 325ºF
  9. Take dough out from fridge and knead gently on a floured surface until pliable
  10. Roll it flat, about 0.3 cm in thickness (it’s OK if it cracks a little, just patch it back together)
  11. Cut into two 6 cm x 25 cm rectanglesEisenbahner (Railroad) Cookies
  12. Bake on a cookie sheet lined with parchment paper until edges just starting to brown, about 8 minutes
  13. Cool, then brush a thin layer of hot jam in between the 2 sheets 
  14. Pipe marzipan paste along edgesEisenbahner (Railroad) Cookies
  15. Turn oven up to 425-450ºF at broiler setting
  16. Bake 2-3 minutes just to caramelize the marzipan paste (watch closely, as it can burn very quickly)
  17. Cool, then fill centre with hot jamEisenbahner (Railroad) Cookies
  18. Cool completely, cut into pieces, dust with icing sugarEisenbahner (Railroad) Cookies

Original recipe by Chef Marco Ropke at the Vancouver Pastry Training Centre.

Be sure to check out the links below for more cookie recipes from other Canadian Bloggers.  You can also find them on social media using the hashtag #CDNFoodCreatives . Many thanks to Laura Irvin at The Blue Nose Baker , Kacey Joanette at The Cookie Writer and Evelyne Budkewitsch at The Cultureatz for organizing.

cookie-collage-final.jpg.jpeg

Orange Cranberry Scones 

The weather here in Vancouver has been very rainy and windy lately. Often, I just feel like staying home all day. I made these scones a few days ago to warm and lift myself up.  Orange and cranberry is one of my favourites.  The two flavours just work together like magic ! With a cup of coffee….Mmmmmmmm, so comforting and delicious ! Scones are actually pretty easy to make, they freeze well too, so you can make and cut the dough ahead and bake later.  You don’t need to thaw them, just take them out when you are preheating the oven.  But keep in mind, the baking time will be slightly longer. 

Makes about 8 scones

  • 360 g all-purpose flour 
  • 1 teaspoon baking powder 
  • 1/2 teaspoon baking soda 
  • 1/4 teaspoon salt 
  • 120 g granulated sugar 
  • 120 g unsalted butter (chilled and cut into small pieces)
  • Zest of 1/2 small orange 
  • 60 g dried cranberries 
  • 1 egg
  • 1/2 cup buttermilk 
  • 30 mL orange juice 
  • 1 teaspoon pure vanilla extract 
  • 1/2 teaspoon orange extract 
  • 50 g melted dark chocolate for drizzling (optional)
  1. Preheat oven to 375ºF
  2. Sift together flour, baking powder, baking soda and salt
  3. Mix in sugar
  4. Cut in butter with a pastry cutter or rub in by hands until resembles coarse crumbs
  5. Add orange zest and cranberries 
  6. Add egg, buttermilk, orange juice and vanilla and orange extract, mix until blended
  7. Transfer dough to a floured surface, and press together to form a round disc about 1/2 inch thick
  8. Wrap with plastic wrap and refrigerate for about 1 to 2 hours
  9. Cut disc into 8 triangular wedges Orange and Cranberry Scones
  10. Bake on cookie sheet lined with parchment paper for about 20 minutes
  11. Serve warm with butter or drizzle with melted dark chocolate Orange and Cranberry SconesOrange and Cranberry Scones

Honey Cornmeal Muffins 

My kids are growing up too fast, especially my son ! He turned 12 two months ago.  He is almost as tall and as heavy as I am, he eats twice as much and he beats me easily on arm wrestling ! I am happy but a little sad at the same time…..My baby is no longer a baby ! He is turning into a man ! I told him I have to kiss and hug him as much as I can because soon he won’t let me ! Looking after 2 active growing kids can be very busy, and often, I tend to forget about myself !  I made these little corn muffins the other day so I can just grab and eat quickly when I am in a rush.  You can have them for breakfast or serve them with a soup or a salad for lunch.   

  • 100 g cornmeal 
  • 180 g all-purpose flour, sifted 
  • 1 teaspoon baking powder 
  • 1/2 teaspoon baking soda 
  • Pinch of salt 
  • 2 teaspoons lemon juice 
  • 120 mL milk 
  • 2 eggs, slightly beaten 
  • 4 tablespoons coconut oil, melted
  • 4 tablespoons honey 

Makes about 12 muffins 

  1. Preheat oven to 350ºF
  2. Put lemon juice into milk and let sit for a few minutes 
  3. Mix together all dry ingredients 
  4. Add eggs, milk with lemon juice, coconut oil and honey, mix until blended 
  5. Pour batter into slightly greased silicon or paper muffin cups and bake for about 20 minutes 
  6. Serve warm with butter 

Honey Cornmeal Muffins


Double Chocolate Cranberry Cookies 

I was craving for some chocolate cookies yesterday. Not just a plain chocolate chip cookie. But the decadent kind that is loaded with chocolate, and all you want to say after taking a bite is Mmmmm…..Mmmmmm and Mmmmmm ! So here they are ! Rich, chocolaty and soft…. I had to quickly shoot a few photos before they were all gone !
This is my first time using coconut sugar. Its taste and sweetness are very similar to brown sugar. I do find it gives the cookies a slightly drier texture. The cranberries are optional, but I thought it’s nice to add some tanginess. I hope you enjoy them as much as we do ! 

Makes about 16 cookies

  • 150 g all-purpose flour
  • 25 g unsweetened cocoa powder
  • 1/2 teaspoon baking soda
  • 1/4 teaspoon salt
  • 100 g unsalted butter
  • 60 g coconut sugar (or brown sugar)
  • 60 g granulated sugar
  • 1 egg
  • 1 teaspoon pure vanilla extract
  • 50 g dark chocolate, 70%, (chopped into small chunks)
  • 50 g semi-sweet chocolate (chopped into small chunks)
  • 60 g dried cranberries
  1. Preheat oven to 350ºF
  2. Sift together flour,cocoa powder, baking soda and salt, set aside
  3. Cream together butter and sugars using either an electric mixer with the paddle attachment or by hand with a wooden spoon (I just did it by hand)
  4. Add egg and vanilla, mix until blended
  5. Mix in flour mixture in two parts
  6. Stir in chocolate chunks and dried cranberries
  7. Drop about 1 tablespoon each of dough onto baking sheets lined with parchment paper, about 2 inches apart
  8. Bake for about 12 minutes
  9. Cool on baking sheets for about 5 minutes, then completely on rack

Double Chocolate Cranberry Cookies

Pumpkin Cheesecake with Maple Caramel Sauce 

Fall

October is a busy baking month for me. Thanksgiving, my daughter’s birthday, bake sale, Halloween…. all of them are happening this month. I am not complaining, in fact, I am enjoying it . Apples, pumpkins, corn, the spices, the Halloween decorations ….the aroma, the colours, the fun, I love them all ! For this Thanksgiving, I made a pumpkin cheesecake topped with maple caramel sauce. It is crunchy, creamy, sweet and a little spicy…..just delicious ! And it’s fairly easy to make ! It’s a great alternative to pumpkin pie.

Makes one 6-inch cake

For the crust

  • 120 g ginger snaps
  • 3 tablespoons unsalted butter, melted

For the fillings

  • 250 g soft cream cheese
  • 120 g granulated sugar
  • 1 tablespoon all-purpose flour
  • 1 teaspoon ground cinnamon
  • 1 teaspoon ground ginger
  • Pinch of ground nutmeg
  • Pinch of ground cloves
  • 1/4 teaspoon salt
  • 120 g pumpkin puree (homemade or canned)
  • 2 eggs
  • 1 teaspoon pure vanilla extract

For the maple caramel

  • 120 ml maple syrup
  • 15 g unsalted butter
  • 60 mL heavy or whipping cream

Pumpkin Cheesecake

To prepare the crust

  1. Crush ginger cookies into fine crumbs
  2. Mix crumbs with melted butter, press firmly into bottom of a spring-form pan or a cake ring (if you use a cake ring like I did, you have to wrap the bottom with parchment paper as it is bottomless)
  3. Bake for about 10 minutes, let cool

To prepare the cheesecake

  1. When crust is cooled, wrap bottom of cake pan with 2 layers of aluminium foil and place on a rimmed baking tray
  2. Turn oven down to 325ºF
  3. Using an electric mixer with the paddle attachment, beat cream cheese and sugar until smooth
  4. Add flour, spices, salt,pumpkin puree and vanilla
  5. Add eggs, one at a time, mix until just blended, do not overmix
  6. Pour batter on top of crust and place the baking tray into the oven
  7. Pour about one inch of hot water into baking tray and bake for about 40-45 minutes (the top should be a little jiggly, do not overbake)
  8. Turn oven off, leave cheesecake inside oven with door ajar for another hour to cool gradually
  9. Take cake out, let cool at room temperature completely, then refrigerate for at least 3-4 hours

To prepare maple caramel

  1. Melt butter in a non-stick pan over medium heat
  2. Add maple syrup, when boil, turn heat down and simmer for about 3 minutes until thicken
  3. Add cream, stirring occasionally and continue to simmer until thick

When cheesecake is set, serve with maple caramel and whipped cream

Pumpkin Cheesecake

Halloween Cake Pops

My daughter borrowed a book about Halloween treats from the library last week, there were so many great ideas we want to try. After looking through the book and “researching” on the internet, we decided to make cake pops !  So we went to the store and bought all we need…..cake pop sticks, chocolate, coating wafers, licorice sticks, sprinkles…..and we also picked up some sour candies, dried fruits, peppermint paddies….. oops, I guess we got a little too much ! Oh well, we had a lot of fun shopping and making them, that’s all that matters, right?! The coating wafers tend to be very sweet, so I used less sugar for the cake and dark chocolate for the frosting. They turned out really tasty and fudgy like brownies. My son, who doesn’t have a sweet tooth, said these cake pops are “boss” !

For the cake

  • 135 g self-rising flour (about 3/4 cup)
  • 25 g unsweetened cocoa powder
  • 60 g unsalted butter
  • 60 g granulated sugar
  • 1 egg
  • 1/2  teaspoon pure vanilla extract
  • 90 mL boiling water

For the chocolate frosting 

  • 60 g unsalted butter
  • 100 g icing sugar
  • 1/2 teaspoon pure vanilla extract
  • 60 g dark chocolate (70%)

For the coating

  • Chocolate or candy moulding wafers (You will need about 300 g of wafers to coat 6 cake pops)
  • Sprinkles, licorice, and or other decorations of choice 

Makes about 20 cake pops 

To make the cake

  1. Preheat oven to 350ºF
  2. Sift together self-rising flour and cocoa powder
  3. Using an electric mixer with the paddle attachment, cream butter and sugar until fluffy
  4. Add egg and vanilla
  5. Add flour mixture in 2 parts, mix until blended
  6. Gradually stir in boiling water, batter will be slightly runny
  7. Bake in a 9 inch x 5 inch loaf pan, lined with parchment paper, for about 20 minutes 
  8. Let cake cool completely

To make the frosting

  1. Melt dark chocolate in a bowl over a pan of simmering water, let cool slightly
  2. Using an electric mixer with paddle attachment, cream butter and icing sugar
  3. Add in vanilla and melted chocolate, mix until smooth

To prepare the cake balls

  1. When the cake is completely cooled, break the cake into fine crumbs with hands
  2. Gradually add frosting, a couple of tablespoons at a time, mix until you can roll mixture into balls
  3. Roll cake mixture into small balls, place on a cookie sheet lined with parchment paper, cover with plastic wrap and put in fridge for at least about 30 minutes

Halloween Cake Pops


 To assemble the cake pops

  1. Melt candy melts or chocolate in a bowl over a pot of simmering water 
  2. Dip cake pop sticks into coating about 1 inch deep
  3. Insert coated sticks into cake balls 
  4. Dip into coating, covering the whole cake pop (since it’s a chocolate cake, you may need to do 2 coatings if using white coating)
  5. Gently tap off excess coating
  6. Decorate while coating is still wet, then let dry (alternatively, you can draw on them when they are dry using edible markers)

Coconut Flour Chocolate Chip Cookies (Gluten-free)

Our family is very lucky. None of us have any food allergies, intolerance, special diet or restrictions.  I do have many friends or their kids who cannot eat nuts, shell-fish, dairy or gluten. Cooking or eating out can be very challenging for them.  These restrictions, however, have given me opportunities to try new ingredients. This is my first time using coconut flour to bake. It is gluten-free, high in fibre and protein, and low in carbohydrates. It is very absorbent, so you cannot make a cup-to-cup substitution with grain-based flour. For every cup of all-purpose flour, you only need about 1/4-1/3 cup of coconut flour. You would also need more eggs, about 2 eggs per 1/3 cup of coconut flour. These cookies are soft, chewy and much healthier than regular chocolate chip cookies. So we can eat more and feel a little less guilty! 

Makes about 12-14 cookies 

  • 40 g coconut flour (about 1/3 cup)
  • 60 g brown sugar 
  • Pinch of salt 
  • 2 eggs, lightly beaten 
  • 60 mL coconut oil, melted
  • 1 teaspoon pure vanilla extract 
  • 50 g semi-sweet chocolate chips 
  1. Preheat oven to 350ºF
  2. Mix together brown sugar, eggs, coconut oil and vanilla 
  3. Add coconut flour and salt, stir until dough is formed (Mixture may look very runny at the beginning, but as you stir, the coconut flour will absorb the liquid)
  4. Stir in chocolate chips
  5. Roll dough into one inch balls, place on baking sheets lined with parchment paper, then gently flattened each ball (these cookies don’t really spread, they remain pretty much the same shape before and after baking)
  6. Bake for about 12 minutes 

Coconut Flour Chocolate Chip Cookies


Cinnamon Bites

When I hear the words “comfort food”, I would somehow think of cinnamon buns ! Warm, sweet bread with ooey, gooey cream cheese icing……yum ! To no surprise, I found that they are originated from Sweden. (that’s why they sell them at Ikea?!) In Swedish they are called “kanelbulle”  which literally means “cinnamon buns” and October 4 is “Kanelbullens Dag” ,Cinnamon Roll Day. Wow, Swedish people must love their cinnamon buns !  I wish I can be there to taste the authentic flavour. Well, for now, I will comfort myself with these little cinnamon bites !  (I made them in bite-size pieces cause I often found the rolls too big) 

For the dough

    • 540 g (3 cups) bread flour
    • 1 cup warm whole milk
    • 1 teaspoon granulated sugar
    • 4 g instant yeast
    • 1/2 teaspoon salt
    • 1 egg
    • 2 tablespoons vegetable oil

For the coating

  • 100 g unsalted butter, melted
  • 1/2 cup granulated sugar
  • 2 tablespoons ground cinnamon

For the cream cheese icing

  • 180 g soft cream cheese
  • 6 tablespoons icing sugar
  • 1 teaspoon pure vanilla extract
  1. Dissolve sugar in warm milk, add yeast and let sit for a few minutes until frothy
  2. In a large mixing bowl, mix together flour, salt, egg, vegetable oil and yeast mixture
  3. Stir with hand and mix until dough starting to form
  4. Transfer to a lightly floured surface
  5. Knead dough until smooth and stretchy
  6. Wrap with plastic wrap and let rise for about 60 minutes until double in size 
  7. Preheat oven to 350ºF
  8. When dough is ready, punch air out, cut dough into 4 parts
  9. Roll each part into a long log, about 12 inches long
  10. Cut each log into about 12 small pieces
  11. Grease two 8 inch round flat pans or pans of your choice
  12. Mix cinnamon and 1/2 cup of sugar together
  13. Dip each small piece into melted butter, then coat with cinnamon sugar
  14. Place in pans, about 24 pieces each
  15. Bake for about 20 minutes
  16. Meanwhile, prepare icing by beating cream cheese, icing sugar and vanilla together until blended
  17. When bread bites are ready, serve warm with cream cheese frosting

Cinnamon Bites


Pineapple Coconut Cake

My family took a vacation to Hawaii last week. Both kids and adults had a lot of fun. We swam, snorkeled, paddled even parasailed ! To be honest, parasailing at 300 feet high was a little scary, but it was really fun ! My daughter had absolutely no fear and she just loved it ! We enjoyed the food too. There were garlic shrimps, fruits, desserts of course. Their Japanese food was also really good. Food is always the best part of my vacation ! To reminisce some of these wonderful flavours, I baked this Pineapple and Coconut Cake yesterday. I used canned pineapple as I was too lazy to chop one up, you can definitely use a fresh one.  I guess I am still in holiday mode !  🙂  

Makes one loaf (I used a 4.5″ x 8.5″ loaf pan)  

For the cake

  • 225 g cake and pastry flour 
  • 1 +1/2 teaspoon baking powder 
  • 1/2 teaspoon baking soda 
  • 1/4 teaspoon salt
  • 120 g unsalted butter, softened 
  • 120 g cup granulated sugar  
  • 2 eggs
  • 100 g canned pineapple tidbits 
  • 25 g shredded coconut 
  • 60 mL canned coconut milk 
  • 90 mL pineapple juice 
  • 1 teaspoon pure vanilla extract 

For the glaze

  • 150 icing sugar 
  • 45mL pineapple juice 
  • 1 tablespoon shredded coconut 
  1. Preheat oven to 350ºF
  2. Drain pineapples well, pat dry with paper towel and save the juice 
  3. To make the cake, sift together flour,baking power, baking soda and salt, set aside 
  4. Using an electric mixer, with the paddle attachment, cream together butter and sugar until fluffy 
  5. Add eggs, vanilla and coconut milk 
  6. Add half of the flour mixture and pineapple juice, mix until blended
  7. Add remaining of the flour mixture
  8. Fold in pineapples and shredded coconut 
  9. Pour batter into a lightly greased and floured loaf pan
  10. Bake for about 45 minutes
  11. To make the glaze, whisk together icing sugar, pineapple juice and shredded coconut
  12. When the cake is cooled, drizzle glaze on top 

Pineapple Coconut Cake