Tag Archives: strawberries

Fruit Pizza (For Canada Day) 

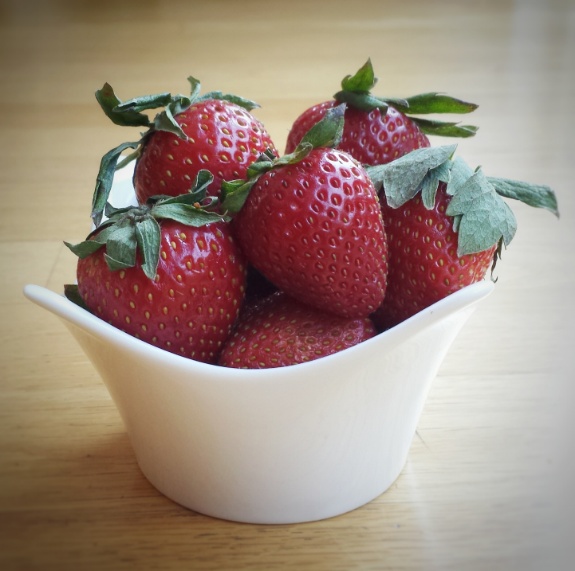
​Summer is here and that means…..lots of berries ! I love to eat them fresh, but also like to use them to make pies, tarts, ice cream, etc…….Just thinking about it makes me soooo excited ! To start off my “berries season”, I made this simple fruit pizza ! It’s basically a giant cookie, top with cream cheese and fruits ! I picked strawberries and raspberries just in time to celebrate Canada Day, but you can also use blueberries, blackberries, even kiwi and banana. It is so easy to put together and I think it is a nice, refreshing dessert for your summer backyard BBQ. Have a Happy Canada Day !  

Makes about four 7″ pizzas

For the “pizza” dough

  • 170 g all-purpose flour 
  • 170 g cake and pastry 
  • 3 g baking soda 
  • 2 g salt
  • 120 g unsalted butter, at room temperature
  • 180 g granulated sugar 
  • 1 egg
  • 5 mL pure vanilla extract 
  • 30 mL lemon juice 
  • Zest of 1 small lemon 

For the toppings

  • 250 g soft cream cheese
  • 60 g icing sugar
  • Fruits of choice 
  1. Preheat oven to 325°F
  2. Sift together flours, baking soda and salt, set aside 
  3. Using an electric mixer with the paddle attachment, cream together butter and sugar until fluffy 
  4. Add 1 egg, vanilla, lemon juice and lemon zest, mix until blended 
  5. Mix in flour mixture, 1/3 at a time until just cooperated (do not over mix)  
  6. Transfer to a lightly floured surface and knead until dough is formed (dough can be stored in fridge or freezer for later use)
  7. Roll out to about 0.5 cm in thickness 
  8. Cut into large circles using a plate or a cake ring (You can collect the dough scraps all together and re-roll, cover unused dough with a damp cloth or plastic wrap)
  9. Place on cookie sheets lined with parchment paper 
  10. Bake for 10-12 minutes, let cool
  11. Beat together cream cheese and icing sugar until smooth
  12. Just before serving, spread cream cheese on top of giant cookies, top with fresh fruits  


Advertisement

Strawberry Mousse Cake

I first made this cake for my son’s 13th birthday last year. He specifically wanted a strawberry cake. It came out alright…but the cake was slightly dry and the mousse layer was too thick…..

My son’s birthday cake

I have been wanting to remake and “upgrade” it ever since, but never had a chance. It’s Mother’s Day, so I thought this is the perfect time! I added a jelly glaze on top to brighten both the colour and flavour. Each of the three layers has a different texture but they match very well together. It looks much prettier than last time too! I can now share it with my mom and my family. Happy Mother’s Day to all our moms! I wonder what my kids are doing to surprise me this year…….

Makes one 6 inch cake

For the cake

  • 2 eggs, separated
  • 75 g granulated sugar
  • 75 g cake and pastry flour, sifted
  • 2 g baking powder
  • 1 g salt
  • 5 mL pure vanilla extract
  • 5 mL fresh lemon juice
  • 30 mL vegetable oil

For the mousse and jelly glaze

  • 400 g fresh strawberries, washed and hulled
  • 160 g granulated sugar
  • 10 mL fresh lemon juice
  • 250 mL cold whipping cream
  • 4 x 1 g gelatin sheets

To make the cake

  1. Preheat oven to 350°F
  2. Sift together flour, baking powder and salt, set aside
  3. Whisk together egg yolks and 60 g of sugar until pale
  4. Mix in vanilla and oil, then gently fold in flour mixture
  5. In a separate bowl, make a meringue by whisking together egg whites and lemon juice until frothy
  6. Slowly add in 15 g of sugar, whisk until medium peak
  7. Gently fold meringue into flour mixture
  8. Pour batter into a lightly-greased 6 or 7 inch cake pan, lined with parchment paper at the bottom (see notes)
  9. Bake for about 20 minutes
  10. Let cool, then trim top and side of cake

Notes : I baked my cake in a 7 inch springform pan and trimmed it to fit into a 6 inch cake ring. You can just bake and assemble your cake in the same pan.

To make the mousse and jelly glaze

  1. For the mousse, place a large mixing bowl in the freezer for about 15 minutes
  2. Soak 3 gelatin sheets (1 g each) in cold water for a few minutes
  3. Blend strawberries and strain seeds out through a mesh
  4. Add sugar and lemon juice, and cook over medium heat until sugar is dissolved
  5. Set aside half of the puree for the glaze
  6. Drained gelatin and add to remaining puree, stir until dissolved, let cool
  7. Whisk whipping cream in the cold mixing bowl until stiff peak
  8. Fold in strawberry gelatin mixture until just blended
  9. Pour on top of cake, smooth with a spatula and refrigerate for at least 3-4 hours until set
  10. For the jelly glaze, soak 1 gelatin sheet in cold water for a few minutes
  11. Reheat the saved strawberry puree over medium heat
  12. Add drained gelatin and stir until dissolved
  13. Let cool, pour on top of mousse layer and refrigerate for another 3-4 hours until set
  14. Release cake from pan or ring and decorate as desired

Spring Chocolate Pudding 

Spring is finally finally here ! It’s been a long time ! Even the cherry blossoms think so, they’ve been waiting to bloom and shine !  I used to garden a lot more, but ever since I have kids, I’ve been too busy growing two little humans and kind of abandoned my garden. This year, I want to at least plant some herbs, so I got some basil and cilantro seeds the other day and just put them in a couple of small pots. Well, I have to wait a while before my herbs grow.  So meanwhile, I made these cute little pudding pots to enjoy. They look very realistic !  And I was so happy that I could shoot the pictures in my backyard with some sunshine ! They would make a fun little snack for the kids at Easter ! Try to pick strawberries that are smaller and longer in shape so they would look more like little carrots.  

Makes about 6-8 servings 

For the candy coated strawberries

  • 180 g orange candy melts 
  • 5-10 mL vegetable oil
  • 8-10 strawberries (at room temperature)
  1. Wash and dry strawberries leaving the stems on 
  2. Melt candy melts in the microwave or over a double boiler according to package instructions 
  3. Add 5-10 mL of vegetable oil to achieve desired consistency if needed 
  4. Coat strawberries with candy melts, tap off excess, be careful not to break the stems 
  5. Place on a tray lined with parchment paper 
  6. Pour remaining candy melts into a piping bag 
  7. Cut a small hole at the end of piping bag 
  8. Drizzle over dried, coated strawberries 

For the chocolate pudding 

    • 30 g unsweetened cocoa powder 
    • 75 g granulated sugar 
    • 30 g cornstarch 
    • Pinch of salt 
    • 500 mL milk (whole or 2%)
    • 120 g semi-sweet chocolate chips 
    • 5 mL pure vanilla extract 

You would also need 8 regular-sized Oreo cookies for topping

      1. In a non-stick pot, mix together cocoa powder, sugar, cornstarch, salt
      2. Gradually stir in milk 
      3. Place over medium heat, stirring continuously until starting to bubble   
      4. Add chocolate chips, stir until thickened and chocolate all melted
      5. Remove from heat, mix in vanilla extract 
      6. Spoon into containers, let cool and refrigerate for at least 2-3 hours (a skin will form on top of pudding, but that’s OK, as we will put crushed Oreo on top)

To assemble pudding, crushed Oreo into small pieces, put on top of pudding, place a coated “carrot” on top 

Candy coated strawberries recipe adapted from lifemadesimplebakes.com

Strawberry Vanilla Cream Tart

Strawberries ! One of our family favourites !  My son can “chomp down” (that’s his words) a bowl in no time! They taste good, look pretty and you can use them in many ways.  I always wish I have a bigger yard and more time so I can grow my own. Luckily, we have a few local farms close to our neighbourhood, and we can get fresh strawberries very easily.  I love the U-picks that they have in the early summer too ! It’s a great activity for both adults and kids.   

Makes about three to four 4-inch tarts

For the tart shell

  • 120 g cold unsalted butter (cut into small pieces)
  • 75 g granulated sugar
  • 1 egg yolk
  • 180 g cake and pastry flour, sifted

For the fillings

    • 450 g (about 1 lb) fresh strawberries
    • 500 mL milk (preferably full fat, but 2 % works too)
    • 2 egg yolks
    • 75 g granulated sugar
    • 40 g cornstarch
    • 1/2 to 1 vanilla bean
    • icing sugar for dusting

To make the tart shells

  1. Mix together cold butter and sugar using a wooden spoon until no more lumps
  2. Add egg yolk, mix until blended
  3. Add flour all at once, mix with the wooden spoon, then transfer onto a table or counter and gently knead dough together (just work until ingredients are mixed in)
  4. Wrap with plastic wrap, refrigerate for at least 2-3 hours or overnight
  5. When ready to bake, preheat oven to 350ºF
  6. Knead dough until pliable
  7. Roll dough out to about 1/8 inch in thickness on a floured surface, dock with a fork
  8. Place inside slightly greased tart molds, trim off excess dough (dough scraps can be re-roll, but may crack, so only re-roll once or twice)
  9. Bake for about 12 minutes till golden, let cool

To make the vanilla cream fillings

    1. Whisk egg yolks, sugar, cornstarch and 1/2 cup of milk together until no more lumps
    2. Cut vanilla bean lengthwise and scrape seeds out of bean pod, do not throw away bean pod
    3. In a pot, heat remaining milk, vanilla beans and the pod over medium heat until just boiled
    4. Whisk 1/2 of boiled milk slowly into egg mixture to temper, then pour everything back into the pot
    5. Heat until just starting to bubble and thicken, whisking constantly
    6. Remove from heat, take out vanilla pod and let cool

When ready to serve, pipe or spoon vanilla cream into baked tart shell, top with fresh strawberries and icing sugar

Original tart shell and vanilla cream recipe by Chef Marco Ropke at the Vancouver Pastry Training Centre 

img_20160525_172119.jpg

This is my first ever collaborative post, how exciting ! The Canadian Food Creatives collaboration are featuring fresh strawberries this month ! Be sure to check out the links below for other great recipes. They can also be found on social media using the hashtag #CDNFoodCreatives . Many thanks to Amanda Saxby at The Cinnamon Scrolls for hosting.

fb_img_1464467144697.jpg