Monthly Archives: November 2015

Easy Caramel Sauce

This is a very easy (or you can say lazy) way of making caramel sauce. I actually tried, many times, the more classic way, using brown sugar, butter and cream. Somehow, I just couldn’t get the right color or the sauce just curdled. So this recipe is more practical and it tastes as good, if not better than the other one ! You can use as a dip for fruits or drizzle over cupcakes, coffee, ice cream, etc. Add some sea salt on top and you have salted caramel sauce!

Makes about 1 cup

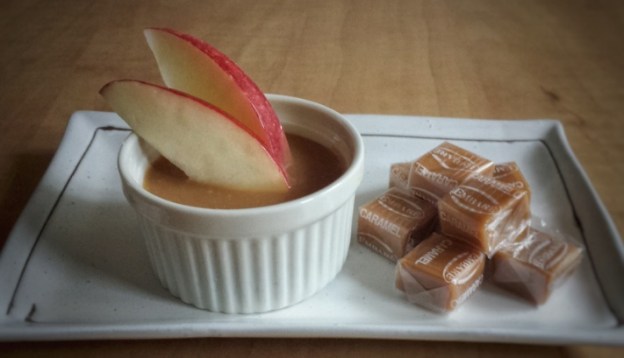
  • 8 ounces caramel candies
  • 1/2 cup whipping cream
  1. Unwrap and melt candies in a non-stick pot over a pan of simmering water
  2. When candies are completely melted, add whipping cream
  3. Remove pan of water and heat non-stick pot directly on stove on low heat (remember to wipe the bottom of the pot)
  4. Stir constantly until smooth, be careful not to scorch
  5. Serve warm or at room temperature, store remaining sauce in refrigerator for up to one week
Advertisement

Ginger Cookies 

These are one of my favourite cookies! I thought my kids would not like them, so I added a bit more ginger to please the adults’ palates. To my surprise, my daughter loves them. She said these cookies are really soft and tasty, and not spicy at all!

Makes about 24-30 cookies
Total time = 60 minutes

  • 2 cups cake and pastry flour
  • 1 teaspoon baking soda
  • 1/4 teaspoon salt
  • 2 teaspoons ground ginger
  • 1 teaspoon ground cinnamon
  • 1/4 teaspoon ground cloves
  • 1/2 cup unsalted butter, at room temperature
  • 1/2 cup granulated sugar
  • 1/4 brown sugar
  • 1/4 cup Crosby’s fancy molasses
  • 1 egg
  • 1 teaspoon pure vanilla extract
  • 2 teaspoons granulated sugar for rolling
  1. Preheat oven to 325°F
  2. Sift together flour, baking soda, salt and the three spices, set aside
  3. Using an electric mixer, beat together butter and sugars at medium speed until fluffy
  4. Add molasses, egg and vanilla, mix until blended
  5. Add flour mixture in 2 parts, mix until dough is formed, scraping sides and bottom of bowl
  6. Refrigerate dough for 30-60 minutes for easy handling
  7. Roll dough into 1 inch balls
  8. Lightly roll top half of cookie balls in sugar
  9. Place on cookie sheets lined with parchment paper, sugar side up, spacing about 2 inches apart
  10. Flatten top gently with bottom of a glass
  11. Bake for about 10-12 minutes

Pear Cobbler

You may have noticed, I like to make my desserts or cakes into individual servings. Instead of making a big cake, I would make 12 minis. The main advantage, especially for baking, is that you can control your baking time and temperature much better. You would need less time, and your goodies would be baked more evenly. There is also more room to play around with your toppings and decorations! This cobbler is another mini version. Top it up with ice cream or a vanilla sauce like Creme Anglaise…..A great dessert on a cold day ! 

Makes about 8 servings

For the pear fillings

  • 400 g Bartlett or Anjou pear chunks (washed, peeled cored and cut)
  • 2 teaspoons lemon juice
  • 1/2 teaspoon lemon zest
  • 4 tablespoons brown sugar
  • 1/2 teaspoon ground cinnamon
  • 4 tablespoons unsalted butter, melted
  1. Coat pear chunks with lemon juice and zest
  2. Mix with brown sugar, cinnamon and melted butter

For the topping

  • 1/2 cup quick oats
  • 1/4 cup all-purpose flour
  • 1/2 cup brown sugar
  • 1/2 teaspoon ground cinnamon
  • 1/4 cup unsalted butter, melted
  1. Mix oats, flour, sugar and cinnamon
  2. Add melted butter, mix until blended

To make the cobbler

  1. Preheat oven to 375ºF
  2. Spoon pear fillings into ramekins, add topping
  3. Bake on a tray for about 25 minutes, serve warm
  4. Top with ice cream or a vanilla sauce like Creme Anglaise

Light Creme Anglaise

This is a modified version of the recipe I learned from my pastry course a few months ago. I didn’t have whipping or half and half cream at home, so I thought I would use milk and do a light version. It came out better than I thought! It may not be as creamy but it tastes almost as good as the original recipe! You can use it over any dessert, e.g. cakes, pies, puddings, pastries, cobblers, etc. 

  • 300 mL 2% milk
  • 4 egg yolks
  • 50 gram granulated sugar
  • 1/2 to 1 vanilla bean
  1. Gently whisk 1/3 of the milk with sugar and egg yolks, set aside
  2. Cut and scrape vanilla bean
  3. Put vanilla bean, including the pod, into the remaining of the milk and heat in a non-stick pot over medium heat until boil.
  4. Turn heat down to low
  5. Pour some boiled milk into egg mixture to temper, then pour back into the pot
  6. Heat mixture until thick enough to coat back of wooden spoon,  stirring constantly
    (Coat back of wooden spoon with sauce, draw a streak in the middle with your finger, if streak stays clear, the sauce is ready. Watch closely when cooking, the sauce thickens quite quickly. Do not over cook or you will have scrambled eggs instead!)
  7. Remove from heat, strain twice through a fine mesh
  8. Serve immediately or cool then refrigerate
  9. Use within one week

Original recipe by Chef Marco Ropke at the Pastry Training Centre of Vancouver

Nutella Rice Crispy Square

Rice crispy square is one of my kids’ favourite snacks and it is so easy to make.  Adding a little Nutella to the recipe makes them even yummier ! 

  • 50 g unsalted butter
  • 3 cups mini marshmallows
  • 1/2 cup Nutella spread
  • 5 cups crispy rice cereal
  1. Melt butter and marshmallows in a non-stick pot over low heat
  2. Add Nutella, mix until blended
  3. Remove from heat and stir in rice cereal
  4. Pour into a 9×13 baking pan lined with parchment paper
  5. Press firmly and evenly
  6. Cut into squares when cooled

Pumpkin Chocolate Chip Muffins

Pumpkin is very nutritious and healthy. It is a good source of vitamin A, vitamin C, potassium and fibre. And best of all, it is low in calories ! So….I have an excuse to add more chocolate chips in this recipe ! Wow ! My kitchen smells so good today with these delicious muffins…..

Makes about 12-14 muffins

  • 1+1/2 cup cake and pastry flour
  • 1+1/2 teaspoon baking powder
  • 1/2 teaspoon baking soda
  • 1/2 teaspoon ground cinnamon
  • 1/4 teaspoon ground ginger
  • pinch of nutmeg
  • pinch of cloves
  • 1/4 teaspoon salt
  • 1/2 cup + 2 tablespoons brown sugar
  • 1/2 cup unsalted butter, melted
  • 2 eggs
  • 1/2 cup milk
  • 1 teaspoon pure vanilla extract
  • 8 oz pumpkin puree,preferably homemade
  • 1/2 cup semi-sweet chocolate chips
  1. Preheat oven to 350ºF
  2. Sift together flour, baking powder, baking soda, salt and the four spices Mix in brown sugar
  3. Add eggs, vanilla, milk, butter and pumpkin, mix until just blended
  4. Add chocolate chips
  5. Spoon into muffin tins lined with slightly greased paper muffin cups
  6. Bake for about 20 minutes

Lemon Curd Meringue Cookies

Meringue and lemon curd go very well together. These cookies are light and delicate but very rich in flavour. To balance the sweetness, I added less sugar to the meringue than I normally would. I also diluted the juice with a little bit of water, you can just use the juice if you prefer a more tangy flavour. Eat them right away though, otherwise the meringue will turn soft and sticky or you can sandwich them just before serving if you want to make them ahead. You can use the leftover lemon curd as a jam on your toasts, pancakes or waffles! Enjoy!

For the lemon curd

Makes about 1/2 cup

  • 2 egg yolks
  • 6 tablespoons granulated sugar
  • 3 tablespoons lemon juice
  • 2 teaspoons lemon zest
  • 2 tablespoons water
  • 50 gram unsalted butter, chilled and cut into small pieces
  1. Whisk together egg yolks, sugar, lemon juice, water and zest
  2. Heat mixture in non-stick pot over low heat, stirring constantly until thickened (mixture should coat back of spoon)
  3. Turn heat off, mix in butter, a few pieces at a time until all melted
  4. Cool, and refrigerate up to 2 weeks

For the meringues

Makes about 24 single cookies or 12 sandwiches

  • 2 egg whites
  • 1/4 teaspoon cream of tartar
  • 3 tablespoons granulated sugar
  1. Preheat oven to 225°F
  2. Using an electric mixer with whisk attachment, whisk egg whites and cream of tartar at medium speed until frothy
  3. Increase speed to high and slowly add in sugar
  4. Whisk until a stiff peak is formed
  5. Pour into piping bag with star or round tip
  6. Pipe onto cookie sheets lined with parchment paper, 2 inches apart
  7. Bake for about 40 minutes, depending on size of cookies, they should be dry to touch, turn off oven
  8. Leave cookies in oven for about 2 more hours to dry 
  9. Remove from oven to cool completely on rack

Coconut Milk Pudding

This is a very yummy Asian dessert, especially if you are a fan of coconut ! You can usually find it at Chinese Restaurants.  But often, too much gelatin or cornstarch is added which makes the pudding too chewy or powdery.  This recipe is silky smooth and soft.  Super yummy !! 

Makes about 4 servings

  • 1 + 1/2 cups milk 
  • 165 mL coconut milk (1 small can)
  • 4 tablespoons granulated sugar
  • 1 envelope or tablespoon unflavoured gelatin powder
  1. Sprinkle gelatin over about 1/2 cup of milk, let sit for a few minutes
  2. Heat remaining milk, coconut milk and sugar in a non-stick pot over medium heat
  3. Stir until sugar all dissolved (doesn’t have to boil)
  4. Turn off heat, add gelatin mixture, stir until dissolved
  5. Strain and pour into bowls 
  6. Cool, then refrigerate until set, at least about 4 hours or overnight

It’s been one awesome year…..

One year ago I started my blog, time really flies and it’s been a wonderful journey.  I never thought I could have a blog of my own and people around the world would actually visit it ! I have learned so much…..how to plan, organize and write my post, how to take good pictures of my food, and most important, how to make good food.  It’s been such a rewarding experience.   Writing this blog has also created more bonding between my kids and me, especially my daughter.  She is my biggest fan, my taste tester and my art director !  She is very creative and has a very good sense of art.  She has helped me a lot with my pictures.    

When I look back, there were times that I ran out of ideas or was too busy, and I wanted to quit posting.  But in the end, I managed to get through.  I told myself,  this is something that I really want to do, I should keep going !  I believe we should all pursue our dreams, no matter how hard it seems. With love, passion and hope, nothing is impossible !

Thank you everyone for their support and thank you for visiting !