Tag Archives: baking

Baked Cinnamon Doughnuts (with Butterscotch Glaze and Toasted Walnuts) 

Another school year has just started ! I can’t believe my son is in high school ! He is certainly excited to move on and become an official teenager, and I am happy to see him growing up and becoming more independent. But as a mom, I would never stop worrying about him ! Is he doing well at school, is he making new friends, and are they good kids, etc….Luckily, my kids and I are very close, and we would talk about almost everything…..I am sure there are things they don’t want me to know !

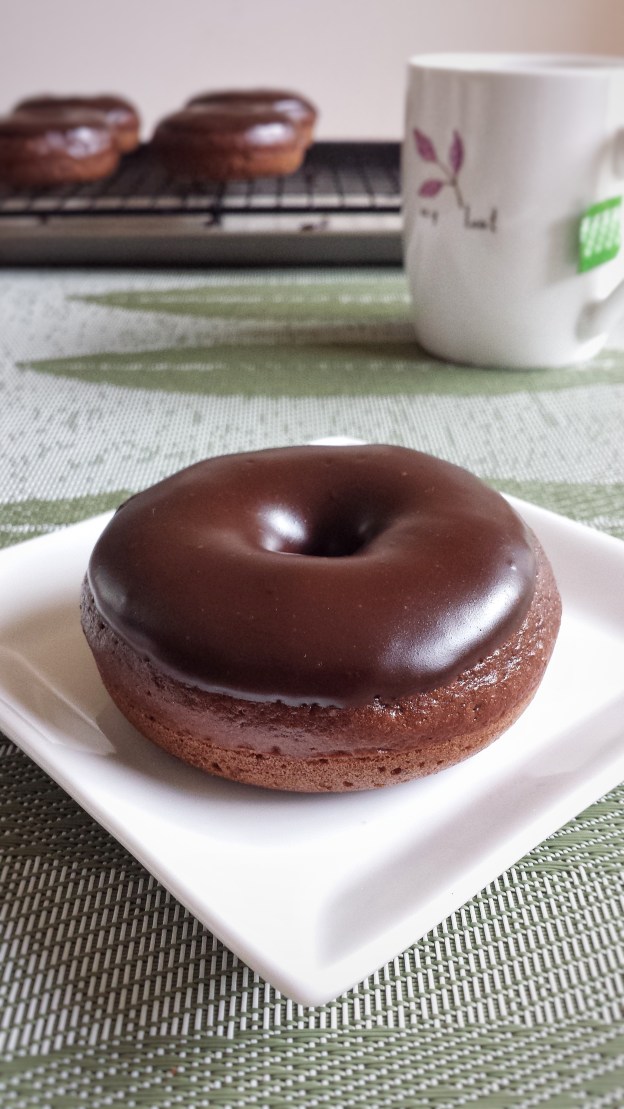
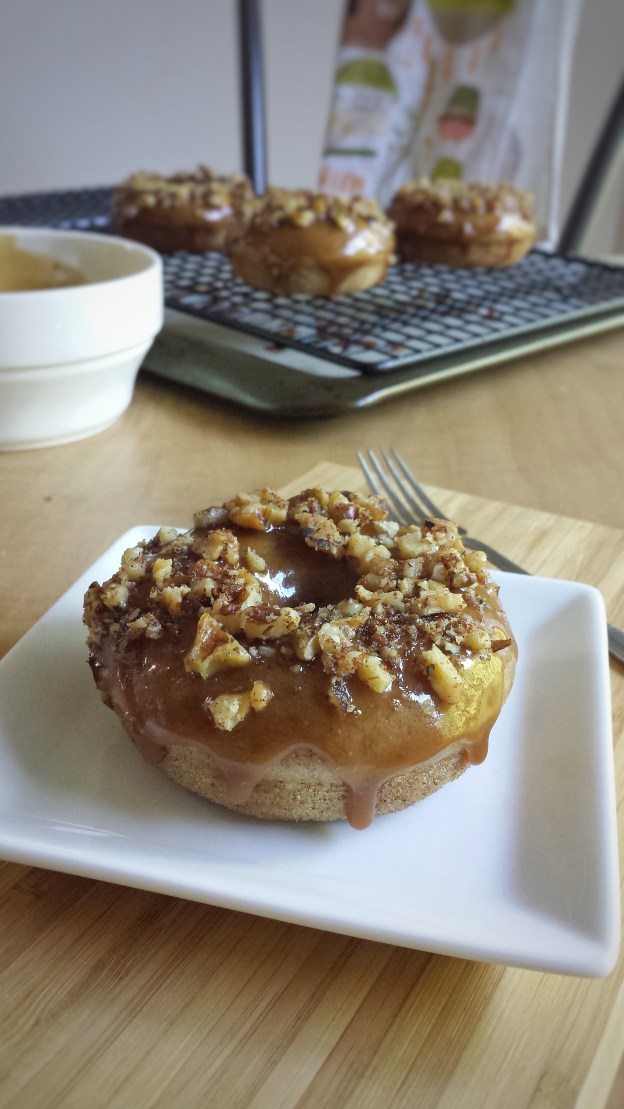
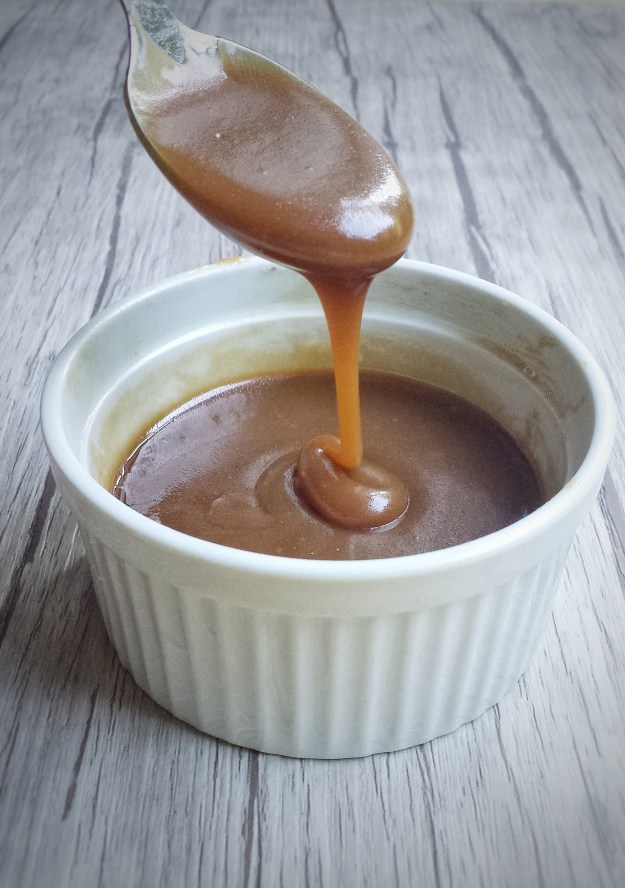
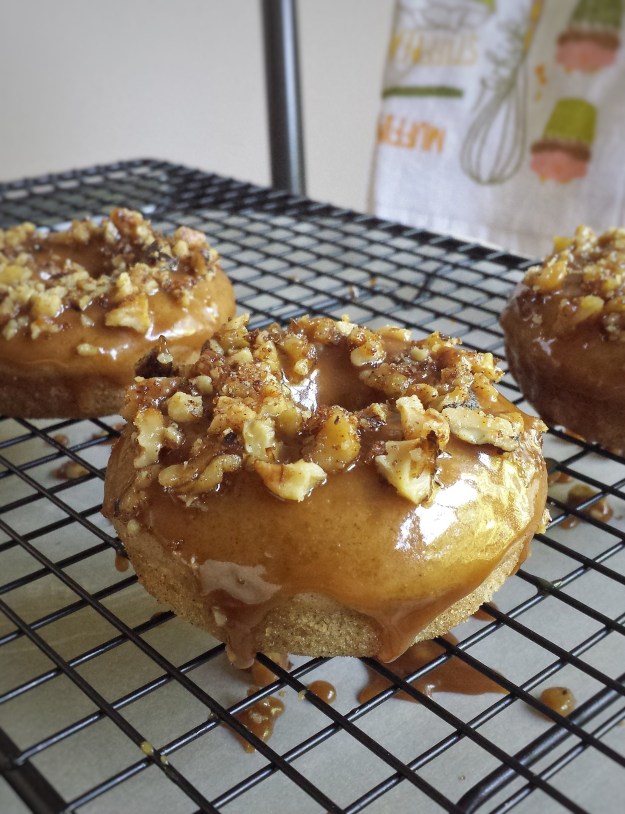
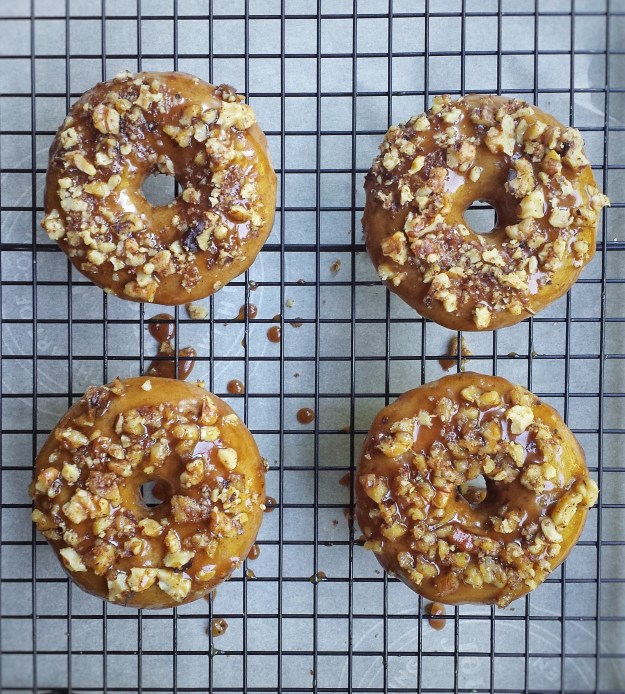
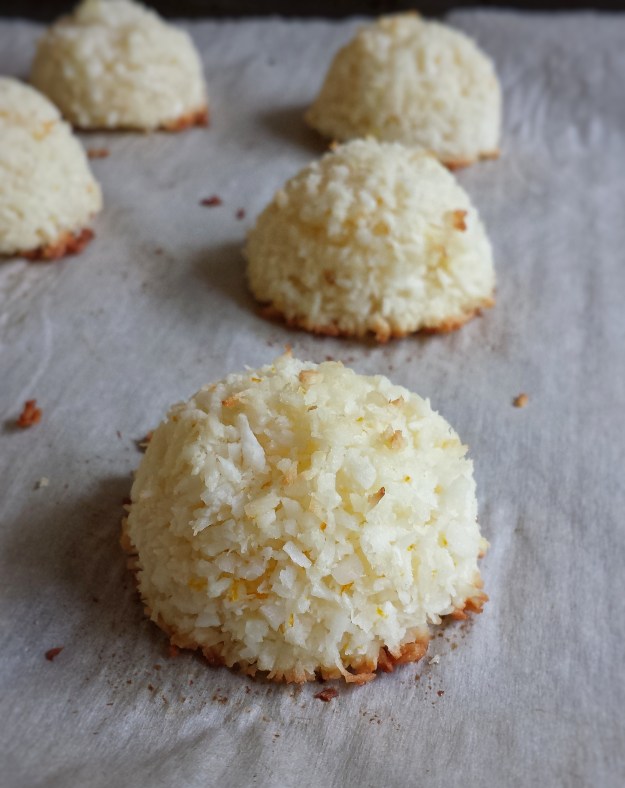
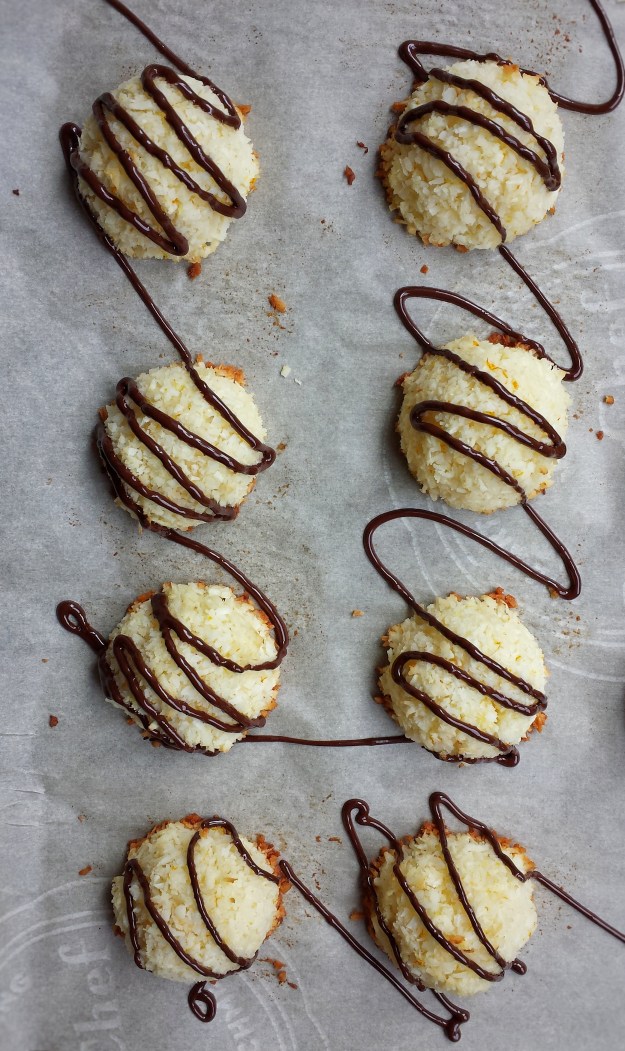
Since the kids are back to school, I finally have a little more time to work on my recipes. These cinnamon doughnuts are nice surprise ! I was trying to make some cinnamon apple waffles but they didn’t turn out right. So, I switched and made doughnuts instead. And I am so glad  I did ! They are so soft and tasty even without any toppings. But hey, why not kick them up 2 more notches ! The butterscotch glaze is heavenly ! No kidding, my daughter would have “drunk” the whole bowl if I didn’t stop her ! The toasted walnuts are really nice too, they add extra flavour and crunchiness. Pecans would also be a good alternative. You can refrigerate the extra butterscotch sauce for up to 1 week. Rewarm and drizzle it on some vanilla ice cream, and you’ll have another dessert !  

Makes about 12 doughnuts     

For the doughnuts

  • 300 g all-purpose flour 
  • 6 g baking powder 
  • 3 g baking soda 
  • 2 g salt 
  • 6 g ground cinnamon 
  • Pinch of nutmeg 
  • 30 g brown sugar 
  • 30 g granulated sugar 
  • 2 eggs (slightly beaten)
  • 300 mL buttermilk 
  • 60 mL vegetable oil 
  • 5 mL pure vanilla extract 

For the butterscotch glaze  

  • 60 g unsalted butter 
  • 120 mL whipping cream 
  • 120 g brown sugar
  • Pinch of salt
  • 5 mL pure vanilla extract

You will also need about 90 g walnuts 

  1. Preheat oven to 325ºF 
  2. Toast walnuts on a baking sheet lined with parchment paper for about 10 minutes, let cool and crush into small pieces
  3. Turn oven up to 350ºF
  4. In a large mixing bowl, sift together flour, baking powder, baking soda, salt, cinnamon and nutmeg, add both sugars
  5. In another bowl, mix together eggs, buttermilk, oil and vanilla extract 
  6. Add wet ingredients into dry ingredients, mix until just blended 
  7. Pour batter into lightly greased doughnut pans and bake for about 12 minutes, let cool
  8. To make the glaze, cook butter and whipping cream in a small non-stick pot over medium heat until butter melts
  9. Add sugar and salt , stir continuously until thicken and smooth  
  10. Add vanilla, let cool slightly
  11. To assemble, dip one side of doughnuts into the glaze, then the crushed walnuts, best to serve immediately


Butterscotch sauce recipe adapted from Mark Bittman, “How to Bake Everything” 


Books and Tools


How to Bake Everything: Simple Recipes for the Best Baking

Wilton Nonstick 6-Cavity Donut Pan

You can get the doughnut pans and the cookbook through the Amazon website by clicking the above link. I will receive a small compensation if you purchase the item. 

Chocolate Zucchini Loaf

I haven’t been blogging actively. It’s been such a busy summer and we were on vacation last week. I make this zucchini loaf all the time and I have been hoping to share it since May ! Somehow just never got around to it. Last week, the mom of my daughter’s best friend gave me a few gigantic zucchini fresh from her garden ! So I made this again and finally put the post together. It’s one of those sneaky recipes in which you can hide the vegetables ! My son doesn’t like sweets nor zucchini, but he would come back for more of this. I guess that means it tastes pretty good ! If you prefer, you can put them in muffin tins instead, just remember to adjust the baking time to about 20-25 minutes. 

Makes 2 mini loaves (dimensions of pan: 5.75 x 3.25 x 2.25 inches)

  • 120 g shredded zucchini
  • 180 g all-purpose flour
  • 20 g unsweetened cocoa powder
  • 1.5 g baking powder
  • 1.5 g baking soda
  • 2 g salt
  • 50 g brown sugar
  • 50 g granulated sugar
  • 1 egg
  • 180 mL buttermilk
  • 30 mL vegetable oil
  • 2.5 mL pure vanilla extract
  • 60 g semi-sweet chocolate chips 
    1. Preheat oven to 350°F
    2. In a large mixing bowl, sift together flour, cocoa powder, baking powder, baking soda and salt
    3. Add both sugars
    4. In another bowl, mix together egg, buttermilk, oil and vanilla
    5. Add wet ingredients into flour mixture, stir until just blended
    6. Fold in chocolate chips and zucchini (batter will be slightly runny)
    7. Pour into lightly greased and floured loaf pans
    8. Bake for about 40-45 minutes 

Tools that I used 

Chicago Metallic 59440 Commercial II Non-Stick Mini Loaf Pans, Set of 4

You can get the mini loaf pans through the Amazon website by clicking the above link. I will receive a small compensation if you purchase the item. 

Blueberry Galette 

Can’t believe summer is half-way through already ! I have been really busy, driving the kids around to different activities, keeping them occupied. If you are a parent, you would know, summer is actually busier than school days ! But they are having so much fun…..swimming, trampoline park, bowling, sleep over…..Although I am exhausted at the end of the day, seeing their happy faces makes it all worth it. Hey, kids are supposed to sleep in, play lots and eat lots during the summer, right ? With all the activities, meal times for us may not always be as regular and as healthy as I’d like. To balance that out, I make sure I stock lots of fruits at home. Luckily my kids are not picky eaters and love the summer fruits…blueberries, cherries, watermelon, peaches, etc.  And of course I use them to make desserts, like this blueberry galette. It’s basically a rustic blueberry pie and you don’t need to worry about making the crust neat and tidy. It makes a perfect summer dessert with some vanilla ice cream or whipped cream !

Makes one galette

For the crust 

  • 90 g unsalted butter (cut into small pieces and chilled)
  • 100 mL ice-cold water
  • 200 g cake and pastry flour, sifted
  • 15 g granulated sugar
  • 2.5 g salt

For the filling 

  • 200 g fresh blueberries 
  • 30 g granulated sugar 
  • 7.5 mL lemon juice 
  • Zest of 1/2 small lemon 
  • 7.5 g cornstarch 
  • 10 g graham cracker crumbs 
  1. To make the crust, combine flour,sugar and salt
  2. Rub in chilled butter with hands until resemble coarse crumbs, there should be pea-sized lumps of butter
  3. Add cold water and mix until dough just starting to form
  4. Transfer to a lightly floured surface, and press dough together (Do not knead)
  5. Wrap with plastic wrap and refrigerate for at least 1 hour or overnight (I actually doubled the amount of ingredients and kept half of the dough in the freezer for later) 
  6. When ready to bake, preheat oven to 375°F 
  7. Gently mix blueberries with sugar,lemon juice, lemon zest and cornstarch 
  8. Let sit for about 10 minutes 
  9. Roll dough out to about 0.5 cm in thickness 
  10. Sprinkle with graham cracker crumbs in the middle leaving about 5 cm from the edge, the crumbs help to prevent a soggy crust 
  11. Spoon filling on top  
  12. Fold and pleat edges over part of the filling
  13. Brush edges with water and sprinkle with vanilla sugar or granulated sugar 
  14. Bake for about 60 minutes until golden and filling is bubbling (you can cover it with aluminium foil for the last 15 to 20 minutes to prevent crust from getting too brown)
  15. Serve warm with whipped cream or vanilla ice cream 

Buttermilk Scones and my day at Vista D’Oro Farm 

A couple of weeks ago, on a beautiful Sunday afternoon, I had the opportunity to participate in a jam making workshop at Vista D’Oro farm in Langley, B.C. It was organized by Appetite by Penguin Random House and Food Bloggers of Canada. Lee Murphy, the owner of the farm, also the author of the cookbook, The Preservatory, patiently taught us her techniques of making artisanal preserves from fresh fruits. We cooked and created some very special blueberry and rhubarb preserves. We then had a tour of the winery with Lee’s husband, Patrick, enjoyed some wine tasting and a yummy snack platter at the patio, with cheese, bread, sausages and jams of course ! It was a wonderful experience and we all went home with a big box full of jams and The Preservatory cookbook !

I also brought home with something else….. something that I saw in Lee and Patrick. It’s the love, the enthusiasm and the passion that they put into their farm, their preserves and their wine. And I truly think that’s what make their products unique. Being able to do what you love and love what you do is a blessing, and I think we should really embrace those opportunities in life and make the best out of them.

So……to make the best use of the jams I got, I made these buttermilk scones. They match perfectly with the fruit preserves. They taste best when they are fresh and warm. So if you cannot consume the whole batch, you can save part of the dough in the freezer.

Makes about 16 scones

  • 180 g all-purpose flour
  • 180 g cake and pastry flour
  • 15 g baking powder
  • 3 g baking soda
  • 1 g salt
  • 100 g vanilla sugar granulated sugar plus more for sprinkling
  • 120 g cold unsalted butter (cut or grate into small pieces)
  • 2 eggs (1 for dough, 1 for egg wash)
  • 150 mL buttermilk
  1. Preheat oven to 400°F
  2. Sift together flours, baking powder, baking soda and salt
  3. Mix in sugar
  4. Rub in cold butter with fingers until resembles coarse crumbs, there should be small lumps of butter in the dough
  5. Lightly beat 1 egg and buttermilk together and add to dry ingredients, mix until just combined 
  6. Transfer to a generously floured surface, gently knead and press until dough just come together, handle the dough as little as possible 
  7. Roll flat to about 1/2 inch in thickness
  8. Cut into discs, about 2 inches in diameter, and place on baking trays lined with parchment paper
  9. Beat the other egg with about 2 teaspoons of water 
  10. Brush top of discs with egg wash and sprinkle with vanilla sugar or granulated sugar
  11. Bake for 10-12 minutes until golden
  12. Serve warm with your favourite jam 

Lee Murphy’s new cookbook, The Preservatory, is a wonderful resource for making and using preserves. The book is divided into 2 parts. Part 1 includes recipes for preserves using seasonal fruits with the addition of spices, herbs and wine. Part 2 contains recipes using the preserves, it covers everything from an appetizer to a dessert. Wow ! Jam is a lot more than a PB&J sandwich ! Lee also has a wonderful scone recipe in her book, which is slightly different from the one above, but her scones were super tasty too ! 


The Preservatory: Seasonally Inspired Recipes for Creating and Cooking with Artisanal Preserves

You can get this beautiful cookbook through the Amazon website by clicking the above link. I will receive a small compensation if you purchase the item. 

Orange Coconut Macaroons (Gluten-Free)

The weather is finally getting a little warmer, even though there are still days that feel more like fall or even winter ! Warmer weather means I can make ice-cream again, yeah ! It is actually very easy but one problem I have, is figuring out what to do with the leftover egg whites. I usually use them to make meringue cookies. This time, I used them for something else. I added a little twist to my old recipe and made these lovely Orange Coconut Macaroons !  With the chocolate drizzle, they are so good ! Looking back at some of my old posts, I feel a little embarrassed about the pictures I took (but back then I thought they were very good….lol). To be honest, to me, taking food photos is actually much harder than making the food itself.  My kids said the macaroons in some of my pictures look like sushi ! Like these two…….

Well, I guess they were right, they do kind of look like little rice balls, don’t they ? 

Makes about 18-20 cookies

  • 200 g unsweetened shredded coconut 
  • Zest of 1/2 orange
  • 2 egg whites (about 70g)
  • 50 g granulated sugar 
  • 2.5 mL pure vanilla extract 
  • 45 mL freshly squeezed orange juice 
  • 60 g semi-sweet chocolate (for drizzling)
  1. Preheat oven to 325°F
  2. Mix together coconut and orange zest, set aside
  3. In an electric mixer, whisk together egg whites and sugar until frothy (about 3 minutes) 
  4. Add vanilla and orange juice, whisk until blended
  5. Fold in coconut mixture
  6. Scoop about one tablespoon each and place on cookie trays lined with parchment paper
  7. Bake for about 12-15 minutes until golden
  8. Cool completely
  9. Melt chocolate in a double boiler or microwave, drizzle on top of macaroons

Lemon Lavender Cake with Cream Cheese Frosting

I haven’t had much luck with growing any living things lately. I planted some herbs and lavender seeds couple months ago, the herbs sprouted but didn’t survive, the lavender is growing but very slow. Then my daughter’s last little neon tetra died (we started with six fishes)……What am I doing wrong ??? Feeling kind of frustrated, I went and purchased a whole bunch of plants…..herbs, tomato, kale and lavender, hoping for better luck with some already-grown plants. Out of all of them, I like lavender the best ! It is in my favourite colour (purple, of course) and I love its smell, so soothing and relaxing. 
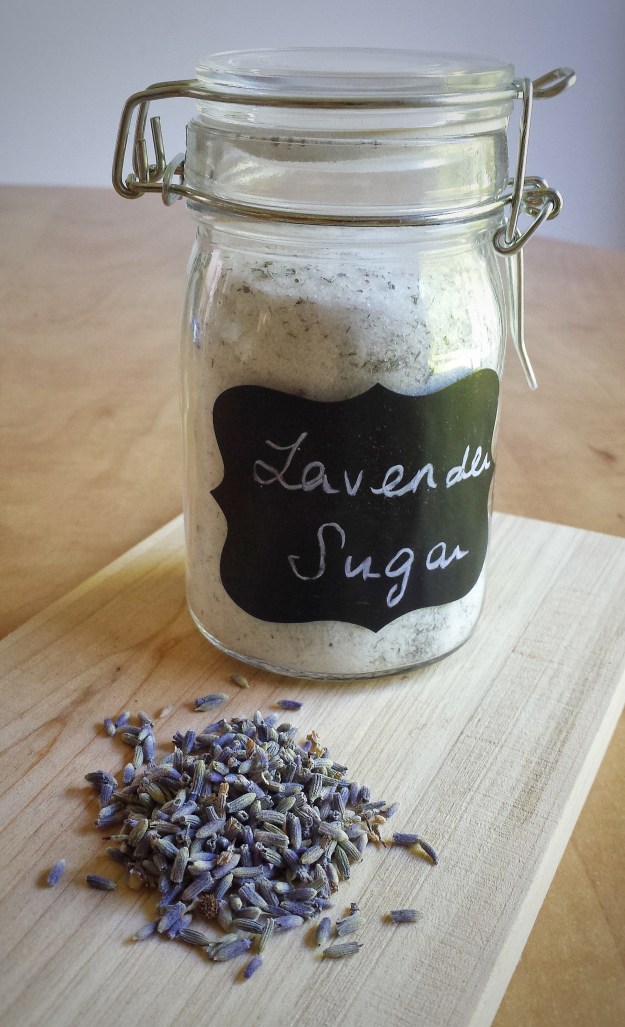
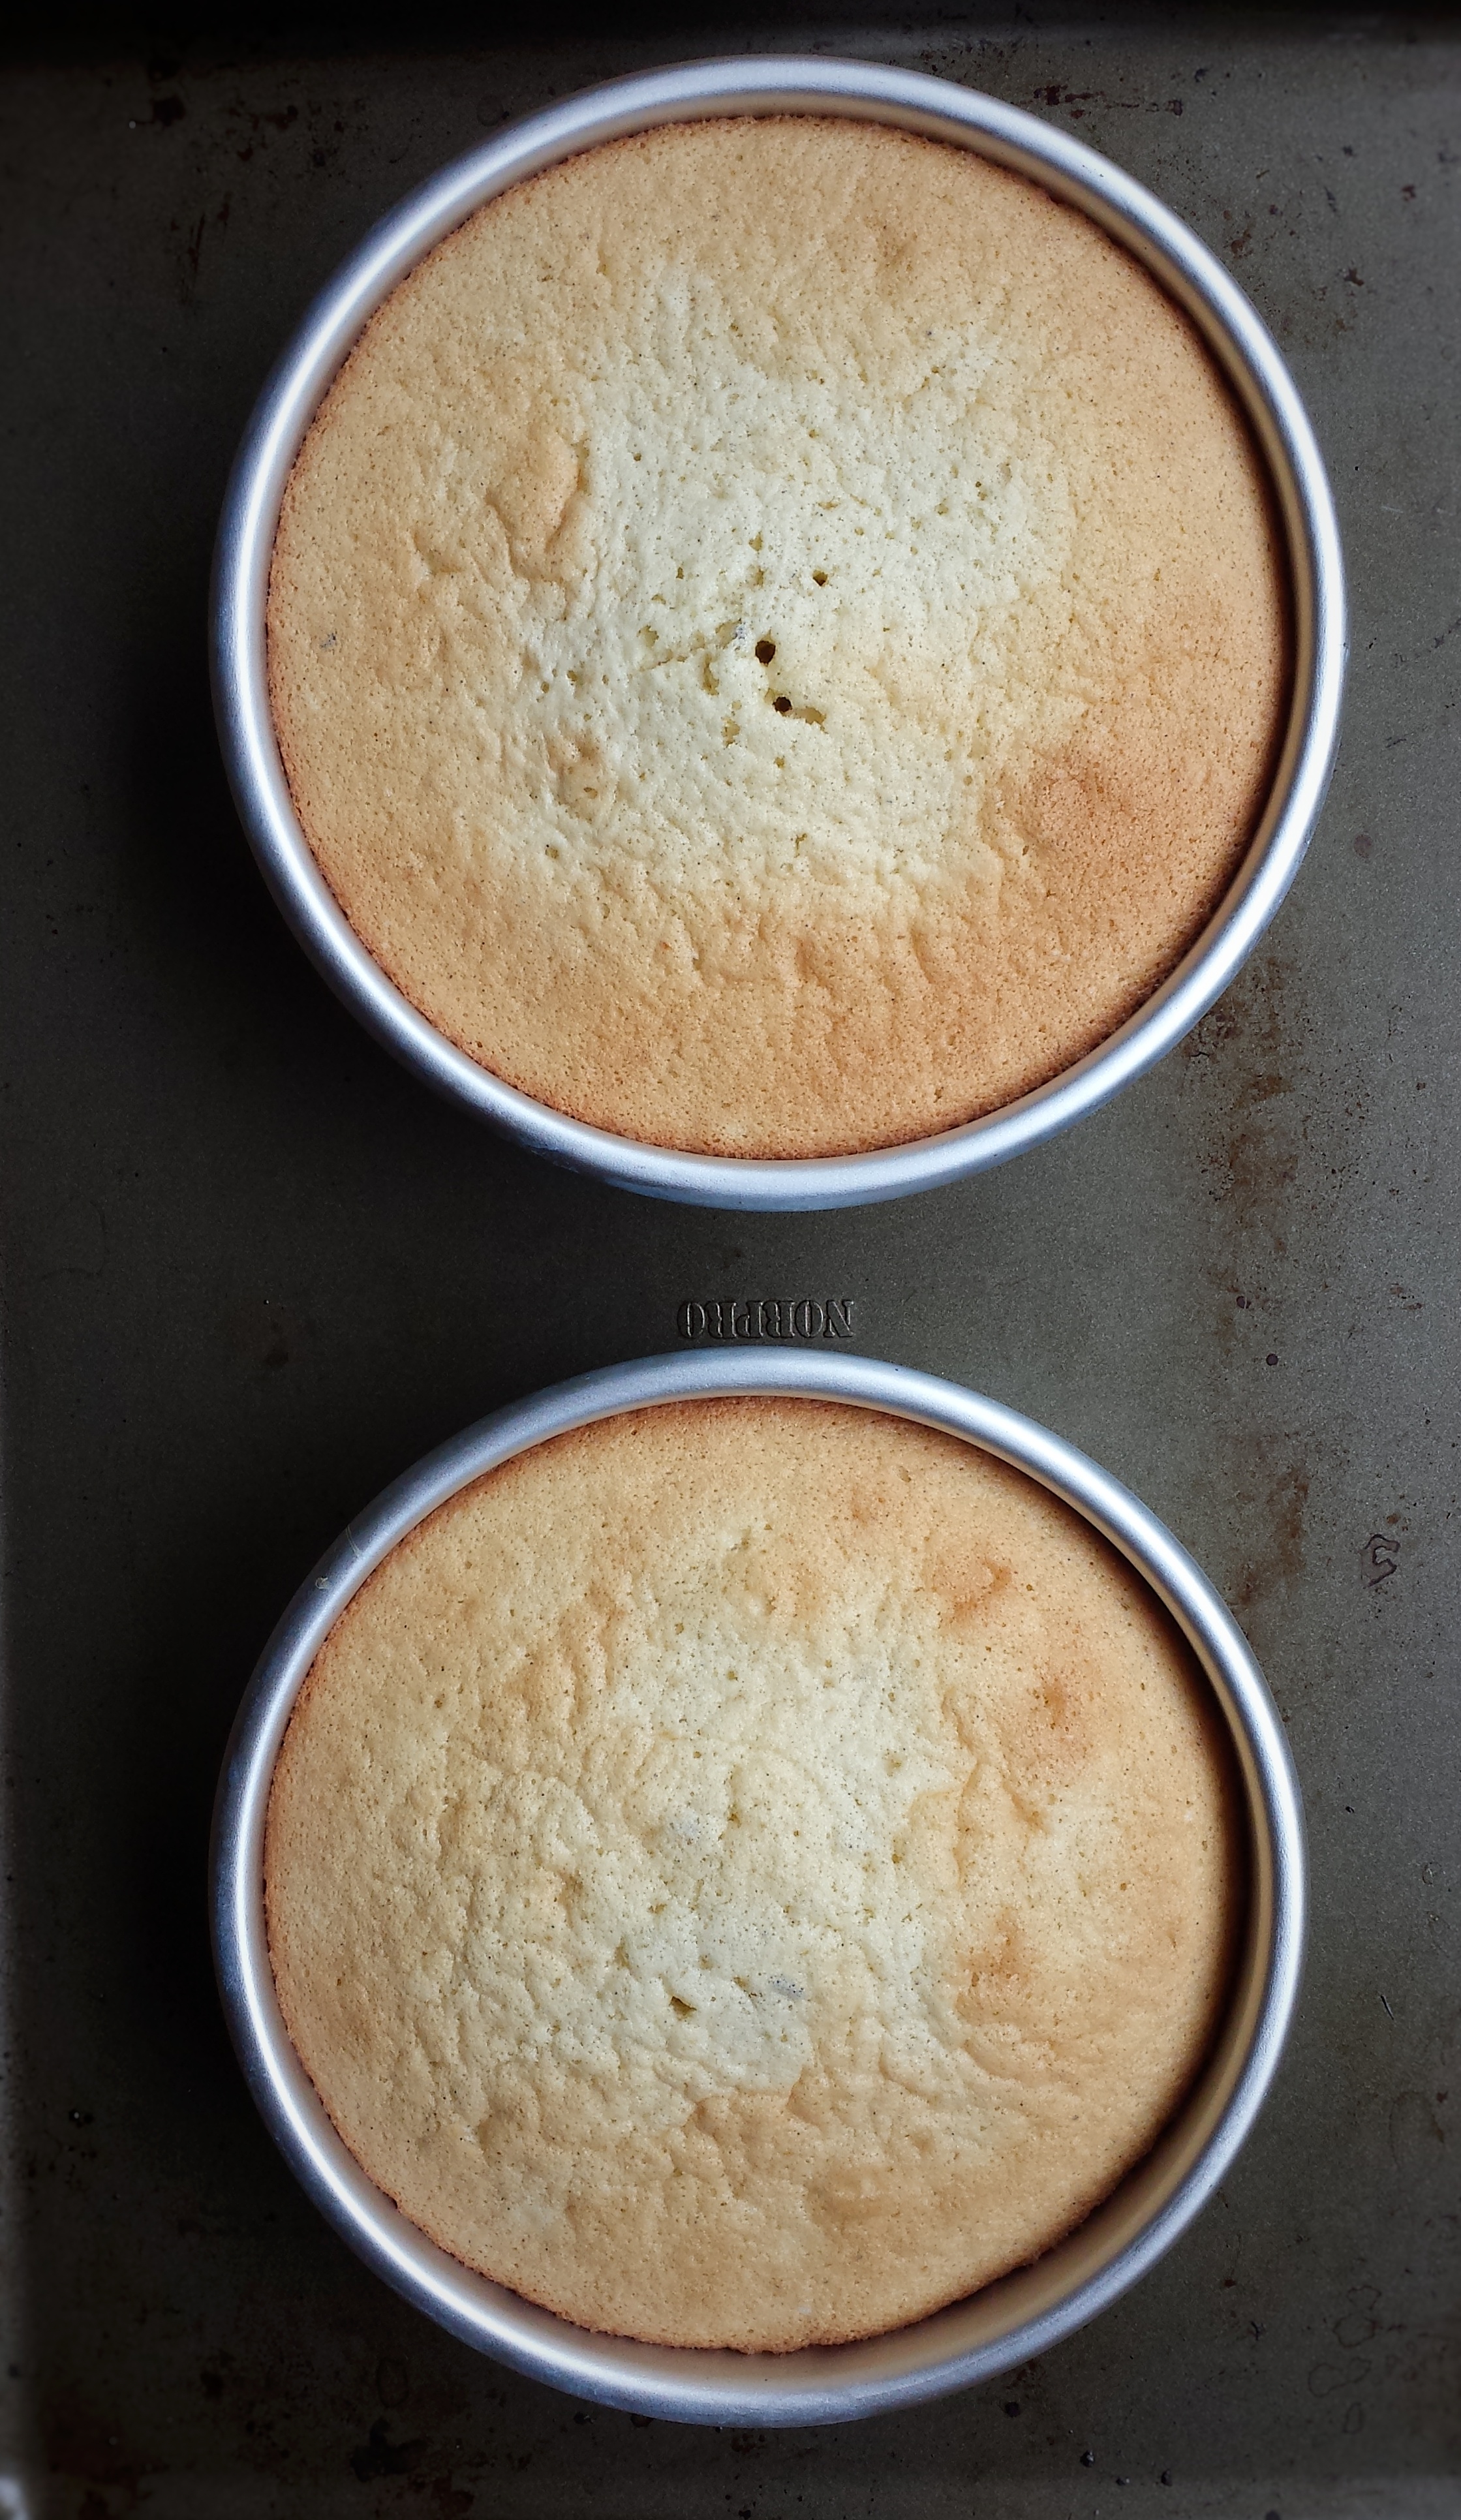
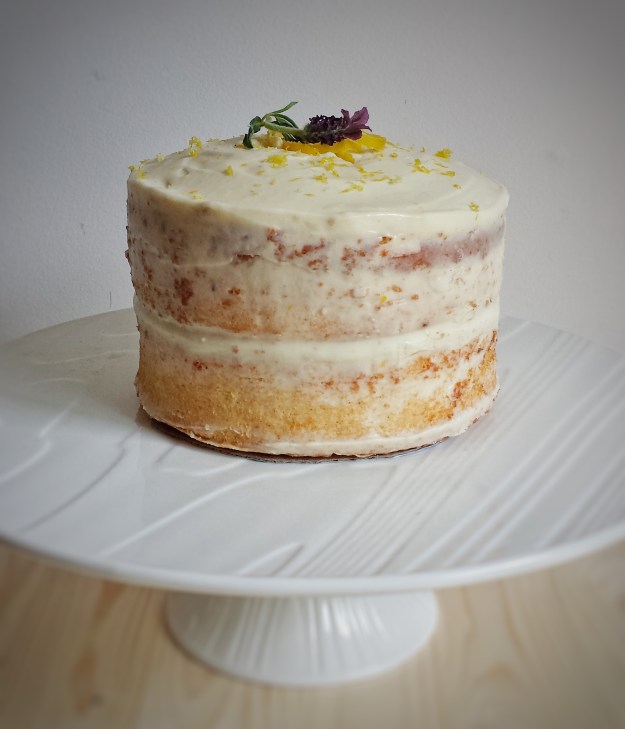
I have always wanted to bake with dried lavender too. Since Mother’s Day is coming up, I thought it would be a perfect time to try. It has a strong flavour, so use very sparingly. (I added a little too much the first time and my cake tasted almost medicinal ! So I had to cut it down and remake the cake.) Make sure you get dried lavender that is for culinary use only. I wouldn’t recommend making your own, as some plants may have been treated with pesticides. I decided to make a naked Lemon Lavender Cake with Cream Cheese Frosting. Naked cakes are very popular these days, but my primary reason was my terrible decorating skill ! With a naked cake, I can get away with the imperfection ! Secondly, I prefer cakes with less frosting (though my daughter would disagree), I can enjoy more of the cake itself rather than just butter and sugar. So, here it is, my Mother’s Day celebration ! A cake with bright lemon flavour and a subtle touch of lavender. Happy Mother’s Day to my mom, myself and all the wonderfull moms in the world ! 

Oh, you probably were wondering about my daughter’s fishes. Well, I told her we will get some more later, but she may want to pick something other than the tetras, cause they just don’t live very long and I really don’t enjoy scooping out dead fishes…..Lol
Makes one 6 inch cake

For the lavender sugar

  • 0.75 g (about 1 teaspoon) dried lavender flowers, food grade only 
  • 150 g granulated sugar 
  • 1/2 vanilla bean (optional)

Scrape vanilla bean and pulse all ingredients together in a food processor until blended

For the cake

  • 4 eggs (separated)
  • 150 g lavender sugar (use 30 g for the meringue)
  • 75 g all-purpose flour
  • 75 g cake and pastry flour 
  • 3 g baking powder 
  • 2 g salt 
  • 30 mL lemon juice (use 5 mL for the meringue)
  • Zest of one lemon 
  • 30 mL vegetable oil 
  • 5 mL pure vanilla extract 
  1. Preheat oven to 350°F 
  2. Lightly grease two 6″ round cake pans and line bottom with parchment paper
  3. Sift together flours, baking powder and salt, set aside
  4. In a mixing bowl, beat together egg yolks and 120 g of lavender sugar until pale
  5. Add 25 mL of lemon juice, lemon zest, oil and vanilla, mix until blended
  6. Gently fold in flour mixture
  7. In a separate bowl, using an electric mixer with whisk attachment, whisk egg whites and 5 mL of lemon juice until frothy
  8. Increase speed to high and slowly add in 30 g of lavender sugar
  9. Whisk until medium peak is formed
  10. Gently fold meringue into cake batter, 1/3 at a time, do not over mix
  11. Pour into baking tray and bake for about 20-22 minutes
  12. Cool completely before frosting 

For the cream cheese frosting

  • 250 g cream cheese
  • 60 g unsalted butter (softened)
  • 120 g icing sugar (sifted)
  • 30 mL lemon juice
  • Zest of one lemon
  • 5 mL pure vanilla extract 
  1. Beat together cream cheese and butter until light and fluffy
  2. Gradually add in icing sugar
  3. Add lemon juice,lemon zest and vanilla, mix until blended and smooth
  4. Keep in refrigerator until use

To Assemble

  1. Spread frosting between two layers of cake and on top (If the frosting is too firm to spread, you can put it in a bowl, then a hot water bath for a minute or two, just enough to soften) 
  2. Lightly frost the sides, smooth with a spatula 
  3. Keep in refrigerator 


Strawberry Hand Pies

I am a home baker, so besides the couple of pastry classes that I have attended, I have never really had any formal training. When I just started baking as a teenager, pie is something that I felt very tricky and difficult to make and I would never be able to do it. To me, making pie was not “as easy as pie” ! But, as I became more experienced, I realized it is actually not that hard. I had a few failures, but it wasn’t a “mission impossible”.  So, gathering my failures and tips from my classes, I have learned a few things: 

  1. Making hand pies or mini pies to start if you haven’t made pies before. The dough is the same, but it’s easier to roll and to control the baking time. And I think it’s more fun ! 
  2. Use very cold butter. I put the cut butter and in the freezer for about 15 minutes before using.
  3. There should be small lumps of cold butter in the dough. So rubbing in the butter by hands would be better than pulsing with a food processor as you will have larger lumps. In the oven, the butter melts creating pockets, the moisture in the butter evaporates, expanding those pockets, hence flaky crust. 
  4. Do not knead the dough, just press it together. The lumps of butter that you want for flakiness will melt if you handle the dough too much.
  5. Let the dough rest in the fridge for at least an hour or overnight before baking.  This allows the butter to firm up and the gluten to relax, which makes rolling easier. 

I hope these tips will help if making pies is on your list ! Once you manage the crust, there are so many possibilities….all the berries, apples, peaches, pears….Mmmmmm, yummy ! 

Makes about 8-10 hand pies

For the pie dough

  • 180 g unsalted butter (cut into small pieces and chilled)
  • 200 mL ice-cold water
  • 400 g cake and pastry flour, sifted
  • 30 g granulated sugar
  • 5 g salt

You will also need 1 egg for brushing top of pies and more sugar for sprinkling 

  1. Combine flour,sugar and salt
  2. Rub in chilled butter with hands until resemble coarse crumbs, there should be pea-sized lumps of butter
  3. Add cold water and mix until dough just starting to form
  4. Transfer to a lightly floured surface, and press dough together (Do not knead)
  5. Wrap with plastic wrap and refrigerate for at least 1 hour or overnight

For the strawberry filling

  • 500 g fresh strawberries (wash, hull and cut into halves or quarters)
  • 60 g granulated sugar
  • 15 g cornstarch
  1. Coat strawberries with sugar and cornstarch
  2. Cook over medium heat until soft and jam-like
  3. Cool to room temperature 

To assemble the pie

  1. Preheat oven to 375°F
  2. On a lightly floured surface, roll dough to about 0.5 cm thickness (If the dough is too hard, let it sit at room temperature for about 10 minutes)
  3. Cut into 8 cm x 8 cm squares (dough scraps can be reused, but try to press them back together instead of kneading, and reuse as little times as possible)
  4. Place bottom squares on a baking tray lined with parchment paper
  5. Spoon about 1 tablespoon of strawberry filling in the middle
  6. Brush egg wash around edges of top squares, and place over bottom squares (egg wash sides down)
  7. Press edges to seal then press down with fork
  8. Cut a small opening on top of pies to let air out during baking
  9. Brush top with egg wash and sprinkle with vanilla sugar or granulated sugar
  10. Bake for about 30 minutes, then cover top with a foil and bake for another 10-15 minutes
  11. Serve warm


Baked Double Chocolate Doughnuts 

My daughter has been asking me to make doughnuts for a while. I love doughnuts,  just not too crazy about frying. I tried frying doughnut holes a couple of times, but they came out like burnt fritters. The only doughnuts I had successfully done were my Baked Honey Crullers. So this time, I decided to bake them again. I figured I would have a better chance of success. And voilà! I made it in one try ! The more exciting part is my son loves them ! He doesn’t have a sweet tooth and it’s not often that he likes my goodies (at least me and my daughter think they are !) He even asked me to make it again and I did ! It’s so easy when you have a doughnut pan. You can actually transform any of your muffin or quick bread recipes into doughnuts !  Just dress them up with a glaze or some sprinkles ! 

Makes 12 -14 doughnuts

For the doughnuts 

  • 270 g all-purpose flour
  • 40 g unsweetened cocoa powder 
  • 120 g granulated sugar 
  • 60 g demerara or brown sugar 
  • 3 g baking powder 
  • 3 g baking soda 
  • 2 g salt 
  • 2 large eggs
  • 60 mL vegetable oil 
  • 250 mL buttermilk (adjust if needed)
  • 5 mL pure vanilla extract 
  1. Preheat oven to 350°F
  2. Sift together flour,cocoa powder, baking powder, baking soda and salt
  3. Add in both sugars 
  4. In another bowl, mix together eggs, oil, buttermilk and vanilla 
  5. Add wet ingredients into dry ingredients 
  6. Mix until just blended 
  7. Spoon/pour batter into lightly greased doughnut trays 
  8. Bake for 10-12 minutes 
  9. Cool completely on rack 

For the chocolate glaze 

  • 120 g semi-sweet or dark chocolate, finely chopped 
  • 120 mL whipping cream
  • 2.5 mL pure vanilla extract 
  1. Heat whipping cream over medium heat until just starting to boil 
  2. Pour it over chopped chocolate 
  3. Wait 30 seconds, add vanilla and stir until smooth 

When doughnuts are cooled, dip one side into chocolate glaze, place on rack to dry 

Tools that I used

Wilton Nonstick 6-Cavity Donut Pan

You can get this doughnut pan through the Amazon website by clicking the above link. I will receive a small compensation if you purchase the item. 


Peanut Butter Chocolate Chip Blondies 

Whether is a PB & J sandwich or a cookie, even a dipping sauce for salad rolls, to me, anything with peanut butter just feels comforting and very satisfying. My daughter loves it too, especially with her banana and apples. I am very thankful that we don’t have any nut allergies in our family so we can enjoy this tasty butter. I was craving for a sweet dessert bar the other day, so I put together this Peanut Butter Chocolate Chip Blondies.  It’s quick, easy and just…..hearty! (I think dessert can be hearty too, not just soup….) I used milk chocolate chips, but you can also use white or butterscotch chips, or M&M’s, Reese…..etc.

Makes about 16 squares

  • 120 g unsalted butter
  • 120 g smooth peanut butter 
  • 80 g demerara or brown sugar 
  • 60 g granulated sugar 
  • 2 eggs
  • 5 mL pure vanilla extract 
  • 250 g all-purpose flour 
  • 3 g baking soda 
  • 2 g salt
  • 100 g chocolate chips 
  1. Preheat oven to 350°F
  2. Sift together flour,baking soda and salt, set aside 
  3. Using an electric mixer with the paddle attachment, cream together butter, peanut butter and sugars until fluffy 
  4. Mix in eggs and vanilla
  5. Add flour mixture in 2 parts, mix until blended 
  6. Stir in chocolate chips
  7. Bake in a square or a rectangular pan lined with parchment paper for 30-35 minutes (my pan is 9 inch x 13 inch)
  8. Cut into squares when cooled

Rose Water Sugar Cookies 

I’ve never been good at drawing. Really, if you ask me to draw something right now, it’s going to look like it was drawn by a six years old ! That’s why I admire people, including my daughter, who has the talent to draw. Her pictures are always full of creative ideas and her characters are very lively. Like this one here….Coffee and Tea are having a battle ! 

And this one, which she drew last week at her art class, illustrates people taking photos of the beautiful Cherry Blossoms.

And yes, thanks to the Cherry Blossoms, otherwise we wouldn’t even notice that Spring is here! The weather is still rainy and pretty cold…….To help “spring” our spirits back, I made these Rose Water Sugar Cookies ! The rose water gives the cookies a nice floral flavour, but you don’t need very much. I decorated the cookies two ways, with coloured sugar and with royal icing. (This is the time when I really wish I am as artistic as my daughter, so I can make my cookies prettier !) 

People often wonder what I do with all the goodies I made. I mostly share them with friends and family.  But this time, I wrapped them up nicely and sent them to my kids’ school for their annual Spring Fair ! Being able to share them and help raise money for our school feels fantastic ! Happy Spring everyone !

Makes about 3-4 dozens 

For the cookies 

    • 360 g all-purpose flour 
    • 3 g baking soda 
    • 2 g salt
    • 120 g unsalted butter, at room temperature
    • 180 g granulated sugar 
    • 1 egg + 1 egg white for brushing 
    • 5 mL pure vanilla extract 
    • 30 mL lemon juice 
    • Zest of 1 small lemon 
    • 5 mL rose water
  1. Preheat oven to 325°F
  2. Sift together flour,baking soda and salt, set aside 
  3. Using an electric mixer with the paddle attachment, cream together butter and sugar until fluffy 
  4. Add 1 egg, vanilla, lemon juice and lemon zest and rose water, mix until blended 
  5. Mix in flour mixture, 1/3 at a time  
  6. Transfer to a lightly floured surface and knead until dough is formed
  7. Roll out to about 0.3 cm in thickness 
  8. Cut with cookie cutters (You can collect the dough scraps all together and re-roll, cover unused dough with a damp cloth or plastic wrap)
  9. Place on cookie sheets lined with parchment paper 
  10. If decorating with coloured sugar, brush top with egg white, sprinkle with sugar, then bake for 8 minutes. If decorating with royal icing (see recipe below), bake first for 8 minutes, cool completely, then decorate. 

Royal Icing

    • 45 g meringue powder,sifted 
    • 500 g icing sugar
    • Pinch of salt
    • 90 – 120 mL warm water
    • 5 mL pure vanilla extract
    • 10 mL corn syrup 
    • Gel food colouring
  1. Mix meringue powder with about 45 mL of water, let sit for a few minutes 
  2. Stir in vanilla and corn syrup 
  3. Using an electric mixer with the whisk attachment, start mixing icing sugar and salt at low speed 
  4. Add meringue powder mixture 
  5. Slowly add in more warm water until shiny and desired consistency (thicker for outlining and thinner for filling)
  6. Add gel food colouring 

This recipe is also part of the Canadian Food Creatives’ round up. Our topic this month is “Bring On Spring” !  Be sure to check out the links below for more Spring recipes from other Canadian Food Bloggers. You can also find them on social media using the hashtag #CDNFoodCreatives. Many thanks to Melanie Maxwell at The Refreshanista for hosting.