Tag Archives: desserts

Baked Coconut Sticky Rice Cake for Lunar New Year

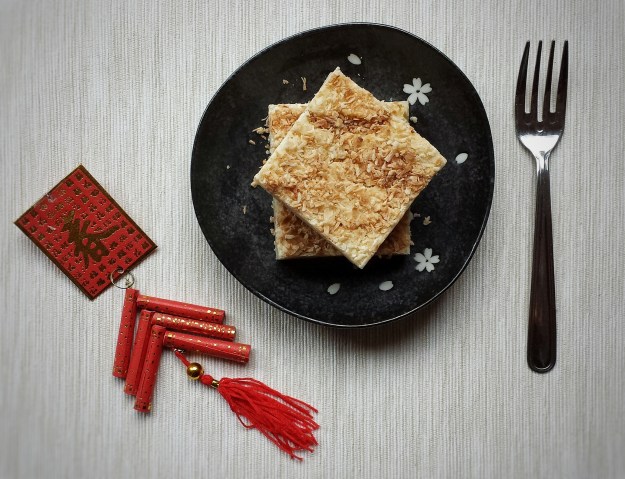
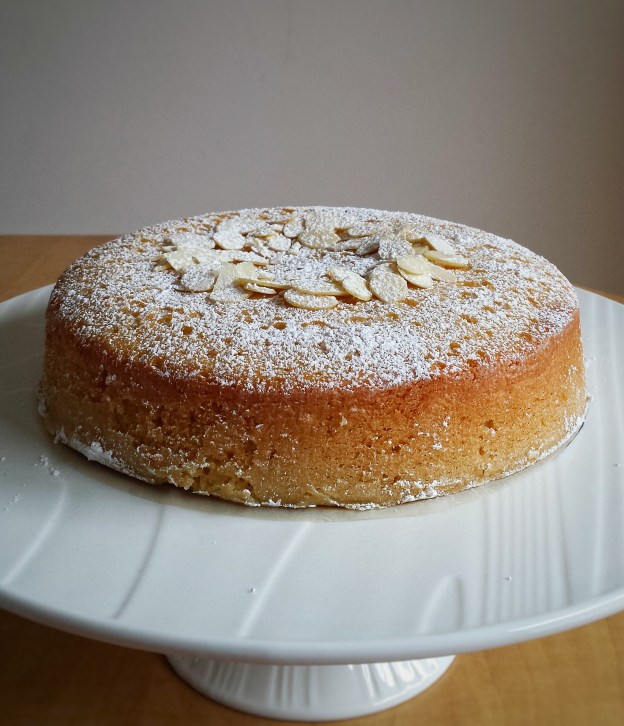
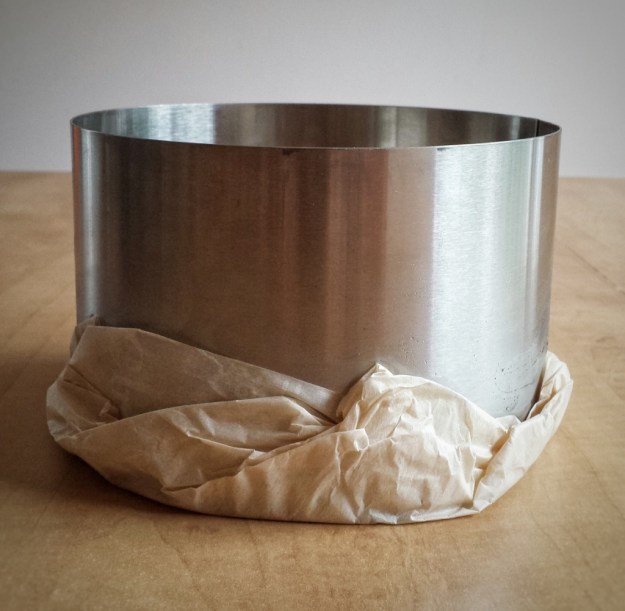
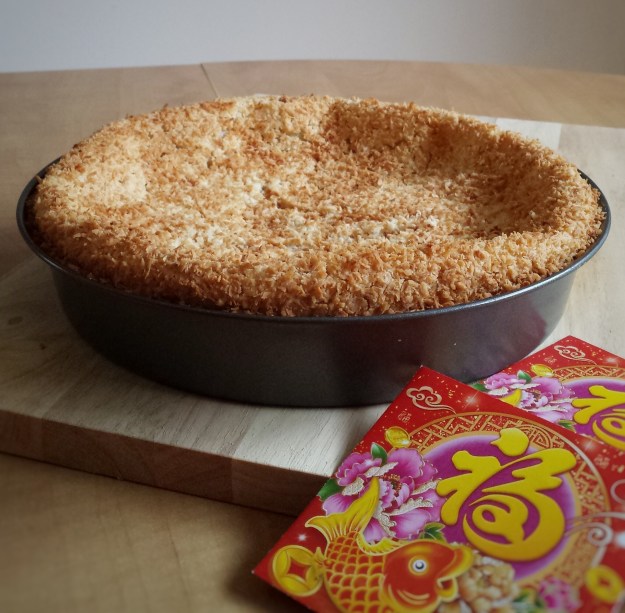
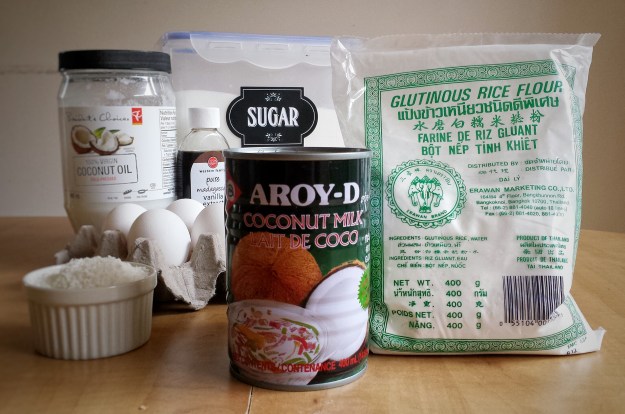
Lunar New Year was my favourite celebration when I was a kid in Hong Kong. I could visit and play with my cousins, get red envelopes and of course, eat lots and lots of good food ! My mom used to make all kinds of dishes and rice cakes, sweet and savoury. To be honest, I have never made them, because hers are always the best! But this year I thought…..hey, I am a baker, I should at least bake something to celebrate. Then, I remembered a recipe from my mom’s friend….Baked Coconut Sticky Rice Cake! I have modified her recipe to make it less greasy and added some shredded coconut on top. The glutinous rice flour and coconut milk should be available in any Asian market. Use the brands in the picture if you can find them, as according to the expert, aka my mom, they are better. (I am not sponsored by them, just personal preference) The cake will rise inside the oven, but then concave in a little when cooled and that’s ok. It doesn’t change the taste nor the texture of the cake. I used a round cake pan because but in Chinese, the word “round” has a meaning of being together. You can use a square pan, which probably will be easier to cut.

Wishing everyone good health and a prosperous year !

Baked Coconut Sticky Rice Cake

Makes one 8 inch round cake

  • 400 g glutinous rice flour, sifted (1 package)
  • 200 g granulated sugar
  • 5 eggs (lightly beaten)
  • 400 mL canned coconut milk (1 can)
  • 60 mL coconut oil (melted)
  • 1 teaspoon pure vanilla extract
  • 45 g unsweetened shredded coconut Baked Coconut Sticky Rice Cake
  1. Preheat oven to 350°F
  2. Line bottom of baking pan with parchment paper and lightly grease bottom and sides
  3. In a large bowl, mix together flour and sugar
  4. Stir in eggs, coconut milk, oil and vanilla until smooth using a hand whisk
  5. Strain batter through a mesh and pour into baking pan
  6. Sprinkle shredded coconut on top
  7. Bake for about 30 minutes, then reduce heat to 325ºF and bake for another 30 minutes (toothpick should come out clean when inserted into middle)
  8. Turn heat off, leave cake in oven with door ajar for about 20 minutes
  9. Take it out, cool slightly and serve warm
  10. You can store the cake in the fridge for up to 1 week. Reheat in oven before serving. Baked Coconut Sticky Rice Cake

White Chocolate and Lime Cookies 

I love citrus fruits ! The colours, the smell, the tanginess, they just brighten me up. I mostly bake with lemons or oranges and this is the first time I use lime. Normally I just use lime juice to make guacamole. The flavour of lime balances nicely with butter and white chocolate. This cookie dough is also very “unique” ! There are two kinds of flour, all-purpose and self-rising.  About 4 years ago, I tried to bake some shortbread cookies. The recipe called for cornstarch, but I accidentally put in self-rising flour ! To my surprise, they turned out really good ! Since then, I have used this combination many times with different variations and everyone likes it. Well, I guess I really have learned from my “mistake” …..but I don’t plan to correct it ! 🙂 Limes

Makes about 24 cookies 

  • 200 g unsalted butter, softened
  • 90 g icing sugar + more for dusting
  • 225 g all-purpose flour 
  • 45 g self-rising flour
  • 1/4 teaspoon salt
  • 1 tablespoon fresh lime juice
  • Zest of a small lime
  • 1 teaspoon pure vanilla extract
  • 50 g white chocolate chips 
  1. Preheat oven to 325°F
  2. Sift together both flours and salt, set aside
  3. Using an electric mixer with the paddle attachment, cream butter and sugar until fluffy
  4. Add lime juice, zest and vanilla extract 
  5. Add flour mixture in 2 parts, mix until just blended
  6. Stir in white chocolate chips
  7. Refrigerate dough for 1-2 hours to prevent cookies from spreading too much
  8. Shape dough into one inch balls and place on baking sheets lined with parchment paper, about 2 inches apart
  9. Bake for about 15 minutes, until edges just golden
  10. Cool on baking sheets for about 10 minutes, then completely on rack
  11. Dust with icing sugarWhite Chocolate and Lime Cookies


Tools I used and you may like

41rqjlmpovl._sy400_.jpg

KitchenAid K45SSWH Classic 4.5-Quart Bowl Stand Mixer, White


789.jpg

Microplane #40020 Classic Grater/Zester, Black

You can get these tools through the Amazon website by clicking the above link. I will receive a small compensation if you purchase the item.

Marzipan Cake

I never knew marzipan can be so tasty and so useful in baking ! My first encounter with it was eating some marzipan-filled chocolate. To be honest, I didn’t really enjoy it. Perhaps it was too sweet or perhaps I always prefer eating pure chocolate. But after I learned to make the Eisenbahner (Railroad) Cookies, I absolutely fell in love with it ! With high hopes for myself, I decided to make a cake this time…..but sadly…..I failed twice ! How frustrating ! The “failures” actually tasted pretty good. I realized the problem was the pans I used. For the first time, I used a 9 inch spring-form pan and the cake turned out too flat (It is a denser cake and it won’t rise very much). So I switched to a 9 inch x 5 inch loaf pan. But it took too long to bake through and the outside of the cake was dry and brown. So for the third time, I used an 8 inch cake ring and baked it in a hot water bath and…..Success finally ! I thought I would never make it !  Phew ! Now I get to sit down, relax and enjoy my cake after all that hard work !

Makes one 8 inch round cake 

  • 180 g unsalted butter, softened
  • 200 g marzipan, cut into small pieces and softened
  • 120 g granulated sugar
  • 4 eggs
  • 1 teaspoon pure vanilla extract
  • 1/2 teaspoon almond extract
  • 60 ml milk
  • 60 g honey
  • Zest of 1/2 orange
  • 180 g all-purpose flour
  • 2 teaspoons baking powder
  • 1/4 teaspoon salt
  • Icing sugar and almond slices for toppings
  1. Grease and flour an 8 inch cake ring  
  2. Wrap bottom with parchment paper, then 2 layers of aluminium foil and place on a rimmed baking trayCake RingCake Ring
  3. Preheat oven to 350°F
  4. Sift together flour, baking powder and salt, set aside
  5. Using an electric mixer with the paddle attachment, beat together butter, marzipan and sugar 
  6. Add eggs, one at a time
  7. Mix in vanilla and almond extract, milk, honey and orange zest 
  8. Add flour mixture in two parts, mix until blended
  9. Pour batter into cake ring (it’s ok if batter is slightly gritty) 
  10. Pour about one inch of hot water in baking tray and bake cake in hot water bath for about 60 minutes  
  11. Cool and remove cake ring
  12. Top with icing sugar and almond slicesMarzipan CakeMarzipan Cake

Espresso Truffles 

2016 has been a pretty busy blogging year for me….Trying new recipes, participating in recipe round-ups, collaborative posts, Gastroposts, etc.  I also took a few pastry courses to improve my knowledge and skills. It’s been fun and rewarding. To treat myself and write my last post for the year, I made these Espresso Truffles with two of my favourite things, coffee and chocolate ! These little balls are so yummy, just one bite can already put a smile on my face and they are surprisingly easy to make ! Looking ahead, I hope to continue to learn, create and share more recipes.  Have a Happy New Year ! Espresso Truffles

Makes about 16 truffles

    • 180 g semi-sweet chocolate (finely chopped)
    • 60 g dark chocolate (70%, finely chopped)
    • 120 mL whipping cream
    • 3 g French Vanilla or other flavoured coffee beans (coarsely crushed)
    • 1 teaspoon pure vanilla extract
    • toppings of choice : unsweetened cocoa powder, melted chocolate for dipping (about 8 oz for 16 truffles), sea salt, crushed nuts, shredded coconut, etcEspresso Truffles
  1. Pour whipping cream and crushed coffee beans in a non-stick pot over medium heat until simmering
  2. Pour hot cream through a fine mesh and over chopped chocolate, let sit for about 30 seconds, add vanilla
  3. Stir until smooth
  4. Cool, then put in fridge for about 2 hours
  5. With the help of a melon scooper or a teaspoon, shape about 2 teaspoons each into balls
  6. Roll over desired toppings or dip them in melted chocolate 
  7. Keep in fridgeEspresso Truffles

Eggnog Panna Cotta with Frozen Sugared Raspberries

We love panna gotta and we love eggnog. So Christmas seems to be a perfect time to combine them together!  It makes a great dessert for your holiday dinner.  It is super easy and you can prepare it the day before.  For the sugared raspberries, many recipes use raw egg whites which I am not comfortable with.  I think a simple syrup works just as good. I also like to freeze mine for a little crunchiness.  Have a Merry Christmas everyone !

Makes about 4 servings

For the sugared raspberries

  • 100 g raspberries (wash and dry)
  • 60 g granulated sugar
  • 1/4 cup boiling water
  • 60 g vanilla sugar (or you can just use granulated sugar)

For the panna cotta

  • 1 envelope (7g) unflavoured gelatin
  • 1/2 cup milk
  • 1 cup eggnog
  • 1/2 cup whipping cream
  • 30 g granulated sugar
  • 1/2 teaspoon pure vanilla extract
  • pinch of nutmegSugared Raspberries
  1. For the sugared raspberries, prepare a simple syrup by dissolving 60 g of granulated sugar in 1/4 cup of boiling water, then let cool
  2. Gently brush raspberries with simple syrup and roll in a dish of vanilla sugar or granulated sugar
  3. Place on a tray lined with parchment paper and freeze for 2 or more hoursSugared Raspberries
  4. For the panna cotta, sprinkle gelatin over milk and let sit for a few minutes 
  5. Heat together eggnog, whipping cream and sugar in a non-stick pot over medium heat until sugar all dissolved and just starting to bubble, turn heat down to low 
  6. Add gelatin mixture
  7. Stir until gelatin all dissolved, add pinch of nutmeg
  8. Turn heat off, add vanilla extract
  9. Strain through a fine mesh twice
  10. Pour into ramekins or desired containers
  11. Let cool and refrigerate until set, at least 3 hours or overnight
  12. Top with frozen sugared raspberries when ready to serve

Eggnog Panna Cotta

Marble Chocolate Bark 

This is probably one of the easiest homemade Christmas treats that you can give to your friends and relatives. And there are so many different ingredients you can use.  All you need are three basics :

  1. chocolate, dark, milk, white or a mix
  2. something chewy, like dried fruits
  3. something crunchy, like nuts, seeds,toffee bits, crushed candy canes

I like mine very simple because I still like to enjoy the chocolate.  So here is my creation !

  • 240 g dark chocolate
  • 120 g white chocolate 
  • 30 g pistachios (remove shells and crush into small pieces)
  • 30 g dried cranberries 
  1. Melt chocolates in a heat-proof bowl over a pot of simmering water.
  2. Pour dark chocolate on a baking tray lined with parchment paper, spread evenly with a spatula
  3. Drop spoonfuls of white chocolate over dark chocolate
  4. Swirl with a skewer or handle of a spatula to create marble effect
  5. Sprinkle dried cranberries and pistachios 
  6. Refrigerate until firm
  7. Break into pieces


Eisenbahner (Railroad) Cookies 

This is a cookie that I learned at my pastry course earlier this year. It was one of my favourites. It’s beautiful, festive, delicious and has a cool name! It looks like a railroad track, hence the name Eisenbahner, which means railroad man in German. When I did a google search, almost all the recipes for this cookie are in German. So, I think it’s a great idea to share this in our Canadian Food Creatives and the Canadian Christmas Cookie Exchange round-up. There are 3 parts to this cookie, the base, the marzipan paste and the jam. Yes, it may seem a little complicated, but it’s definitely worth all the work. Hope you enjoy the ride !

Makes about 12 cookies

For the cookie base

  • 120 g cold unsalted butter
  • 60 g granulated sugar
  • 1 egg yolk
  • 170 g cake and pastry flour

For the marzipan paste and jam 

  • 200 g marzipan
  • 20 g unsalted butter, softened
  • 30 g icing sugar
  • 30 g honey
  • 1 egg white
  • 100 g raspberry jam (You want the jam to be hot and runny, so you can put it in a bowl and sit in a hot water bath for a few minutes before using)
  1. To make the cookie base, mix together cold butter and sugar using a wooden spoon until no more lumps
  2. Add egg yolk, mix until blended
  3. Add flour all at once, mix then transfer onto a table or counter and gently knead dough together (do not overmix, just work until ingredients are mixed in)
  4. Wrap with plastic wrap, refrigerate for at least 2-3 hours or overnight
  5. To make the marzipan paste, mix together marzipan, softened butter, icing sugar and honey into a thick paste (I found it easier to mix them with hands)
  6. Add egg white, mix until it has a stiff piping consistency (it looks like mash potato and you may not need the whole egg white)
  7. Put in piping bag with a star tip
  8. When ready to bake, preheat oven to 325ºF
  9. Take dough out from fridge and knead gently on a floured surface until pliable
  10. Roll it flat, about 0.3 cm in thickness (it’s OK if it cracks a little, just patch it back together)
  11. Cut into two 6 cm x 25 cm rectanglesEisenbahner (Railroad) Cookies
  12. Bake on a cookie sheet lined with parchment paper until edges just starting to brown, about 8 minutes
  13. Cool, then brush a thin layer of hot jam in between the 2 sheets 
  14. Pipe marzipan paste along edgesEisenbahner (Railroad) Cookies
  15. Turn oven up to 425-450ºF at broiler setting
  16. Bake 2-3 minutes just to caramelize the marzipan paste (watch closely, as it can burn very quickly)
  17. Cool, then fill centre with hot jamEisenbahner (Railroad) Cookies
  18. Cool completely, cut into pieces, dust with icing sugarEisenbahner (Railroad) Cookies

Original recipe by Chef Marco Ropke at the Vancouver Pastry Training Centre.

Be sure to check out the links below for more cookie recipes from other Canadian Bloggers.  You can also find them on social media using the hashtag #CDNFoodCreatives . Many thanks to Laura Irvin at The Blue Nose Baker , Kacey Joanette at The Cookie Writer and Evelyne Budkewitsch at The Cultureatz for organizing.

cookie-collage-final.jpg.jpeg

Choux Pastry Puffs 

I was going to call these Cream Puffs, but my daughter insisted that these are cream sandwiches ! She said cream puffs should have a hole to fill the cream inside the puffs… OK, OK… So, now I call them Choux Pastry puffs ! Whatever it’s called, they look cute and are absolutely delicious ! (Actually I think Choux Pastry Puffs sounds fancier !) They will be a perfect dessert for your upcoming holiday dinners! 

Makes about 16 puffs 

  • 200 mL water
  • 90 g unsalted butter
  • 1/4 teaspoon salt
  • 30 g  granulated or vanilla sugar 
  • 120 g all-purpose flour
  • 3 eggs
  • 1 cup whipping cream
  • 2 tablespoons icing sugar, plus more for dusting, sifted 
  • 1/2 teaspoon pure vanilla extract 
  • 50 g semi-sweet chocolate (melted), for drizzling
    1. To prepare the whipped cream, place a mixing bowl into freezer for about 15 minutes 
    2. Using an electric mixer, whisk together whipping cream, 2 tablespoons of icing sugar and vanilla, in the cold mixing bowl, until stiff peak is formed 
    3. Refrigerate until use 
    4. To prepare the choux paste, heat together water, butter, salt and granulated or vanilla sugar in a pot over medium heat until just starting to boil
    5. Turn heat down to low, add flour all at once
    6. Stirring constantly, cook until a thin film of paste formed at the bottom of the pot, about 5 minutes
    7. Transfer paste to a heat-proofed mixing bowl and cool down
    8. Meanwhile, preheat oven to 350ºF and prepare piping bag with desired piping tip
    9. Add eggs to paste, one at a time and mix well after each addition
    10. Transfer to piping bag and pipe into rounds on baking sheets lined with parchment paper, no bigger than 2 inches in diameter Choux Pastry Puffs
    11. Bake at 350ºF  for about 12-14 minutes until starting to brown, turn heat down to 325°F and bake for another 15 minutes until golden (if puffs are under baked, they will collapse after taken out)
    12. Turn heat off, leave puffs inside oven for about 15 -20 minutes with oven door ajar
    13. Take puffs out, let cool on baking sheets, then completely on rack Choux Pastry Puffs
    14. Cut puffs in halves, fill centres with whipped cream
    15. Drizzle with melted chocolate and dust with icing sugar, serve immediately Choux Pastry Puffs

Double Chocolate Cranberry Cookies 

I was craving for some chocolate cookies yesterday. Not just a plain chocolate chip cookie. But the decadent kind that is loaded with chocolate, and all you want to say after taking a bite is Mmmmm…..Mmmmmm and Mmmmmm ! So here they are ! Rich, chocolaty and soft…. I had to quickly shoot a few photos before they were all gone !
This is my first time using coconut sugar. Its taste and sweetness are very similar to brown sugar. I do find it gives the cookies a slightly drier texture. The cranberries are optional, but I thought it’s nice to add some tanginess. I hope you enjoy them as much as we do ! 

Makes about 16 cookies

  • 150 g all-purpose flour
  • 25 g unsweetened cocoa powder
  • 1/2 teaspoon baking soda
  • 1/4 teaspoon salt
  • 100 g unsalted butter
  • 60 g coconut sugar (or brown sugar)
  • 60 g granulated sugar
  • 1 egg
  • 1 teaspoon pure vanilla extract
  • 50 g dark chocolate, 70%, (chopped into small chunks)
  • 50 g semi-sweet chocolate (chopped into small chunks)
  • 60 g dried cranberries
  1. Preheat oven to 350ºF
  2. Sift together flour,cocoa powder, baking soda and salt, set aside
  3. Cream together butter and sugars using either an electric mixer with the paddle attachment or by hand with a wooden spoon (I just did it by hand)
  4. Add egg and vanilla, mix until blended
  5. Mix in flour mixture in two parts
  6. Stir in chocolate chunks and dried cranberries
  7. Drop about 1 tablespoon each of dough onto baking sheets lined with parchment paper, about 2 inches apart
  8. Bake for about 12 minutes
  9. Cool on baking sheets for about 5 minutes, then completely on rack

Double Chocolate Cranberry Cookies

Matcha (Green Tea) Mochi 

Mochi is one of my favourite desserts ! It’s sweet, soft, chewy….. just delicious. Traditionally, it is made by steaming a short-grain rice called mochigome, then it is mashed and pounded with wooden mallets in a mortar. I saw a video on YouTube on the fastest mochi maker in Japan. Wow !  It sure takes some serious skills and labour ! (Here is the link if you are interested https://www.youtube.com/watch?v=tmSrULDVRPc).

Of course I don’t have those skills and tools. This recipe uses sweet rice flour and is very simple. The red bean paste matches so well with the green tea flavour.  With a cup of green tea, I feel like I am in Japan……I wish ! 

Makes about 8-10 pieces

  • 150 g sweet red bean paste (coarse or fine)
  • 180 g sweet rice flour (mochiko)  
  • 1 teaspoon matcha powder
  • 60 g granulated sugar 
  • 300 mL water
  • 1/4 cup potato starch (for dusting) 
  1. Scoop red bean paste with a teaspoon into small balls (about 1/2 inch) 
  2. Place in freezer for about 15 minutes 
  3. Mix together sweet rice flour, matcha powder and sugar in a large microwavable bowl 
  4. Add water, mix well 
  5. Microwave on high for 1+1/2 minutes, remove and stir, then microwave on high again for about one more minute (each microwave oven is different, you may need to adjust the time) 
  6. Cool slightly for about 5 minutes 
  7. Place a piece of parchment paper on work surface and dust generously with potato starch 
  8. When dough is still fairly warm, spoon about 1-2 tablespoons each onto dusted parchment paper (dough is very sticky)
  9. Put a red bean paste ball in the middle, wrap and seal by pinching the edges together 
  10. Dust with more potato starch if needed to prevent sticking (you can dust off the extra with a pastry brush when mochi is cooled
  11. Place seal side down on a tray lined with parchment paper  
  12. Cool and serve. You can keep them in an air-tight container for up to 2 days at room temperature 

Matcha (Green Tea) Mochi