Tag Archives: recipes

Butterscotch Coconut Cookies

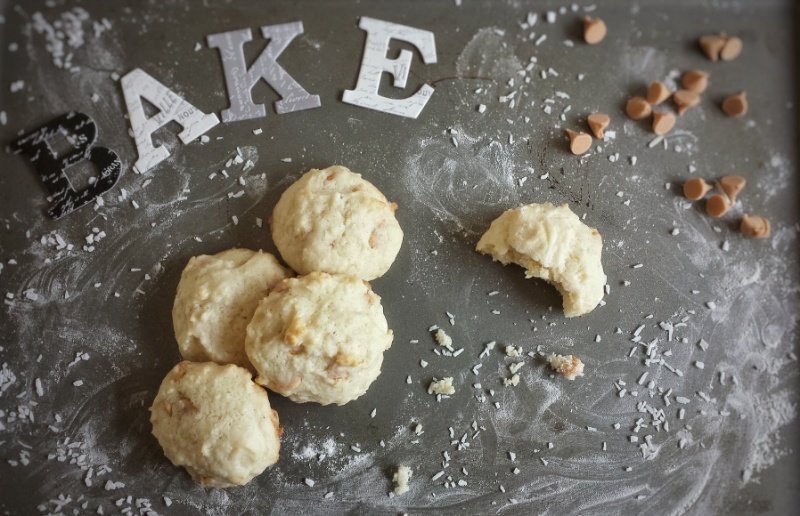
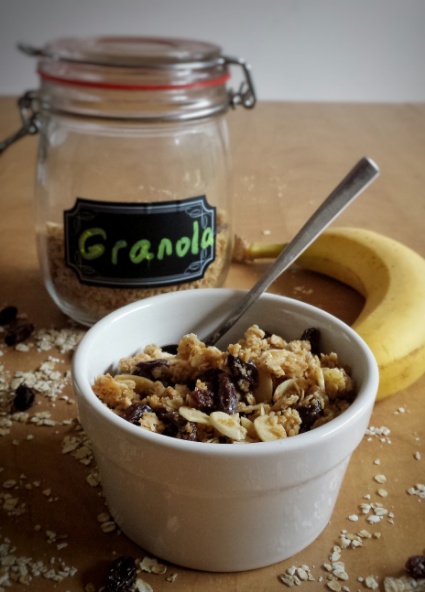
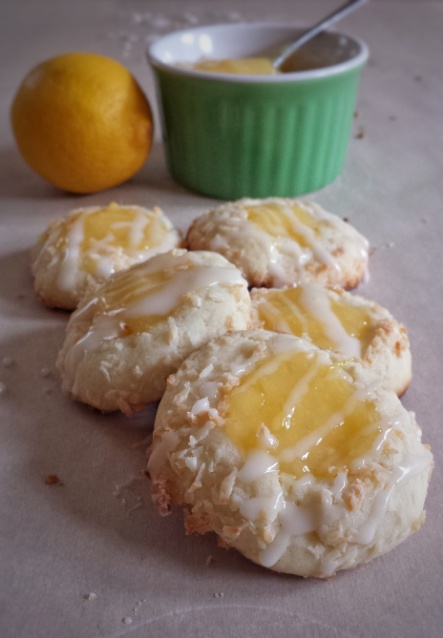
I was cleaning up my pantry today. I found many bags and containers of leftover, soon expired ingredients. So I threw most of them together and made some granola bars. Still left with some butterscotch chips and shredded coconut, I decided to put the two together. I was never a big fan of butterscotch, but these cookies came out soft, sweet and chewy, they are super yummy ! So if you have some leftover ingredients in your pantry, don’t feel shy to experiment, you never know what you can come up with.

Makes about 40 cookies
Total time = 30 minutes

  • 2 cups all-purpose flour
  • 2 teaspoons baking powder
  • 1/2 teaspoon salt
  • 1/2 cup unsalted butter
  • 1 cup granulated sugar
  • 2 eggs
  • 1 teaspoon pure vanilla extract
  • 1/4 cup canned coconut milk
  • 1/2 cup unsweetened shredded coconut
  • 1/2 cup butterscotch chips
  1. Preheat oven to 350ºF
  2. Sift together flour, baking powder and salt, set aside
  3. Using an electric mixer with the paddle attachment, cream butter and sugar until fluffy
  4. Add eggs, vanilla and coconut milk, mix until blended, scraping sides and bottom of mixing bowl
  5. Stir in shredded coconut and butterscotch chips
  6. Drop about 1 tablespoon each of dough onto cookie sheets lined with parchment paper, spacing 2 inches apart
  7. Bake for about 12 minutes until edges are golden

img_20160419_102454.jpg


Earl Grey Orange Truffles

I am mostly a coffee drinker, but I love tea too, especially after meals. Tea contains antioxidants and has many health benefits. Studies have shown that some teas may help with cancer and heart disease. Besides drinking, tea can be used in many recipes, both savory and sweet. These Earl Grey truffles are infused with a subtle tea flavour.  They taste scrumptious and are so easy to make!

Makes about 24 

  • 2 Earl Grey tea bags
  • 3/4 cup heavy or whipping cream
  • Zest of one medium orange (about 1 teaspoon)
  • 12 ounces semi-sweet chocolate or dark chocolate
  • 1 teaspoon pure vanilla extract
  • Unsweetened cocoa powder for coating
  1. Heat cream in a non-stick pot over medium heat until just starting to bubble
  2. Remove from heat, put in tea bags and orange zest, let steep for about 1 hour (You can cover the pot with a dry tea towel but not the lid of the pot, otherwise condensations will drip into mixture)
  3. Finely chop chocolate, set aside in a large mixing bowl
  4. After 1 hour, remove tea bags, squeezing the tea out into the cream
  5. Strain out orange zest with a mesher
  6. Reheat cream mixture in a non-stick pot over medium heat until just starting to bubble
  7. Pour over chopped chocolate, let sit for 1 minute
  8. Add vanilla, stir until smooth
  9. Cool, then put in fridge for about 3 hours
  10. With the help of a melon scooper or a teaspoon, roll 2 teaspoons each into balls
  11. Roll in unsweetened cocoa powder
  12. Keep in fridge

img_20160413_141603.jpg

Dates Bars

Dates are sweet, delicious and nutritious. They are a good source of fibre, vitamin B, iron and many more. Medjool dates are of better quality but I just used regular dried dates from the bulk section of a grocery store, and it came out fine. I actually prefer eating medjool dates on their own to fully enjoy the goodness. I got a box of Trader Joe’s medjool dates for X’mas from my friend and I munched them all within a week!

Makes about 16 squares
Total time = 75 minutes

  • 1 cup rolled oats
  • 1 cup all-purpose flour
  • 1/2 cup demerara or brown sugar
  • 1/2 teaspoon baking soda
  • 1/4 teaspoon salt
  • 120 g unsalted butter, chilled and cut into small pieces
  • 400 g pitted dates, diced
  • 1 cup water
  • 1 teaspoon pure vanilla extract
  1. Preheat oven to 350ºF
  2. In a mixing bowl, mix together oats, flour, sugar, baking soda and salt 
  3. Rub in butter with hands until resembles coarse crumbs
  4. Place half of crust in a 8 inch x 10 inch baking pan (or pan of choice) lined with greased parchment paper
  5. Press firmly and evenly
  6. Bake for about 15 minutes, let cool
  7. Meanwhile, cook dates and water in a non-stick pot over medium heat about 15 minutes until thickened
  8. Turn heat off, stir in vanilla and let cool slightly
  9. Spread dates paste evenly on top of baked crust
  10. Sprinkle remaining crust mixture (just a thin and even layer)
  11. Bake for about 25 minutes until golden
  12. Cool completely before cutting into squares

Homemade Granola

Granola is so easy to make, even my eight year old daughter can almost do it all by herself (except using the oven) ! You can make it as simple as ours, or you can add more of your favourites. Eat it with milk, yoghurt and fresh fruits as a healthy breakfast or snack.

Makes about 2 cups
Total time = 30 minutes

  • 1 cup quick oats
  • 2 tablespoons demerara or brown sugar
  • 1/4 cup raisins
  • 1/4 cup blanched almond slices
  • 1 tablespoon vegetable oil
  • 2 tablespoons maple syrup
  • 1 teaspoon pure vanilla extract
  1. Preheat oven to 300°F
  2. Mix together oats, sugar, raisins and almonds
  3. Add oil, maple syrup and vanilla, mix well
  4. Place a thin and even layer on cookie sheet lined with parchment paper
  5. Bake for about 20 minutes until golden, stirring once
  6. Cool and store in air-tight container for up to 2 weeks

Peach Frozen Yoghurt

I finally got an ice cream machine! Now there are so many more recipes I can do! This is my first one using my new toy. My friend and her kids taste tested it for me and they all like it!

Makes about 1 L
Total time: 30 minutes (for soft serve )

  • 250 g frozen peaches
  • 600 g full fat plain Greek yoghurt
  • 3/4 cup granulated sugar
  • 1 tablespoon lemon juice
  • 1 teaspoon pure extract
  1. Blend peaches,100 g of yoghurt and lemon juice into a puree
  2. Whisk remaining yoghurt, sugar and vanilla extract until smooth
  3. Add puree to yoghurt mixture, mix well 
  4. Mixture should be cold, if not, you can put it in the fridge for 2-3 hours before churning
  5. Put into an ice cream machine according to manufacturer’s instructions
  6. Serve right away as a soft yoghurt or put in air tight container and keep in freezer for up to 1 month

Tools I used and you may like 

41jgxv8adpl._sy400_.jpg

Cuisinart ICE-21C Frozen Yogurt, Ice Cream and Sorbet Maker

You can get this ice cream machine through the Amazon website by clicking the above link.  I will receive a small compensation if you purchase the item.


Maple Bacon Waffles

I love waffles, especially the Belgian type. They are so soft, light and fluffy! The trick is whisking the egg whites separately first, then folding them back into the batter. The combination of bacon and maple syrup is both sweet and savory. I can’t find a word to describe these waffles other than yummy !

Makes about 5-6 waffles
Total time = 30 minutes

  • 4 strips of bacon (about 4 ounces)
  • 5 tablespoons maple syrup
  • 3/4 cup cake and pastry flour
  • 1 tablespoon baking powder
  • 1/4 teaspoon salt
  • 2 eggs, separated
  • 2/3 cup whole milk
  • 3 tablespoons warm melted butter
  • 1/2 teaspoon pure vanilla extract
  1. Preheat oven to 350ºF
  2. Brush both sides of bacon strips with 1 tablespoon of maple syrup
  3. Place on baking sheet lined with parchment paper and bake for about 20 minutes until crispy, flipping over once
  4. Place on paper towel to dry and cool
  5. Cut into small pieces, set aside
  6. Sift together flour, baking powder and salt in a large mixing bowl, set aside
  7. Using an electric mixer, at medium then high speed, whisk egg whites until stiff peak is formed
  8. Meanwhile, whisk egg yolks, milk, melted butter, vanilla and remaining maple syrup into flour mixture
  9. Fold in egg whites and bacon, do not overmix
  10. Cook in waffle maker according to manufacturer’s instructions
  11. Serve warm with butter, more bacon and maple syrup or desired toppings

Easy Raspberry Trifle

Trifle is a dessert that usually consists of pound cake, fruits, jam, custard and whipped cream.  I changed it to a healthier and easier version by using yoghurt. For the cake base, I used a microwaved mug cake. You can bake your own cake or use a store-bought one.

Makes 3-4 servings
Total time: 30 minutes

For the mug cake

  • 3 tablespoons unsalted butter, melted
  • 1/4 cup granulated sugar
  • 60 mL milk
  • 1 egg
  • 1/2 teaspoon pure vanilla extract
  • 1/4 cup self-rising flour
  • 1/8 teaspoon salt
  1. Coat inside of  mugs with 1 tablespoon melted butter
  2. In a mixing bowl, whisk together sugar, milk, 2 tablespoons melted butter, vanilla extract and egg until blended (butter may still be warm, add egg at the end to prevent curdling)
  3. Add flour and salt, whisk until smooth
  4. Pour into mugs, no more than half full
  5. Microwave for about 90 seconds

For the trifle

  • 300-400 g mug cake or store-bought cake
  • 100 g fresh raspberries
  • 1/4 cup pure raspberry jam
  • 200 g vanilla flavoured Greek yoghurt
  1. Coarsely mash raspberries with fork, add jam, mix until blended
  2. Layer cake, raspberry mixture, yoghurt in desired container…..Dig in!

Matcha Green Tea Pudding

Matcha green tea is one of my favourites !  It is served as a tea and is found in many sweets, like ice cream, cakes, cookies, candies, etc. This pudding is another tasty dessert using matcha. As the pudding cools, some matcha powder settles at the bottom which gives the pudding two layers of flavour and texture.  I like mine with sweetened red bean paste, but you can also top it with whipped cream.

Makes about 6 servings
Total time = 3 hours

  • 1 + 1/2 tablespoons matcha green tea powder
  • 2 cups whole milk
  • 1/4 cup granulated sugar
  • 1 envelope or tablespoon unflavoured gelatin powder
  • 1 teaspoon pure vanilla extract
  • 1/4 cup sweetened red bean paste or whipped cream
  1. Sprinkle gelatin over 1/4 cup of milk, let sit for a few minutes
  2. In a non-stick pot, heat remaining milk and sugar over medium heat until just starting to boil, remove from heat
  3. In a separate bowl, whisk green tea powder in about 1/2 cup of hot milk until no more lumps
  4. Add gelatin mixture, green tea mixture and vanilla into pot, stir until all dissolved
  5. Strain through a fine mesh twice and pour into bowls
  6. Cool, then wrap with plastic wrap and refrigerate for about 2-3 hours or overnight until set
  7. Top with red bean paste or whipped cream

Lemon Coconut Thumbprint Cookies

Can’t believe Spring is already on its way ! The weather is warmer, Cherry Blossom trees are blooming….and my hay fever is back ! Even though my nose is a little itchy and stuffy, I can still smell these delicious cookies. They are loaded with lemon flavour ! I added some shredded coconut around the cookies for extra crunchiness. You can omit it, or use almonds or hazelnuts if you are not a coconut fan.

Total time: 90 minutes

For the lemon curd

Makes about 1/2 cup

  • 2 egg yolks
  • 6 tablespoons granulated sugar
  • 3 tablespoons lemon juice
  • 2 teaspoons lemon zest
  • 2 tablespoons water
  • 50 gram unsalted butter, chilled and cut into small pieces
  1. Whisk together egg yolks, sugar, lemon juice, water and zest
  2. Heat mixture in non-stick pot over low heat, stirring constantly until thickened (mixture should coat back of spoon)
  3. Turn heat off, mix in butter, a few pieces at a time until all melted
  4. Cool, can refrigerate up to 2 weeks

For the cookies

Makes about 20 cookies

  • 1+1/4 cup all-purpose flour
  • 1/4 teaspoon salt
  • 1/2 cup unsalted butter,at room temperature
  • 1/2 cup granulated sugar
  • 1 egg
  • 1 tablespoon lemon juice
  • 1 teaspoon pure vanilla extract
  • 1/4 cup unsweetened shredded coconut (optional)
  1. Preheat oven to 325ºF
  2. Sift together flour and salt, set aside
  3. Using an electric mixer with the paddle attachment, cream butter and sugar until fluffy
  4. Add egg, lemon juice and vanilla
  5. Add flour mixture in 2 portions, mix until blended
  6. Roll dough into one inch balls
  7. Gently crate an indentation in the middle of balls with thumb or tip of a wooden spoon
  8. Coat top of cookies with shredded coconut
  9. Bake for about 10 minutes, take cookies out, gently crate centres again
  10. Bake for another 7-8 minutes until golden
  11. Cool on cookie sheets for about 5 minutes, then completely on rack
  12. Spoon lemon curd into centres of cookies 

Japanese Cheesecake

Last Sunday, I made this Japanese cheesecake with my daughter. It turned out very nice. It has a lighter taste and a softer texture than a regular cheesecake, but is still very creamy. The special ingredient ? ……. Meringue ! It allows more air to be incorporated into the cake batter and hence, a fluffy cake. So if you find regular cheesecake too heavy, this may just be right.
By the way, you can now “yum” my recipes on Yummly if you have an account.  Just click the Yummly button under each recipe. Thanks in advance !

For the cake

  • 3/4 cup cake and pastry flour
  • 1/2 teaspoon baking soda
  • 400 g soft cream cheese
  • 1/4 cup granulated sugar
  • 60 g unsalted butter, at room temperature
  • 6 egg yolks
  • 200 mL whipping cream
  • 2 teaspoons lemon juice
  • 1 teaspoon pure vanilla extract
  • pot of boiling water for baking cake

For the meringue

  • 6 egg whites
  • 1/2 cup granulated sugar
  • 1/4 teaspoon cream of tartar

To make the cake

  1. Preheat oven to 325ºF
  2. Line a 9 inch spring-form cake pan with slightly greased parchment paper
  3. Wrap base of pan with two layers of aluminium foil to prevent seepage
  4. Sift together flour and baking soda, set aside
  5. Using an electric mixer with the paddle attachment, cream butter, cream cheese and sugar until fluffy
  6. Add egg yolks, lemon juice, vanilla extract and whipping cream, mix until blended
  7. Add flour mixture, mix until smooth
  8. Pour batter into a different large mixing bowl
  9. Clean and dry used mixing bowl thoroughly before making meringue
  10. To make the meringue, use the electric mixer with whisk attachment, whisk egg whites and cream of tartar at medium speed until frothy
  11. Increase speed to high, gradually add in sugar
  12. Whisk until stiff peak is formed
  13. Gently fold meringue into cake batter until just blended, do not over mix
  14. Pour batter into cake pan, place on a tray filled with boiling water and bake for about 60 minutes until golden brown, a tooth pick should come out clear when inserted in the middle
  15. Turn oven off, leave oven door ajar for about 20 minutes before taking cake out. This will prevent cake from shrinking too much due to sudden drop in temperature.  A slight shrinkage is normal.
  16. Remove baking tray, let cool on rack completely
  17. Remove from cake pan, refrigerate for 2-3 hours or overnight in an air tight container
  18. Cut, serve and enjoy!


img_20160228_112118.jpg

Adapted from http://www.justonecookbook.com